When it comes to quick jewelry repairs, knowing how to dry acrylic material efficiently can save you valuable time. Acrylic, celebrated for its clarity and durability, is increasingly used in custom jewelry. However, waiting for it to dry can be a frustrating setback, especially when you’re eager to wear or showcase your pieces. In this article, we’ll explore effective techniques for drying acrylic quickly, ensuring that your repairs are as seamless as possible. Whether you’re a hobbyist or a professional jeweler, mastering this skill will empower you to respond to unexpected challenges and maintain your creative momentum. Read on to discover tips that will transform your repair process and keep your jewelry looking its best.

How to Choose the Right Acrylic for Jewelry Repairs
Choosing the appropriate acrylic for jewelry repairs can make all the difference in the durability and aesthetic of your creations. The world of acrylics is vast, with different formulations designed for specific applications. Begin by considering the clarity and color options available; clear acrylic is often favored for its optical clarity, while colored varieties can add unique flair to your designs. Look for acrylics labeled as “impact-resistant” or “high-strength,” especially for pieces that may experience wear and tear, as these will offer greater durability.When selecting acrylic sheets, consider the thickness as well. Thicker acrylic is generally more robust and less prone to cracking, which is essential when making any structural repairs. For lighter, decorative pieces, thinner acrylic can be effective but ensure it maintains the visual appeal of your jewelry. You can also explore acrylic adhesives specifically formulated for jewelry, which provide strong bonds without clouding the material’s clarity.Testing the acrylic you intend to use is also a valuable step. Small, experimental applications can help you understand how the material behaves and adheres under various conditions. Some adhesives may require specific drying techniques to achieve optimal results, which you’ll need to keep in mind as you execute your repairs. By making informed choices about acrylic types, thickness, and adhesives, you set the stage for successful, lasting jewelry repairs that keep your pieces looking stunning and vibrant.
Best Drying Techniques for Acrylic Materials
When it comes to drying acrylic materials, the methods you choose can significantly affect the integrity and appearance of your jewelry pieces. Achieving the perfect balance between speed and effectiveness is essential, especially if you’re aiming for quick repairs. To expedite the drying process, consider techniques that maintain clarity and strength without compromising the final result.One highly effective method is utilizing a heated workspace. By placing your acrylic pieces in a warm, controlled environment, you can encourage faster evaporation of any adhesives or moisture. A simple heat lamp can provide a gentle, consistent warmth without direct contact, reducing the risk of warping. It’s crucial to ensure that the temperature is not too high, as excessive heat can distort the acrylic.Additionally, employing a fan to circulate air around your acrylic can hasten drying times. This technique works particularly well in tandem with warmth, as moving air allows for quicker moisture evaporation, keeping your jewelry clean and clear of dust. Just be cautious of placing the fan too close, as this may create dust issues or disturb freshly applied adhesives.Another innovative approach is using specialized drying techniques such as UV curing lamps if you’re working with UV-activated adhesives. These devices can swiftly cure adhesives in minutes, while also providing a polished finish to the acrylic. Always follow the manufacturer’s instructions for best results, ensuring you do not overexpose the material to UV light.No matter the method, patience is key. Allow your pieces ample time to cure fully to avoid any cracks or premature wear. Remember, the drying techniques you adopt should cater not only to speed but also to the lasting quality of your jewelry. Using these methods thoughtfully will keep your creations vibrant and enduring, ensuring that your repairs stand the test of time while maintaining their stunning aesthetic.
Step-by-Step Guide to Speedy Acrylic Drying
Achieving an efficient drying process for acrylic materials is vital when you’re in the midst of jewelry repairs. Speedy drying not only helps you complete your projects on time but also enhances the overall quality of your finished pieces. Here’s a straightforward guide to speed up the drying of acrylic while ensuring your jewelry retains its integrity and shine.Start by preparing your workspace. A well-ventilated area will help moisture evaporate faster. If possible, set up near a window or in a space where air circulation is good. For added warmth, consider using a heat lamp positioned about 12 inches away from your working area. This gentle heat source can help maintain a consistent temperature without overheating the acrylic. Always monitor the setup to avoid warping due to excessive heat.Next, apply your adhesives or finishes to the acrylic jewelry. After application, immediately introduce a fan to your workspace. Position the fan to blow air across the pieces without being too close, which could stir up dust. The moving air will help speed up evaporation, ensuring your jewels dry more evenly. For those working with UV-curing adhesives, utilizing a UV lamp can significantly reduce drying time. Hold the piece under the light as per the manufacturer’s guidelines for quick and effective curing.Finally, patience is essential. Even with these techniques, allow your pieces a few extra minutes to fully cure before touching them. This additional time is crucial for ensuring that your repairs are durable and that the final product meets your standards for quality and aesthetics. With these steps in mind, you can master the drying process and elevate your acrylic jewelry repairs to the next level.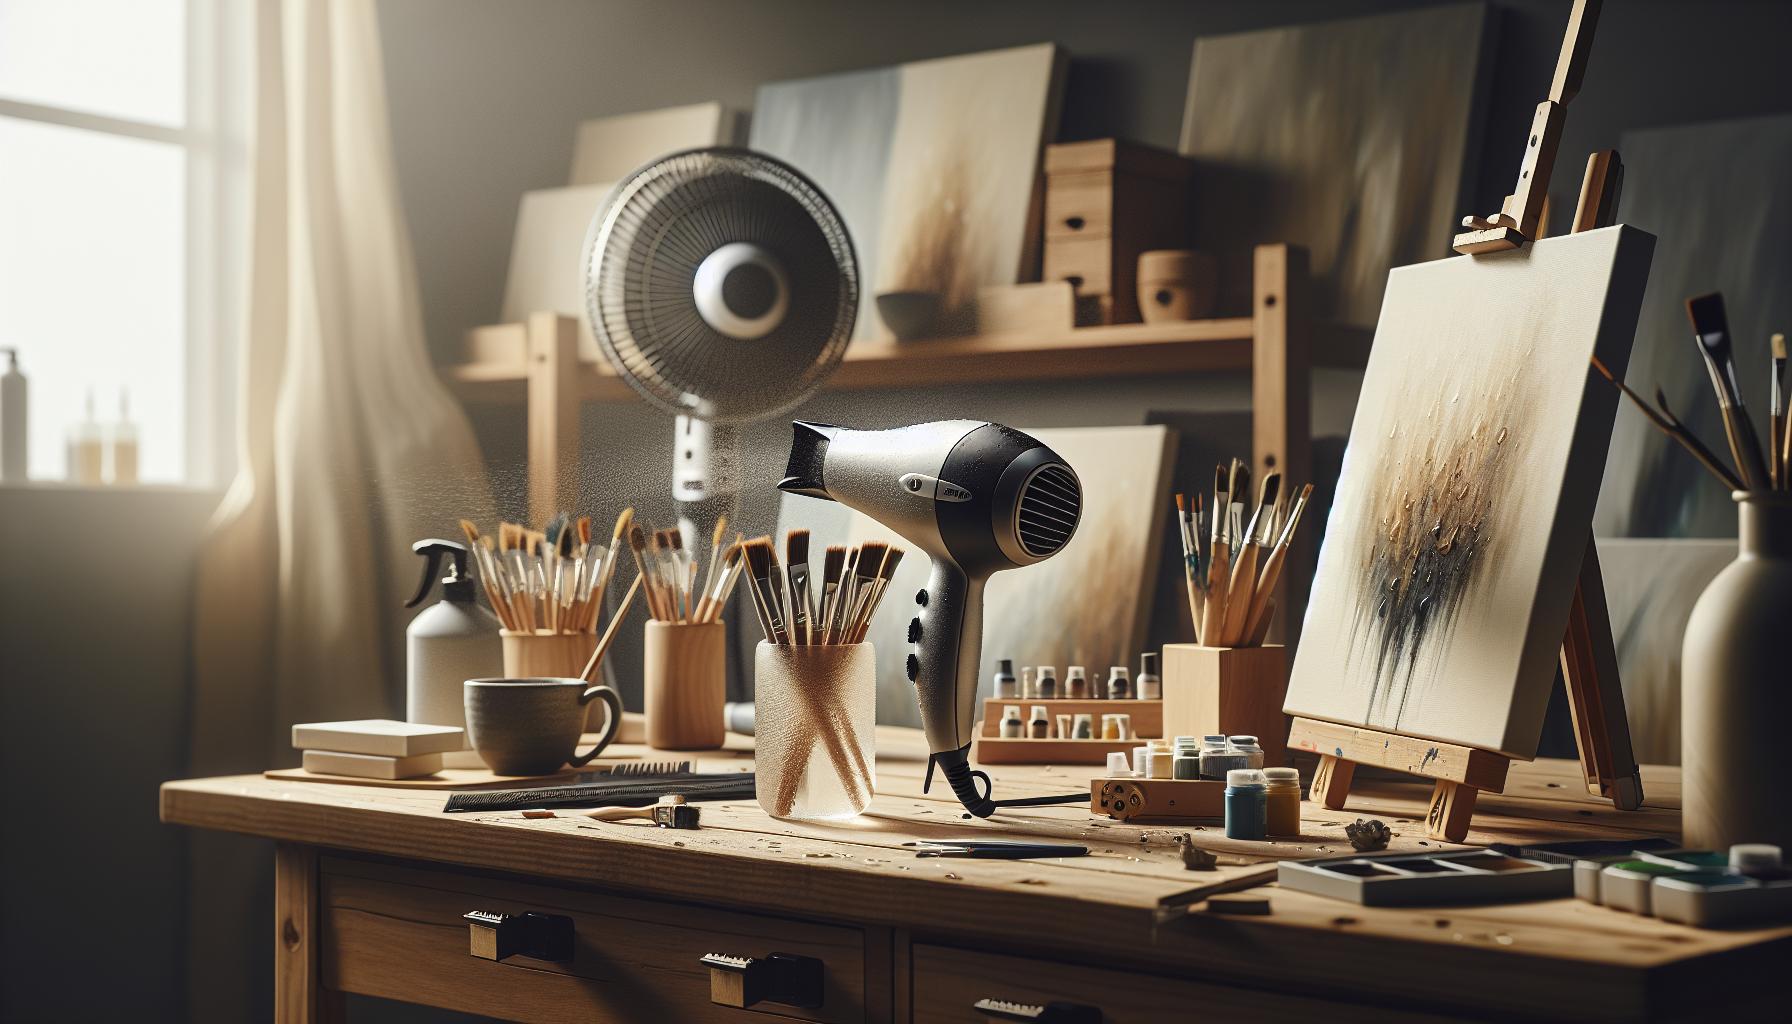
Essential Tools for Fast Acrylic Drying
To ensure your acrylic projects dry quickly and effectively, having the right tools at your disposal can make all the difference. Tools not only enhance efficiency but also help you achieve professional results in your jewelry repairs. With a focused setup, you can significantly reduce drying times and enhance the durability of your finished pieces.- Heat Lamp: This tool provides gentle, consistent warmth that can accelerate the drying process without risking damage to the acrylic. Positioning the heat lamp about 12 inches away helps maintain a safe temperature, promoting even drying and preventing warping.
- Fan: A small, oscillating fan can be instrumental in creating airflow across your workspace. By circulating air, you facilitate moisture evaporation. Just ensure it’s positioned optimally to avoid blowing dust onto your freshly applied finishes.
- UV Lamp: If you’re using UV-curing adhesives, a UV lamp will be your best friend. These specialized lights quickly cure the adhesive, allowing you to work faster while ensuring a solid bond. Make sure to follow the manufacturer’s guidelines for timing to maximize effectiveness.
- Thermometer: Monitoring the temperature in your workspace can help you maintain the optimal conditions for drying. A digital thermometer can provide precise readings, allowing you to adjust your heat sources as needed.
- Clean Cloths: Keeping your work area dust-free is crucial. Use lint-free cloths to wipe down surfaces and tools before and during your project, ensuring no contaminants affect the drying process.
Common Mistakes to Avoid When Drying Acrylic
To achieve perfect drying for your acrylic jewelry repairs, avoiding common pitfalls can be just as crucial as having the right tools and techniques. Many DIY enthusiasts inadvertently sabotage their efforts by overlooking key aspects of the drying process. These mistakes can lead to delayed results, ineffective bonds, and even damage to your beautiful pieces.One prevalent mistake is applying excessive heat in an attempt to speed up drying times. While gentle warmth can help, too much heat can warp or discolor acrylic. Ensure that your heat sources, such as lamps, are kept at an appropriate distance-ideally 12 inches away-to maintain a controlled environment. Similarly, neglecting to monitor the workspace temperature can lead to uneven drying. Maintain optimal conditions with a thermometer, as extreme temperature fluctuations can cause acrylic to crack or cloud.Another common error is inadequate airflow during the drying process. While some may think sealing off their workspace would protect it from dust, this can trap humidity and slow down evaporation. Instead, use fans strategically positioned to circulate air without blowing dust onto your work. Regular maintenance of your workspace is also essential; dust and debris can settle on drying finishes, leading to a less-than-perfect final appearance.Lastly, be mindful of rushing the process. Patience is key-allow sufficient time for each layer to cure before applying additional finishes or making further repairs. Hasty work can compromise the integrity of the bonds and leave you with subpar results. By recognizing these missteps and following the tips provided, you’ll enhance your acrylic drying process and ultimately create stunning, durable jewelry that holds up beautifully.How Temperature Affects Acrylic Drying Time
The environment in which you work can significantly impact how quickly your acrylic jewelry repairs dry. Temperature plays a crucial role in the curing process of acrylic materials, affecting not only drying time but also the final appearance and strength of the bond. In ideal conditions, warm temperatures can accelerate the drying process and improve adhesion. However, care must be taken, as excessive heat can lead to undesirable results such as warping, bubbling, or discoloration.For optimal drying, aim to keep the workspace at a consistent temperature, typically between 65°F and 75°F (18°C to 24°C). This range facilitates steady evaporation without putting the integrity of the acrylic at risk. Cold temperatures can slow down the curing process drastically, making it essential to avoid drafts or chilly environments that could extend drying times unreasonably. Additionally, fluctuations in temperature can lead to uneven drying, causing unsightly patches or weaknesses in the glued areas.To manage temperature effectively, consider the use of heat sources judiciously. Infrared heat lamps or heating mats can provide gentle warmth, but they should be positioned at least 12 inches from the work surface. Circulating warm air can also be beneficial-using a fan to gently move air without disturbing dust particles can enhance evaporation while keeping the temperature steady. Always monitor the conditions with a thermometer to ensure you stay within the optimal range.By understanding how temperature influences drying times, you can better time your jewelry repairs and achieve flawless results, allowing your creative pieces to shine beautifully.Quick Fix Tips for Instant Jewelry Repairs
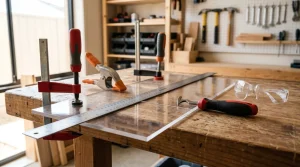
When time is of the essence, having quick and effective solutions for jewelry repairs can be a game-changer. Imagine you’re getting ready for a big event, and your favorite acrylic piece experiences a slight mishap. Instead of panicking, here are effective tips that help you make speedy repairs that last.Start by keeping a reliable repair kit on hand. This should include clear acrylic adhesive, precision applicators, and small clamps or weights. When a piece breaks, apply a small drop of adhesive to the bond area and press the pieces together firmly. For added stability, use a clamp to hold the pieces in place while the adhesive sets. If you’re in a rush, consider placing the repaired piece under a gentle heat source, like an infrared heat lamp or a warm area, which can accelerate drying significantly while avoiding damage.Another effective method involves the use of superglue, which cures fairly quickly and is excellent for small resin or acrylic repairs. However, make sure to use it sparingly, as too much glue can create an unsightly residue. For finer details and intricate designs, a toothpick or a fine paintbrush can help you control the amount of glue you use. Once the repair is made, allowing the piece to sit undisturbed, preferably in a warm area, will help it cure faster and bond more securely.After you’ve completed the repair, be sure to check for any remaining adhesive residue. If any glue seeps out from the edges, wipe it away carefully with a soft cloth before it hardens. For an even cleaner finish, you can use a gentle adhesive remover designed for plastic surfaces. This ensures that your piece looks its best after repairs, allowing it to shine again beautifully.Mastering these quick-fix techniques can empower you to tackle any acrylic jewelry mishap with confidence. With the right tools and a bit of know-how, you can keep your favorite pieces in pristine condition without worrying about timing.Caring for Your Acrylic Jewelry After Repairs
Following a successful acrylic repair, proper care is crucial to extending the life of your jewelry. Did you know that simple daily habits can significantly enhance the longevity of your precious pieces? Acrylic jewelry is not only stylish but also prone to scratches and disfiguration if not handled correctly. Understanding how to care for your jewelry after repairs can make all the difference in maintaining its beauty and integrity.To ensure your recently repaired acrylic pieces remain stunning, consider the following care tips:- Avoid Harsh Chemicals: Clean your acrylic jewelry with mild soap and water. Steer clear of abrasive cleaners, as they can dull the surface and potentially harm the adhesive used in repairs.
- Store Properly: Keep your acrylic jewelry in a soft pouch or padded compartment to prevent scratches. If stacking is necessary, use cloth barriers between pieces to minimize direct contact.
- Limit Exposure: Remove your jewelry before engaging in activities that could exert stress on the materials, such as heavy lifting or contact sports. Prolonged exposure to extreme temperatures or direct sunlight can also warp or discolor acrylic.
- Regular Inspections: Periodically check for any signs of damage or wear, including the stability of repaired areas. Early intervention can prevent minor issues from escalating into major repairs.
Alternative Materials for Quick Jewelry Mends
When faced with the need for quick jewelry repairs, knowing alternative materials can significantly ease the process. While acrylic is a popular choice due to its versatility and ease of use, other materials can be equally effective, providing robust options for various types of jewelry. Here are some alternatives that can come in handy for unexpected mends or stylistic updates.Epoxy Resins
Epoxy resins are excellent for bonding broken pieces, offering a strong hold that’s often more durable than many adhesives. These two-part systems (resin and hardener) create a waterproof bond, ideal for jewelry exposed to moisture. For quick repairs, choose clear drying epoxy for an invisible fix or colored options to add a playful twist. Remember to use the resin in a well-ventilated area and give it sufficient time to cure for optimal strength.Resin Adhesives
Similar to epoxy, resin adhesives are exceptionally strong and can fill gaps, making them perfect for areas where acrylic may not provide enough structural support. They’re particularly useful for embedding embellishments or beads, allowing you to customize your jewelry quickly. Look for quick-setting formulations to minimize downtime between repairs and ensure the adhesive aligns with your design palette.Super Glue (Cyanoacrylate)
For fast fixes, super glue is a go-to. It dries transparently and bonds quickly, making it ideal for non-load-bearing repairs. However, its rigidity can be a double-edged sword; while it holds strongly, it doesn’t allow for flexibility, which may lead to future breaks under stress. Use this for minor fixes or when you’re in a pinch, but be mindful of how it may affect the integrity of the piece in the long term.Polymer Clay
If you’re feeling creative, polymer clay provides a wonderful alternative for both repairs and decorative updates. It can be shaped or molded to replace a missing component or enhance your piece’s aesthetic. After shaping, bake the clay according to the manufacturer’s instructions to harden it, resulting in a durable repair that adds a unique flair to your jewelry.Fabric and Thread
For a different approach, consider incorporating fabric and thread. This option is particularly appealing for textile jewelry. By using a sturdy thread and fabric patches, you can mend broken chains or even create new designs out of scraps. This method not only allows for robust repairs but can also transform your jewelry into an art piece, reflecting a more bohemian or personalized style.When selecting an alternative material for repairs, assess the specific requirements of the piece-consider its size, the stress it will endure, and your desired aesthetic outcome. Combining these materials with rapid drying techniques can lead to innovative jewelry solutions without compromising quality. Each alternative offers unique characteristics that can enhance both the functionality and beauty of your jewelry pieces, empowering you to maintain and customize your collection with confidence.
Expert Tips for Long-Lasting Acrylic Jewelry
Acrylic jewelry can be a vibrant and long-lasting addition to your collection, particularly when cared for properly. One of the most effective ways to ensure your acrylic pieces maintain their beauty is by understanding the intricacies of drying and protecting them. Proper maintenance not only extends the life of the jewelry but also preserves clarity and color, making it essential for every enthusiast.To enhance the durability of your acrylic jewelry, consider the following tips:- Choose Quality Acrylic: Investing in high-quality acrylic from reputable sources reduces the risks of discoloration and cracking. Sourced acrylic tends to have better transparency and durability, ensuring that your pieces remain both beautiful and functional over time.
- Use Specific Cleaning Materials: When cleaning, avoid harsh chemicals that can damage acrylic. Instead, use a soft microfiber cloth and a gentle cleanser specifically designed for acrylic materials, which helps maintain its shine and prevents fogging.
- Store Properly: To prevent scratches and maintain clarity, store your acrylic jewelry in a padded jewelry box or soft cloth pouches. This prevents movement and friction, which can degrade the surface over time.
- Avoid Extreme Temperatures: Acrylic can warp if exposed to extreme heat or cold. To ensure longevity, store your pieces away from direct sunlight and avoid leaving them in hot cars or freezing environments.
- Regular Inspections: Look out for any signs of wear or damage early. If you notice stress marks or tiny cracks, make repairs immediately using appropriate adhesives, as this helps prevent further damage.
Storing Acrylic Jewelry to Prevent Damage
To keep your acrylic jewelry looking stunning and prevent it from suffering damage, proper storage is crucial. Acrylic is a beautiful material that can be prone to scratches and clouding, especially if it’s not treated with care. By implementing some mindful storage practices, you can maintain the luster and clarity of your pieces, ensuring they remain worthy additions to your collection.First and foremost, opt for a suitable storage solution that minimizes contact and gives each piece its own dedicated space. Using a padded jewelry box or soft cloth pouches can significantly reduce the risk of scratches. Consider organizing your jewelry by style or color to make it easier to access and catalog your collection. Avoid storing multiple pieces in one tight compartment; this can lead to friction, which may scuff the surface of your acrylic items.Humidity and Temperature Considerations
Humidity and temperature play significant roles in the longevity of acrylic jewelry. Store your pieces in a cool, dry place, away from direct sunlight and heat sources, as excessive temperature changes can warp or discolor acrylic. If your environment is particularly humid, adding silica gel packets to your storage area can help absorb moisture, reducing the risk of damage.Additionally, implementing a routine inspection of your jewelry can catch any signs of wear early. Evaluate each piece before putting it away, ensuring they are free from any dirt or oils that could lead to cloudiness over time. This proactive approach not only preserves their beauty but prolongs their overall life.By following these thoughtful storage methods, you can protect your acrylic jewelry from potential damage and enjoy its vibrant beauty for years to come. With just a little extra care, your pieces will remain as vivid and stunning as the day you acquired them.Troubleshooting: What to Do If Acrylic Won’t Dry
If you’ve found yourself frustrated by acrylic that simply won’t dry, you’re not alone. Acrylic resin can sometimes be finicky, and a variety of factors can contribute to prolonged drying times. Understanding these nuances can empower you to troubleshoot effectively and ensure your jewelry repairs are completed promptly and beautifully.The first step to addressing stubborn drying issues is to examine the environment in which you are working. Humidity plays a critical role in the drying process; high humidity can significantly slow down the evaporation of solvents in acrylic materials, preventing them from curing properly. To combat this, consider using a dehumidifier or drying your acrylic in a climate-controlled space. Additionally, ensuring that your workspace has good airflow will facilitate the drying process. Simple tools like fans can help circulate air around your pieces, enhancing evaporation rates.Another common issue could be the application technique. If you’ve applied too thick a layer of acrylic, it may take much longer to dry than expected. Thin, even coats dry more quickly and are less prone to issues like bubbling or cracking. When dealing with particularly thick applications, gently heating the area with a heat gun can expedite drying. Just be cautious to keep the heat at a safe distance; excessive heat can warp the acrylic.In some cases, using additives specifically designed to speed up the curing process can be beneficial. Look for products labeled as fast-drying agents that are compatible with your acrylic material. Nevertheless, always read the manufacturer’s guidelines to ensure that any additives won’t compromise the integrity of your jewelry pieces.Lastly, be mindful of the temperature in your workspace. Ideal temperatures for drying acrylic generally range between 65°F and 75°F (18°C to 24°C). If it’s too cold, the drying process can be severely slowed. Conversely, excessive heat can cause bubbling or distortion. A stable, moderate environment tends to yield the best results for drying.By addressing these key areas-humidity, application technique, additives, and temperature-you’ll enhance your chances of successfully drying acrylic for your jewelry repairs. With a little patience and the right approach, you’ll have your beautiful pieces back in wearable condition in no time.Faq
Q: What is the fastest way to dry acrylic glue for jewelry repairs? A: The fastest way to dry acrylic glue is to expose it to a heat source, like a hairdryer on a low setting, for a few minutes. Be cautious not to overheat, as this can warp the acrylic. You can also use a UV lamp for quicker, effective curing if using UV adhesives.Q: Does hot water help dry acrylic quickly? A: Yes, immersing acrylic in warm water can accelerate drying. However, ensure your acrylic can withstand the temperature to avoid distortions. This method can be effective for curing adhesives or speeding up the hardening process of acrylic materials.Q: Why is my acrylic glue taking so long to dry? A: Acrylic glue may take longer to dry if applied too thickly, in low temperatures, or in high humidity. Ensure you apply a thin layer and consider using a fan or heat source to promote faster drying. Refer to the section “How Temperature Affects Acrylic Drying Time” for detailed advice.Q: Can I speed up the drying time of acrylic paint on jewelry? A: To speed up acrylic paint drying on jewelry, use a heat gun or hairdryer from a distance. Also, applying thin layers of paint will help it dry quicker. For optimal results, work in a well-ventilated area to improve airflow and evaporation.Q: How can I ensure my acrylic jewelry is completely dry before use? A: To ensure acrylic jewelry is fully dry, wait at least 24 hours after application, especially if using glue. Performing a touch test can help-if the surface feels tacky, it needs more time. Consider reading the “Caring for Your Acrylic Jewelry After Repairs” section for best practices.Q: Is it safe to use a microwave to dry acrylic? A: No, using a microwave to dry acrylic materials is not safe. Acrylic can melt or deform under heat. Instead, utilize safe drying methods like air drying, heat guns, or UV curing lamps to maintain the integrity of the material.Q: What common mistakes delay acrylic drying during repairs? A: Common mistakes include applying too thick a layer of glue or paint, working in humid conditions, or not providing adequate airflow. For best results, apply in a controlled environment and follow guidelines in “Common Mistakes to Avoid When Drying Acrylic.”Q: How does humidity affect acrylic drying speed? A: High humidity can significantly slow down the drying time of acrylic materials because moisture in the air interferes with the evaporation of solvents in adhesives and paints. Aim to work in low-humidity conditions for better results, as discussed in “How Temperature Affects Acrylic Drying Time.”In Retrospect
Now that you know how to effectively dry acrylic material for quick jewelry repairs, it’s time to put this knowledge into action! Don’t let your projects sit idle-speed up your repair process and get back to crafting beautiful pieces. For more tips on jewelry care, check out our guides on cleaning metals and gems or explore our DIY tutorials for creative inspiration.If you found this article helpful, consider signing up for our newsletter to stay updated with the latest jewelry-making tips and trends. Feel free to leave a comment below sharing your experiences or any questions you may have! Remember, every jeweler started somewhere, and your passion can turn ideas into stunning creations. Keep exploring and crafting with confidence!
Make MissJ.eu a Preferred Source
Get our latest guides, news, and insights highlighted in your Google Search & AI Overviews.
✓ Preferred Source Added