✨ This article was AI edited. Editorial responsibility: MissJ.eu.
Produced with AI. This article was artificially generated. Editorial responsibility: MissJ.eu.
Acrylic glass (frequently known by brand names Plexiglas, Perspex, Lucite, or chemical term polymethyl methacrylate) is one of the most versatile materials for home DIY projects, jewelry displays, custom shelving, and picture frames. Lightweight, shatter-resistant, and optically clear, it provides the beauty of glass without the fragility. However, learning how to cut acrylic glass at home without chipping, melting, or cracking requires understanding thickness limits, tool selection, and proper scoring mechanics.
In this comprehensive workshop tutorial, we detail the safest and cleanest methods for cutting acrylic sheets of varying thicknesses using basic hand tools and power saws, followed by edge flame-polishing techniques that yield crystal-clear results.
Choosing the Best Cutting Method by Acrylic Sheet Thickness
| Thickness Range | Recommended Tool | Cut Complexity | Risk of Cracking |
|---|---|---|---|
| Thin Sheets (1mm – 3mm / 1/8″) | Acrylic Scoring Knife / Utility Blade | Straight linear cuts only (Score-and-Snap) | Very Low (Safest home method) |
| Medium Sheets (4mm – 6mm / 1/4″) | Jigsaw with plastic blade or Deep Score | Straight and curved contour cuts | Moderate (Requires steady feed speed) |
| Heavy Sheets (6mm – 12mm / 1/2″) | Circular Table Saw with 80+ tooth carbide blade | Straight, heavy structural cuts | High if incorrect blade pitch is used |
Method 1: The Score-and-Snap Hand Method (Best for 1mm–4mm)
The score-and-snap technique is the gold standard for home crafters because it requires zero expensive power tools, generates no dangerous flying plastic chips, and creates perfectly straight lines:
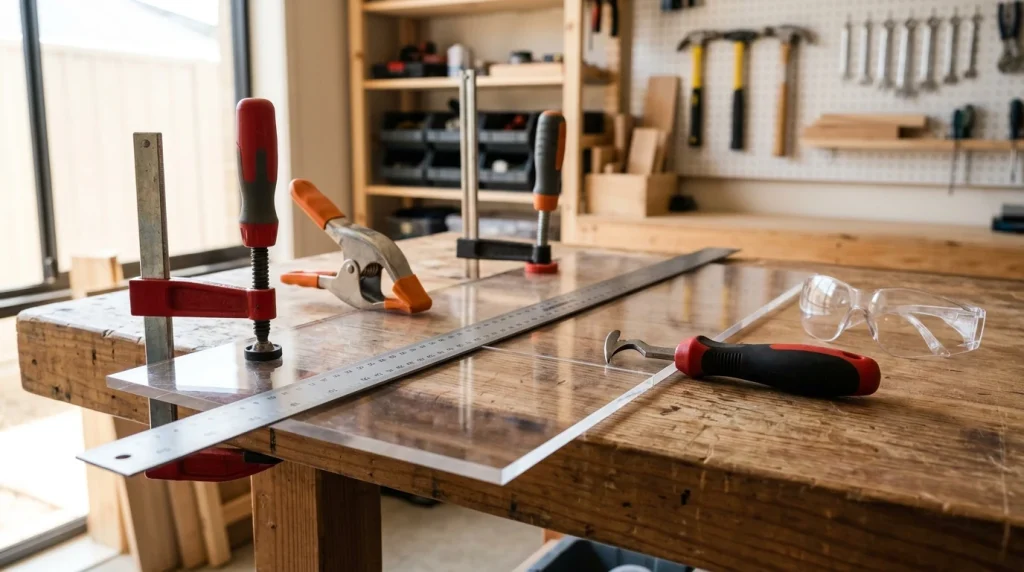
Required Tools
- Acrylic scoring knife (plastic cutting tool with hooked carbide blade).
- Heavy-duty metal straightedge ruler.
- C-clamps or quick-release bar clamps.
- Sturdy workbench with a sharp, flat 90-degree table edge.
- Safety glasses.
Step-by-Step Execution
- Leave the Protective Film On: Do not peel off the manufacturer’s paper or plastic masking film until cutting and sanding are fully completed. This protects the acrylic from surface scratches.
- Measure and Clamp: Mark your cut line with a fine-tip permanent marker on the protective film. Align your metal straightedge along the line and clamp it firmly at both ends to the acrylic sheet and workbench.
- Score the Groove: Draw the hooked scoring knife along the straightedge with firm, downward pressure. The blade will carve out a continuous curled plastic ribbon. Pull the knife across the line 8 to 12 times until you have cut through approximately 30% to 40% of the sheet’s total thickness.
- Position on the Table Edge: Unclamp the sheet and reposition it so the scored line aligns precisely with the sharp edge of your workbench, with the scored groove facing upward.
- The Snap: Clamp a piece of 2×4 lumber over the supported side of the sheet. Place both hands evenly across the overhang section and apply quick, firm, downward pressure. The sheet will cleanly snap along the scored fracture line with a crisp crack.
Method 2: Cutting Curves & Complex Shapes with a Jigsaw
If your project involves rounded corners, circles, or intricate jewelry display geometries:
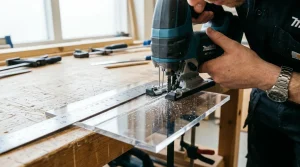
- Use a specialized jigsaw blade labeled for Acrylic / Plexiglas / Non-Ferrous Metals (10 to 14 TPI – teeth per inch).
- Standard wood blades have too few teeth, causing violent chipping and grabbing. Metal blades with 24+ TPI have too many teeth, causing frictional heat that melts the plastic back together behind the blade.
- Set the jigsaw to medium speed and turn off orbital action (set orbital dial to 0).
- Apply a thin line of painter’s tape over the cut line to prevent chipping and feed the saw at a steady, moderate pace.
How to Polish Rough Acrylic Edges to Optical Clarity
After cutting, the freshly snapped or sawed edge will appear matte, cloudy, or slightly grooved. Here is how to restore glass-like optical clarity:
- Scrape Edge: Draw a utility blade held at a 90-degree angle along the edge (card scraper technique) to remove saw marks.
- Wet Sanding: Sand progressively with waterproof sandpaper: 240 grit → 400 grit → 600 grit → 1200 grit → 2000 grit, keeping the paper wet with water.
- Buffing Compound: Apply a plastic polishing cream (such as Novus #2 or Meguiar’s PlastX) with a microfiber wheel on a rotary tool or drill.
- Flame Polishing (Advanced): Sweep the blue cone of a small butane torch rapidly along the edge at a speed of 3 inches per second. The surface will instantly melt into a mirror finish. Warning: Never hold the flame in one spot, or the acrylic will bubble and ignite.
Frequently Asked Questions
Can I cut acrylic glass with a standard utility box cutter?
You can use the back (unsharpened dull corner) or tip of a heavy-duty utility blade, but a specialized plastic scoring knife with a hooked beak is vastly superior because it physically carves out a channel rather than just compressing the plastic.
Why does my acrylic melt when cutting with power saws?
Melting is caused by excessive frictional heat. This happens when the saw RPM is too high, the blade has too many fine teeth, or the feed rate is too slow. Lower your saw speed and use dedicated plastic-cutting blades.
Can I laser cut acrylic sheets at home?
Yes. Diode lasers (10W–20W) can cut opaque and colored acrylic (black, red, green). However, clear transparent acrylic cannot be cut by diode lasers (the beam passes straight through) and requires a CO2 laser cutter.
Drilling Acrylic Sheets Without Cracking
If your DIY jewelry display or frame project requires mounting holes, drilling acrylic presents unique challenges. Standard high-speed twist drill bits have sharp 118-degree tips designed for wood and metal that grab the plastic, causing instant spiderweb fractures. Follow this drilling protocol:
| Drill Bit Type | Tip Angle & Rake | Risk of Shattering | Drilling Technique |
|---|---|---|---|
| Specialized Acrylic Bit | 60° steep point with 0° scraping rake | Zero Risk | Scrapes plastic rather than biting; smooth exit |
| Step Drill Bit (Unibit) | Stepped conical design | Very Low | Ideal for enlarging holes gradually without grabbing |
| Standard Twist Bit | 118° standard aggressive cutting angle | High Risk (Grabs on breakthrough) | Must clamp backing wood and drill at slow RPM with water cooling |
Safety Protocols When Working with Acrylic
- Always wear certified safety glasses to guard against sharp flying plastic shards during scoring and snapping.
- Work in a well-ventilated space when flame polishing to prevent inhaling trace acrylic monomer vapors.
- Never clean acrylic with glass cleaners containing ammonia (like Windex) or rubbing alcohol; these chemicals cause micro-cracking (crazing) across the surface. Use warm soapy water or dedicated Novus plastic cleaner only.
Get our latest guides, news, and insights highlighted in your Google Search & AI Overviews.