✨ This article was AI edited. Editorial responsibility: MissJ.eu.
Produced with AI. This article was artificially generated. Editorial responsibility: MissJ.eu.
Acrylic glass (polymethyl methacrylate, sold under trade names Plexiglas, Perspex, Acrylite, and Lucite) is one of the most widely used rigid polymers in modern fabrication, retail displays, picture framing, and architectural glazing. Possessing 92% optical light transmission—higher than standard float glass—while offering ten times the impact resistance, mastering acrylic glass cutting is an essential workshop skill for DIY makers, hobbyists, and display designers.
However, acrylic behaves fundamentally differently than wood or metal. Incorrect blade geometry, excessive feed speeds, or improper scoring techniques cause plastic melting, catastrophic edge chipping, or dangerous fractures. In this comprehensive technical guide, we detail tool selection, scoring physics, power saw configurations, laser parameters, and edge finishing techniques.
Comparison of Acrylic Cutting Methodologies
| Cutting Technique | Optimal Sheet Thickness | Tooling Requirements | Edge Quality |
|---|---|---|---|
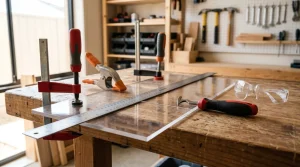
| Score and Snap | 1.5mm – 4.0mm (1/16″ – 5/32″) | Carbide hooked scoring knife + steel clamp straightedge | Crisp straight fracture; requires light edge scraping |
| Table Saw / Miter Saw | 3.0mm – 25.0mm (1/8″ – 1″) | 80T – 100T Triple Chip Grind (TCG) Carbide blade | Square, satin-smooth edge ready for flame polish |
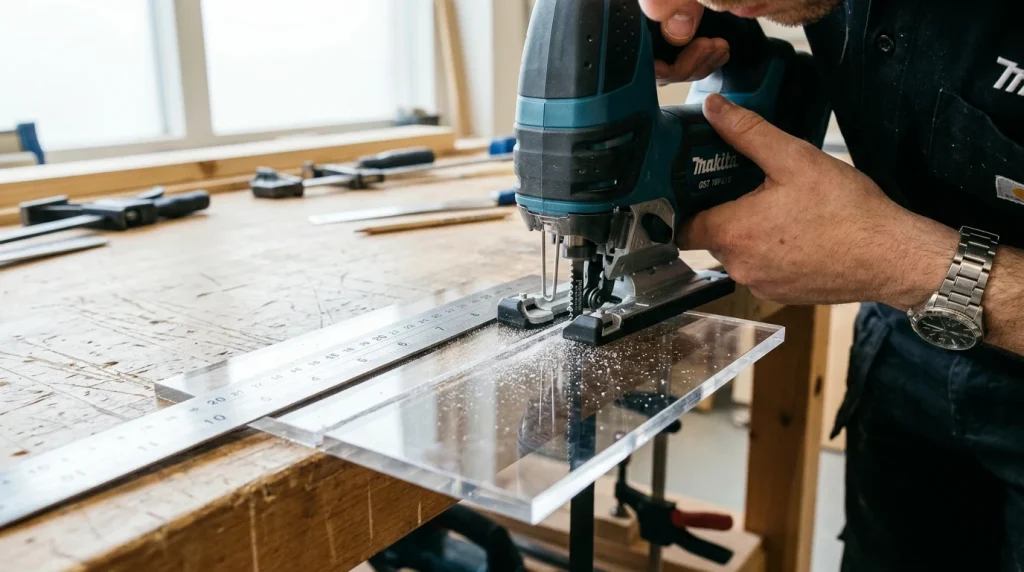
| Jigsaw (Contour Cuts) | 2.0mm – 6.0mm (3/32″ – 1/4″) | 10 – 14 TPI bi-metal plastic cutting blade (Zero orbit) | Slightly ridged; requires progressive sanding |
| CO2 Laser Cutting | 1.0mm – 12.0mm | 40W – 150W CO2 Laser with air assist | 100% Optical flame-polished mirror edge directly off bed |
Blade Geometry & Feed Rate Physics
When cutting acrylic with power saws, preventing frictional heat is the paramount objective:
- Tooth Geometry: Use a Triple Chip Grind (TCG) tooth configuration with a neutral or negative 5-degree rake angle. Positive rake wood blades aggressively grab the plastic and pull it into the saw, resulting in violent shattering.
- Blade Height: Set the table saw blade height so teeth protrude approximately 1/2 inch (12mm) above the top surface of the acrylic sheet. This ensures the blade cuts downward through the plastic rather than pushing horizontally.
- Feed Consistency: Feed the material smoothly and steadily. Feeding too fast causes tooth chipping; feeding too slowly generates excessive heat that melts the plastic behind the blade.
Step-by-Step Edge Polishing Masterclass
- Draw Filing / Edge Scraping: Hold a clean utility blade or hardened cabinet scraper at a strict 90-degree angle and draw it along the cut edge to shave away saw blade chatter marks.
- Sequential Wet Sanding: Wrap waterproof silicon carbide sandpaper around a flat sanding block. Sand with water lubrication: 240 → 400 → 600 → 1200 grit.
- Buffing Wheel: Buff with a clean flannel cotton wheel on a bench grinder loaded with fine white plastic rouge compound at 1,800 RPM.
- Flame Polishing: Quickly sweep a clean hydrogen-oxygen or butane micro-torch along the edge at a steady 3 inches per second to instantly liquefy and smooth surface micro-scratches.
Frequently Asked Questions
What is the difference between cast and extruded acrylic when cutting?
Cast acrylic has a higher molecular weight, melts at higher temperatures, machines cleanly without gumming, and produces crisp white laser engraving. Extruded acrylic is softer, melts easily if saw speed is too high, but offers tighter thickness tolerances for precision joinery.
Why does my acrylic sheet craze (develop spiderweb micro-cracks) after cutting?
Crazing is caused by residual internal stress from localized frictional heat combined with chemical exposure (such as cleaning with Windex or alcohol). Always cool cuts and clean solely with specialized plastic cleaners.
Can I use water as a coolant while cutting acrylic?
Yes. Misting the cut line with a light spray of soapy water or running compressed air directly at the blade prevents blade heating and yields significantly cleaner cuts.
Laser Cutting vs CNC Routing: Advanced Acrylic Fabrication
For custom display cases, retail sign fabrication, and intricate organic geometries, computerized digital cutting delivers unmatched precision:
| Fabrication Method | Acrylic Compatibility | Edge Finish Quality | Best Project Use |
|---|---|---|---|
| CO2 Laser Cutter (40W–150W) | 100% ideal for Cast & Extruded sheets (1mm – 12mm) | High-gloss, optically clear flame polished edge directly off bed | Intricate filigree, acrylic jewelry charms, custom lettering |
| CNC Router Table | Best for thick acrylic (6mm – 30mm) | Frosted, square dimensional edge (requires post-buffing) | Heavy structural furniture, retail display blocks, 3D relief |
Chemical Bonding Acrylic Components After Cutting
To assemble custom acrylic display cases or boxes after cutting:
- Never use standard superglue (cyanoacrylate), which off-gasses white frosted residue (blooming) across the clear plastic.
- Use solvent cement (such as Weld-On 3 or Weld-On 4). Solvent cement chemically melts and solvent-welds the two acrylic pieces together via capillary action, forming an invisible, unbreakable molecular bond.
- Apply solvent using a fine hypodermic needle applicator along the joint seam while clamping firmly for 2 minutes.
Get our latest guides, news, and insights highlighted in your Google Search & AI Overviews.