Did you know that polymer clay earrings can be a stunning and unique addition to your jewelry collection, all crafted right in your own home? If you’re looking to express your creativity and create pieces that reflect your personal style, this DIY guide on making polymer clay earrings is for you. Not only are these earrings fashionable, but they also offer a satisfying and rewarding crafting experience. Whether you’re a seasoned crafter or just starting, this guide will walk you through each step, from selecting materials to mastering techniques. You’ll discover how to mix colors, form intricate designs, and achieve that perfect finish. So grab your tools and let’s dive into the vibrant world of polymer clay jewelry, where your imagination is the only limit!
Choosing the Right Polymer Clay for Your Earrings
When it comes to crafting polymer clay earrings, selecting the right type of clay is crucial for achieving the best results. Not all polymer clays are created equal; they vary in texture, flexibility, and finish, which can significantly affect your designs and how they wear over time. Ideally, you’ll want a polymer clay that is soft enough to work with but strong enough to hold its shape after baking. Popular brands like Sculpey, Fimo, and Cernit offer a range of options suitable for earrings, each with unique qualities for different styles.
Consider the purpose and design of your earrings when choosing your clay. If you’re aiming for vibrant colors and intricate patterns, opt for a brand that provides a wide spectrum of hues and exceptional blendability. For instance, Sculpey Soufflé is known for its soft texture and ability to retain shape while being lightweight, making it perfect for larger designs. On the other hand, Fimo Professional is a firmer clay, offering excellent durability and detail retention, ideal for intricate pieces like canes or detailed shapes.
Additionally, pay attention to the finish of the clay. If you’re looking for a glossy look, some clays, like Premo!, come with a naturally shiny finish post-baking. For a matte appearance, you might consider using a clay specifically designed for that look or plan to sand and polish your earrings after baking. Always remember to read the clay packaging for specific baking instructions, as temperature and time can vary significantly, affecting the final outcome of your earrings.
In summary, choosing the right polymer clay is a combination of understanding your creative vision and matching it with the qualities of different clay types. Whether you prioritize flexibility, color vibrancy, or durability, selecting the appropriate material will enhance your crafting experience and ultimately the beauty of your finished earrings.
Essential Tools and Materials for DIY Earrings
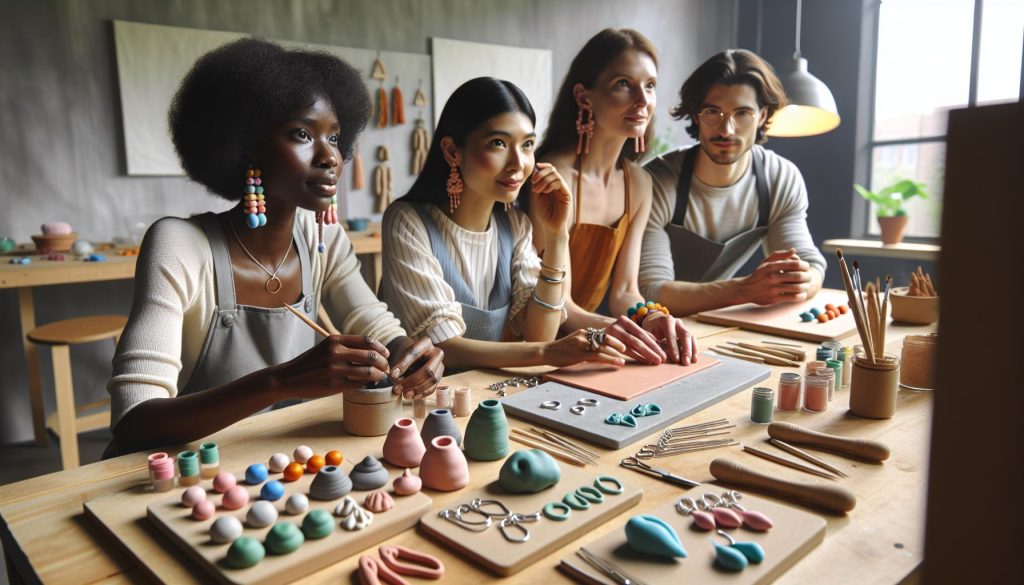
Creating stunning polymer clay earrings doesn’t just rely on your artistic talent; it also hinges on having the right tools and materials at your disposal. Equipping yourself with essential supplies can elevate your crafting experience and help you produce professional-looking jewelry that’s as durable as it is beautiful.
Begin with the basics: polymer clay itself. A variety of brands exist, including Sculpey, Fimo, and Cernit, each offering different textures and colors. Choose clay that suits your design needs-soft for large vibrant pieces or firmer for intricate details. Don’t forget to gather some cutting tools such as X-Acto knives and cookie cutters to shape your earrings precisely. A rolling pin is essential for flattening the clay evenly, while a mat or baking sheet is helpful for easy transfer to the oven.
For texture and decoration, consider investing in a set of clay tools like needles, stamps, and texture sheets. These can help you create unique patterns and designs that will make your earrings stand out. Additionally, sanding pads or files are crucial for achieving a smooth finish on your baked pieces-this ensures a polished look and feel that enhances the overall quality of your earrings.
Finally, once your earrings are shaped and baked, you’ll need adhesives for attaching components like earring posts or hooks. Look for jewelry-specific glues, such as E6000 or super glue, which provide strong bonds suitable for polymer clay. If you’re aiming for a specific finish, be sure to select a sealer or glaze to protect your creations and give them that extra shine or matte look, depending on your vision. With these tools and materials in hand, you’ll be well-prepared to embark on your polymer clay earring-making journey!
Step-by-Step Guide to Crafting Polymer Clay Earrings
Creating your own polymer clay earrings can be a rewarding and creative experience, allowing you to express your personal style while honing your crafting skills. The process is both simple and enjoyable, and it opens a world of possibilities for customization. Here’s a straightforward guide to help you navigate the craft of making beautiful polymer clay earrings.
Start by preparing your workspace. Gather all your necessary materials and tools, ensuring you have a clean, well-lit area to work in. Lay down a sturdy mat to protect your surfaces and make clean-up easier. Next, choose the right polymer clay colors for your design. Soften the clay by kneading it with your hands until it’s pliable, which will make the shaping process easier.
Once you have your clay ready, use a rolling pin to flatten it to your desired thickness, usually about 1/8 inch. For uniform shapes, consider using cookie cutters or templates. After cutting out your shapes, it’s essential to create holes for earring hooks, so use a needle tool or other small implements to punch the holes, placing them strategically to ensure balance in the design.
Next, it’s time to bake the clay according to the manufacturer’s instructions, typically at around 275°F (130°C) for 15-30 minutes, depending on the thickness of your pieces. Ensure your creations are on a baking sheet lined with parchment paper to prevent sticking. Once baked, let your earrings cool completely before handling them.
After they’ve cooled, finish your earrings with either sanding to smooth out any rough edges or apply a sealer or glaze for added shine. Choosing a glossy or matte finish can significantly alter the appearance of your earrings, so consider what look you want to achieve. Finally, attach your earring findings, such as posts or hooks, using an appropriate adhesive. A strong jewelry glue like E6000 works best for ensuring durability.
With these steps, you can create stunning polymer clay earrings that reflect your unique style. Don’t hesitate to experiment with different colors, shapes, and techniques to discover what you love most about this art form!
Creative Techniques for Unique Earring Designs
Creating unique polymer clay earrings is an art that invites both creativity and experimentation. One captivating approach is to embrace a variety of textures and techniques that can transform simple designs into show-stopping pieces. By incorporating techniques like marbling, caning, and layering, you can add depth and visual interest to your earrings, making them truly one-of-a-kind.
Marbling Techniques
Marbling is a fantastic way to create stunning visual effects. To achieve this, start with two or more colors of polymer clay. Roll each color into a snake, then twist them together. Fold the combined clay multiple times and gently roll again. Aim for a marbled appearance without blending the colors completely. Once you’re satisfied, flatten the clay and cut out your earring shapes. The result will be beautiful, swirled designs that add a striking dimension to your earrings.
Caning for Intricate Patterns
Caning is a more advanced technique that allows for intricate patterns. Begin by creating a cane, which involves rolling colored clay into a log shape and then slicing it to reveal the design. You can create themes such as flowers, geometric shapes, or even abstract art. Slice the cane into thin disks and use them as decorative elements on your earring designs. This technique not only enhances the aesthetic but also showcases your skills, making your earrings appealing to buyers looking for unique pieces.
Layering for Depth
Layering is an effective technique for achieving a 3D effect. Start by shaping different clay pieces in various colors and thicknesses. Stack them to add depth, ensuring to adhere each layer well. You can also play with transparency by using translucent polymer clay in conjunction with colored layers. Once baked, these layered earrings create shadows and depth, drawing attention to their unique structure.
Embrace your creativity by combining these techniques or developing your own. The realm of polymer clay is vast; experimenting with shapes, textures, and colors can lead to stunning designs. Not only will this artistic exploration refine your skills, but it will also ensure your earrings stand out in a crowded market, attracting customers who appreciate handcrafted beauty.
Color Mixing and Effects in Polymer Clay Jewelry
Mixing colors in polymer clay is akin to painting with a vibrant palette; the possibilities are as vast as your imagination. Understanding color theory and techniques will not only elevate your polymer clay earrings but also spark your creativity, allowing you to make pieces that truly stand out. When experimenting with color, consider the following approaches to achieve stunning results.
Basic Color Mixing Techniques
To get started, you can blend colors by simply kneading two or more shades together until you achieve your desired hue. Keep in mind that mixing complementary colors (opposites on the color wheel) will give you muted tones, while mixing analogous colors (those next to each other on the wheel) will create harmonious looks. You can also create gradients by gradually mixing similar colors in varying proportions, which can be particularly effective for earrings designed to mimic natural elements like sunsets or ocean waves.
Creating Unique Effects
Beyond simple mixing, you can produce eye-catching effects through techniques like ‘skinner blending’ and adding texture or finishes post-baking. The skinner blend involves rolling parts of different colors into long sheets, then folding and rolling them together to create a smooth gradient effect. After baking, consider applying a finish like gloss or matte varnish to enhance the colors and add depth. Experimenting with mica powders or metallic pigments can transform your earrings with shimmering accents, making them catch the light beautifully.
Color Combinations That Work
Crafting visually appealing color combinations can make your earrings more attractive. A great way to discover appealing palettes is to use a color wheel for inspiration. For example, pairing warm colors like oranges and yellows can create an energetic look, while cooler tones like blues and greens can provide a calming effect. You might also consider the current color trends in fashion and jewelry, which can inform exciting choices that resonate with potential buyers.
By embracing color mixing and effects, you not only enhance the visual appeal of your earrings but also push your creative boundaries. Experimentation is key-allow yourself to make mistakes and learn from them. The more you play with color, the more unique and beautiful your polymer clay creations will become, positioning you for success in a competitive market.
How to Bake and Finish Your Polymer Clay Earrings
Baking polymer clay is a vital step in ensuring your earrings are not only beautifully crafted but also durable enough for regular wear. Unlike traditional clays, polymer clay hardens when baked in an oven, transforming your creative designs into sturdy jewelry. Understanding the best practices for baking and finishing your polymer clay earrings will elevate your DIY projects and help achieve professional-looking results.
The ideal baking temperature for polymer clay is typically around 275°F (130°C), which allows the clay to cure without burning. It’s essential to follow the manufacturer’s instructions on the specific brand of clay you use, as temperatures may vary. When placing your beads or earrings in the oven, consider using a baking mat or parchment paper on your baking tray to prevent sticking. To help maintain their shape, you can create small supports out of aluminum foil or place them upright in a container.
Once baked, allowing your earrings to cool for at least 15 minutes is crucial before handling them. This cooling period ensures they harden completely, reducing the risk of breakage when you’re working with them further. After cooling, you can enhance the final look of your earrings by applying a finish. Options include a clear gloss or matte varnish, which not only protect the surface but also add depth to your colors, making them more vibrant. When applying finishes, use a soft brush to avoid leaving streaks, and consider multiple light coats for an even application.
Lastly, don’t forget to clean your finished earrings with a soft cloth to remove any fingerprints or residue. If desired, you can also incorporate decorative elements like metal findings or embellishments to complete your creations. Embracing these baking and finishing techniques will ensure your polymer clay earrings not only look stunning but are also made to last, giving your creations the polished finish they deserve.
Earring Findings: Types and Their Uses
The final touch in crafting beautiful polymer clay earrings often comes down to the earring findings you choose. These essential components, which connect your handmade creations to the ear, can dramatically influence both the aesthetic and functional aspects of your earrings. With a variety of options available, understanding the types of findings and their uses is key to creating jewelry that not only looks professional but also lasts.
Types of Earring Findings
Earring findings are typically categorized into various types based on their design and functionality. Here are some common options:
- Studs: These are flush to the earlobe and often feature a post that holds the earring in place with a clasp. Studs are perfect for lightweight polymer clay designs.
- Hoops: Circular findings that can range from small to large. Hoops add a dynamic look and are customizable with dangles.
- Hooks: These findings feature a wire that hangs from the ear, allowing for versatility in design. They work great with dangling polymer clay pieces.
- Clips: Ideal for those without pierced ears, clip-on findings provide a secure fit without the need for a hole.
- Chain connectors: These allow for more intricate designs, letting you combine multiple elements into a single pair of earrings.
Choosing the Right Finding for Your Design
Selecting the appropriate finding depends on both the weight of your polymer clay earrings and the look you desire. Lightweight earrings can easily use hooks or studs, whereas heavier designs might benefit from the added support of hoops or a secure clip. Always consider the comfort of the wearer as well; for instance, some may prefer hooks for their movement, while others appreciate the snug fit of studs.
Additionally, consider the material of your findings. Options like sterling silver, gold-filled, or stainless steel offer different levels of durability and hypoallergenic properties. Ensuring your earring findings match or complement your clay colors can also enhance your overall design aesthetic, making your creations pop.
Armed with the right knowledge of earring findings and their applications, you can elevate your polymer clay earring projects from simple crafts to sophisticated jewelry pieces that are sure to impress. So, as you gather your materials and plan your designs, remember that the right finishing touches will take your creativity to new heights.
Caring for Your Polymer Clay Jewelry
To keep your polymer clay earrings looking vibrant and beautiful, proper care and maintenance are essential. Polymer clay is remarkably durable but can benefit from gentle handling and some routine cleaning to maintain its appearance and longevity. By adopting a few simple habits, you can ensure that your unique creations remain stunning for years to come.
Start by avoiding exposure to harsh chemicals, as these can degrade the clay over time. When cleaning your earrings, use a soft, damp cloth to gently wipe them down, making sure to avoid any abrasive materials that could scratch the surface. If your earrings need more thorough cleaning, consider a mild soap solution; however, rinse them thoroughly and dry them completely to avoid any moisture damage. To remove scuff marks and restore the shine, a gentle polishing cloth can be beneficial.
When storing your earrings, opt for a cool, dry place away from direct sunlight to prevent discoloration. To prevent them from being scratched, consider placing them in a soft pouch or a dedicated jewelry box lined with a soft fabric. Additionally, keeping them separate from other jewelry can avoid wear and tear from friction.
Proper care not only enhances the beauty of your polymer clay jewelry but also ensures they remain a cherished part of your collection. By following these simple guidelines, you can enjoy wearing your custom designs while keeping them in pristine condition, ready to showcase their unique allure every time you wear them.
Styling Tips for Showcasing Polymer Clay Earrings
When it comes to polymer clay earrings, styling can elevate your unique creations, making them not just accessories but standout pieces of art. The right styling can enhance your earrings and ensure they complement your outfit while showcasing the intricate details of your craftsmanship. Here are some tips to make your polymer clay earrings the focal point of your look.
Play with Proportions
Bold and colorful polymer clay earrings can make a striking statement, especially when balanced with more subdued outfits. If you’re wearing large dangle earrings, consider opting for a simpler top or dress to let the earrings shine. Conversely, if your earrings are more understated, you can get away with bolder prints or textures in your clothing. This principle of proportion ensures that your earrings catch the eye without overwhelming your overall look.
Mix and Match
Don’t hesitate to mix materials and textures! Polymer clay earrings pair wonderfully with other jewelry types, such as metal, fabric, or stone. For example, you can layer dangle polymer clay earrings with a leather bracelet or a silver necklace for a beautifully curated look. Just remember to alternate the styles to keep the focus on your earrings while achieving a cohesive aesthetic.
Consider Hair and Makeup
Your hairstyle and makeup can significantly influence how your earrings are perceived. If your earrings are lengthy and detailed, consider wearing your hair up or back to reveal their beauty fully. For makeup, opting for a more neutral palette allows the colors of your earrings to pop, while a bold lip can complement vibrant designs. Think about creating a harmonious interplay between your earrings and other elements of your appearance.
Remember, the beauty of polymer clay earrings lies not just in their design but also in how you choose to style them. Experiment with different combinations to discover what feels right for you! Whether you’re dressing up for an event or adding flair to your everyday attire, the right styling can ensure your polymer clay creations stand out and reflect your personal style.
Troubleshooting Common Polymer Clay Issues
Crafting with polymer clay can be a delightful experience, but it’s not without its challenges. Whether you’re a beginner or an experienced crafter, encountering issues along the way is common. Understanding how to troubleshoot these problems can help you create stunning polymer clay earrings that last.
A frequent issue is clay that remains soft or oily after baking. This can occur if the temperature of your oven is too low or if the clay is not baked long enough. Always use an oven thermometer to ensure that your polymer clay is being baked at the manufacturer’s recommended temperature, typically around 265°F to 275°F (130°C to 135°C), for the correct duration as specified on the package. If you find yourself with soft clay, it may require additional time in the oven; just be cautious not to overbake, as this can lead to discoloration or burning.
Another common problem is pieces breaking or cracking after baking. This often results from using too thick a layer of clay or not conditioning the clay sufficiently before use. It’s beneficial to roll the clay to an even thickness of about 1/8 inch to ensure even baking. Proper conditioning helps eliminate air bubbles that can also contribute to cracking. Additionally, when assembling components, consider how structural stress will affect areas where pieces meet; you might need to add a stronger bond, like liquid clay, to reinforce joins.
Lastly, adhesion can be an issue, especially when incorporating materials like metal findings. Polymer clay may not stick well to smooth metal surfaces. To create a better bond, try using a textured surface or embedding the clay around the metal component before baking. This mechanical hold can help ensure your earring components remain securely attached after the clay hardens.
By staying attentive to these common issues and applying some preventative measures, you can enhance the durability and beauty of your polymer clay earrings, allowing your creativity to shine through your finished pieces.
Marketing Your Handmade Polymer Clay Earrings
Getting your handmade polymer clay earrings noticed in a crowded marketplace is as exciting as it is challenging. The art of marketing doesn’t just promote your creations; it helps weave your personal story into the very fabric of your brand. Begin by defining your unique selling proposition (USP) – what sets your earrings apart? Perhaps it’s your choice of colors, the themes you explore, or even the materials you incorporate. By articulating this clearly, you can create a brand image that resonates with your target audience.
Utilizing social media platforms is essential for connecting with potential customers. Create visually appealing accounts on platforms like Instagram and Pinterest where artisans showcase their creativity. High-quality photographs of your earrings in lifestyle settings can significantly enhance appeal. Consider sharing behind-the-scenes content that shows your creative process, offering glimpses into how your earrings are made. Engaging storytelling can cultivate a loyal community that not only appreciates your art but actively promotes it.
Building an online store or utilizing established platforms like Etsy can provide you with a marketplace to reach a wider audience. Optimize your product listings with clear, enticing descriptions, and include relevant keywords that customers might use when searching for unique jewelry. Don’t overlook the power of customer reviews; positive testimonials can greatly influence buying decisions, so encourage past buyers to leave feedback.
Additionally, consider local markets or craft fairs where you can showcase your pieces in person. These venues offer invaluable opportunities for interaction, allowing you to gather feedback directly from customers and build relationships within your community. Attend workshops or join local crafting groups to network with fellow creators, as collaborations can lead to mutual promotion.
Incorporating eco-friendly practices can also enhance your marketability; many consumers today are drawn to sustainable brands. Highlighting the environmentally friendly aspects of your materials or processes can attract eco-conscious buyers. With the right strategies and a genuine passion for your craft, your handmade polymer clay earrings can find their ideal audience, helping your creativity shine in the marketplace.
Eco-Friendly Practices in Polymer Clay Crafting
In the evolving world of crafting, adopting eco-friendly practices not only elevates your polymer clay earring creations but also resonates with an environmentally conscientious audience. Sustainable crafting methods are becoming increasingly important as consumers seek products that align with their values. By making mindful choices, you can significantly reduce your environmental footprint while crafting beautiful earrings.
One of the simplest ways to start is by opting for eco-friendly polymer clay brands. Some manufacturers offer products made from non-toxic, phthalate-free materials, which are safer for both the environment and your workshop. These clays typically utilize sustainable ingredients and avoid harmful chemicals. Always check for certifications or claims regarding eco-friendliness on the packaging. When you’re finished with your scraps, consider recycling them rather than throwing them away; many companies provide programs to return or recycle unused materials.
Incorporating sustainable practices into your design process can also enhance creativity. Try to maximize every inch of clay by planning your designs carefully. If you’re using larger shapes, consider creating smaller complementary pieces from leftover clay. This not only reduces waste but also allows for unique clusters or mix-and-match sets that can be appealing to buyers. Additionally, consider using natural or recycled materials for earring findings, such as hypoallergenic metals or sustainably sourced wood.
Packaging and Shipping Considerations
When it comes to packaging, prioritize using recyclable or biodegradable materials. Instead of plastic bags, opt for paper or cardboard that can be easily reused or recycled by your customers. Small touches, like biodegradable tape or using newspaper for packing, can make a significant impact. By clearly labeling your products as eco-friendly, you not only educate your customers but also create a marketable brand identity that stands out in a crowded space.
By integrating these eco-friendly practices into your polymer clay earring crafting, you not only contribute to a healthier planet but also appeal to a growing demographic of environmentally aware consumers. Your commitment to sustainability can set you apart, transforming your creations into not just beautiful pieces of jewelry, but also a part of a larger movement towards responsible crafting and consumption.
Q&A
Q: What type of glue works best for attaching earring posts to polymer clay?
A: A strong adhesive like E6000 or a two-part epoxy is recommended for attaching earring posts to polymer clay. These adhesives form a durable bond and are suitable for use on baked clay, ensuring your earrings stay intact. For more guidance, check the “How to Bake and Finish Your Polymer Clay Earrings” section.
Q: How can I achieve a glossy finish on my polymer clay earrings?
A: You can achieve a glossy finish on polymer clay earrings by applying a polymer clay glaze or liquid clay after baking. Seal the surface with a layer of gloss varnish or resin for a high-shine finish. Explore more in the “How to Bake and Finish Your Polymer Clay Earrings” section.
Q: Why is it important to cure polymer clay properly?
A: Properly curing polymer clay ensures its strength and durability. Insufficient baking may lead to breakage or damage, so it’s vital to follow the manufacturer’s instructions for time and temperature. Learn more about common issues in the “Troubleshooting Common Polymer Clay Issues” section.
Q: What combination of tools do I need to start making polymer clay earrings?
A: Essential tools include a craft knife, rolling pin, cutting mats, earring posts, and various shaping tools like cutters and molds. Check the “Essential Tools and Materials for DIY Earrings” section for a detailed list.
Q: How can I add unique designs or textures to my polymer clay earrings?
A: Experiment with different techniques like caning, marbling, or using stamps for unique textures. Layering colors and shapes will also create eye-catching designs. For more creative techniques, see the “Creative Techniques for Unique Earring Designs” section.
Q: What is the best way to store polymer clay earrings?
A: Store polymer clay earrings in a cool, dry place, separated by tissue paper or a soft cloth to prevent scratches. Avoid exposure to direct sunlight. For additional care tips, refer to the “Caring for Your Polymer Clay Jewelry” section.
Q: How do I clean polymer clay earrings without damaging them?
A: Clean polymer clay earrings with a soft, damp cloth to remove dirt and oils. Avoid harsh chemicals, which can damage the surface. For detailed care advice, check out the “Caring for Your Polymer Clay Jewelry” section.
Q: When is the best time to market my handmade polymer clay earrings?
A: The best time to market your handmade earrings is during seasonal events, holidays, and local craft fairs. Promote your work on social media consistently, particularly during peak shopping times. For more insights, see the “Marketing Your Handmade Polymer Clay Earrings” section.
The Way Forward
Congratulations on diving into the vibrant world of polymer clay earrings! With the techniques shared in our “How to Make Polymer Clay Earrings: Creative DIY Guide,” you now have the tools to unleash your creativity and craft beautiful pieces that reflect your unique style. Don’t let fear of imperfection hold you back – every piece is a learning opportunity! If you’re ready to enhance your skills further, check out our guides on DIY techniques for earring design and jewellery care tips to keep your creations looking stunning.
Don’t forget to share your earring creations with us in the comments or on social media – we love to see what you’ve made! For those interested in turning their passion into a business, explore our insights on starting your own jewellery shop for next steps. The journey doesn’t end here! Subscribe to our newsletter for more creative ideas and tips that will inspire your jewellery-making adventures! Let’s keep crafting and creating beautiful things together!


