If you’ve ever wondered whether acrylic paint works well on wood, you’re not alone! Many crafters and DIY enthusiasts question the compatibility of these two mediums, especially when seeking to achieve vibrant finishes on furniture, art projects, or home decor. The good news is that acrylic paint is not only applicable to wood but can also offer stunning results when applied correctly. This guide will reveal best practices and techniques that address common concerns, ensuring your creative endeavors yield beautiful and lasting outcomes. Whether you’re a seasoned artist or a beginner eager to explore new projects, understanding how to effectively use acrylic paint on wood can open up a world of possibilities for your artistic expression. Stick around as we delve deeper into preparation, application, and tips for achieving that perfect finish!
Can Acrylic Paint Be Used on Wood? Exploring Material Interactions
Acrylic paint is a versatile medium that not only offers vibrant colors but also adheres effectively to a variety of surfaces, including wood. This compatibility stems from acrylic’s unique chemical composition, which allows it to bond well with porous materials like wood. Whether you’re painting furniture, crafting, or engaging in artistic projects, the interactions between acrylic paint and wood create opportunities for stunning designs and durable finishes.
One critical aspect to consider when using acrylic paint on wood is the type of wood itself. Softer woods may absorb paint differently than hardwoods, affecting the final appearance. Additionally, the surface texture can influence how the paint adheres; smoother surfaces may require more preparation to ensure proper bonding. It’s recommended to choose wood that has been sanded and cleaned to eliminate dust and oils, promoting better paint adhesion.
Another vital interaction to keep in mind is moisture. While acrylic paint is water-based, excessive moisture from unsealed wood can lead to uneven absorption and drying times. To mitigate this, sealing the wood with a primer or a sealant can help create a consistent base for paint application. This not only enhances the adhesion of the acrylic but also impacts the vibrancy and longevity of the colors, ensuring your artwork or project withstands the test of time.
Ultimately, understanding these material interactions will empower you to achieve the best results with acrylic paint on wood. By considering wood type, surface texture, and moisture levels, you can create beautiful, lasting pieces that showcase the dynamic relationship between your chosen medium and the natural beauty of wood.
Understanding Acrylic Paint: Benefits and Limitations
Acrylic paint has surged in popularity among artists and DIY enthusiasts alike, thanks to its vibrant colors and versatility. One of its most appealing features is its ability to adhere to various surfaces, including wood, making it a go-to choice for creative projects ranging from furniture upcycling to intricate crafts. However, while there are many benefits to using acrylic paint, it’s equally important to be aware of its limitations to ensure a successful outcome.
One of the standout advantages of acrylic paint is its quick drying time, allowing for faster layering and touch-ups. This feature is particularly helpful when working on projects that require precision and a quick turnaround. Additionally, acrylic paint is water-based, making it easy to clean up with soap and water while still wet. When dry, it becomes water-resistant, adding to the durability of your wooden creations. Furthermore, acrylics are known for their color retention; they do not fade easily over time, which means the investment you make in your artwork will last long into the future.
However, it’s crucial to understand the limitations as well. One primary concern is the potential for cracking if the paint is applied too thickly or if the underlying wood shifts or expands due to moisture changes. Moreover, unlike oil paints, which can be blended over extended periods, acrylics dry quickly, which can limit the time available for blending colors. Lastly, while the finish can be glossy, it may not achieve the same depth of sheen as traditional wood finishes unless specifically treated.
In summary, when choosing acrylic paint for your wood projects, recognizing both its benefits and limitations can enable you to make informed decisions, ultimately enhancing your creative experience. By considering aspects such as drying time, adherence, and the nature of your desired finish, you can effectively harness the power of acrylics in your artistic endeavors.
Preparing Wood Surfaces for Acrylic Painting Success
To achieve stunning results when painting with acrylics on wood, proper preparation of the wood surface is crucial. An inadequately prepared surface can lead to peeling, cracking, or uneven application of paint, hindering the overall outcome of your project. Start by ensuring the wood is clean and dry; any dust, grease, or moisture can interfere with paint adhesion. Use a damp cloth to wipe down the surface and allow it to dry completely before proceeding.
Next, assess the texture and condition of the wood. If you’re working with an unfinished or rough piece, consider sanding it to create a smooth surface. Use a fine-grit sandpaper (around 220 grit) to avoid gouging the wood, and always sand in the direction of the grain to prevent scratches. After sanding, remove any dust with a clean, dry cloth or a tack cloth to ensure no particles interfere with painting.
For those with old or painted wood, stripping the old finish may be necessary. Use a chemical wood stripper or sand down the old paint, ensuring you follow safety guidelines, including working in a well-ventilated area and wearing protective gear. Once you’ve removed the old finish, clean the surface again to prepare it for new paint.
Finally, applying a primer can significantly enhance your acrylic paint application. A primer not only helps the paint adhere better but also provides a uniform surface and can minimize the potential for wood grain to show through. Choose a water-based acrylic primer for best compatibility with your acrylic paints. Remember, taking these preparatory steps is essential for ensuring that your acrylic highlighted wood projects not only look beautiful but also endure the test of time.
Best Techniques for Applying Acrylic Paint on Wood
Applying acrylic paint on wood can unlock a realm of creativity, allowing artists and DIY enthusiasts alike to transform simple wooden surfaces into stunning pieces of art. To achieve the best results, it’s essential to employ effective techniques tailored specifically for this medium. Here are some tried-and-true methods to enhance your painting experience and ensure a beautiful finish.
Begin with the right tools. Using quality brushes is key; synthetic brushes work best with acrylics because they hold the paint well without absorbing too much moisture. For larger areas, consider using foam rollers or paint sponges, which can provide a smooth finish without leaving brush strokes. Remember to clean your brushes thoroughly between colors or when taking breaks to prevent paint from hardening in the bristles.
When it comes to application, a thin, even layer is your best friend. Start with a light base coat, allowing it to dry completely before applying additional layers. This not only prevents peeling but also provides a solid foundation for deeper color. If you’re working on a detailed piece, consider using techniques like dry brushing or an airbrush to add depth and texture. Dry brushing can create a stunning effect by applying a small amount of paint to a dry brush and dragging it lightly across the surface, allowing the base color to show through.
Also, don’t overlook the importance of drying time. Acrylics dry quickly, which can be both a blessing and a curse. If you need time to blend colors, consider using a slow-drying medium. These additives can help increase the workability of the paint, giving you the freedom to create more intricate designs without rushing.
Remember, patience is essential. Allow each layer to dry completely before adding more paint or detailing. If you apply multiple layers too quickly, you’ll risk disturbing the undercoats and creating a muddy appearance. Finally, once your artwork is complete, sealing your painted surface with a clear acrylic sealer will protect it from damage and enhance vibrancy, ensuring your masterpiece will stand the test of time.
Choosing the Right Primer for Your Wood Project
Selecting the right primer for your wood project can significantly enhance the overall outcome of your acrylic painting. A good primer not only prepares the wood surface for paint, ensuring better adhesion and durability but also helps to prevent any unwanted stains or resin from bleeding through, which can mar the finished design. The correct primer sets the stage for vibrant colors and a smooth application, making your artistic endeavor more enjoyable and visually appealing.
When choosing a primer, consider using an acrylic-based primer that is specifically formulated for wood. These primers are designed to bond effectively with acrylic paint, creating a solid foundation. Here are some key factors to keep in mind:
- Surface Type: If you’re working with raw wood, ensure that the primer you select can adequately seal the porous fibers. For previously painted or varnished surfaces, look for a primer that promotes adhesion on slick finishes.
- Compatibility: Always check the compatibility of the primer with the acrylic paint you plan to use. Many brands offer specific primers that pair well with their paint lines, ensuring optimal results.
- Drying Time: Fast-drying primers can simplify your workflow, allowing you to layer paint without long waits. Look for options that offer quick drying times for efficiency but balance this with ease of application and workability.
- Color Base: White or gray primers are ideal for bright colors, as they provide a neutral base, while dark primers can be beneficial when working with rich, deep hues.
Before applying primer, ensure that the wood surface is clean and free of dust or oils. A light sanding can help create a better bond, especially on glossy finishes. After applying the primer, allow it to cure completely according to the manufacturer’s instructions before moving on to your acrylic paint. This preparatory step is essential for achieving that professional look in your painted wood project, enhancing both color vibrancy and finish durability.
Acrylic Paint Finishes: Gloss, Matte, and Satin Explained
The finish you choose for your acrylic painting on wood significantly impacts both the aesthetics and functionality of your project. Acrylic paints come in various finishes, mainly gloss, matte, and satin, each offering unique characteristics that can enhance your wooden piece in different ways.
Gloss Finish
A gloss finish delivers a shiny, reflective surface that enhances color vibrancy and depth. It’s excellent for highlighting details and can make colors appear more saturated. This finish is particularly suitable for decorative pieces, as it can create a striking visual impact. However, it’s important to note that gloss finishes can show fingerprints and dust easily, requiring more maintenance to keep it looking pristine.
Matte Finish
For those seeking a soft, understated look, a matte finish is ideal. It provides a non-reflective surface, which can lend a more natural and rustic appearance to your wooden art. Matte finishes can also minimize glare, making them perfect for pieces that are viewed under various lighting conditions. However, they can be less durable than gloss finishes and may require a protective topcoat to safeguard against scratches and wear.
Satin Finish
Satin finishes strike a balance between gloss and matte, offering a subtle sheen that adds a touch of elegance without being overly shiny. This type of finish exhibits good durability while providing a soft glow that enhances the depth of colors. Satin is often favored for furniture and practical items because it provides a sophisticated look while retaining resistance to fingerprints and dirt.
In selecting the right finish, consider the intended use and desired effect of your project. A glossy finish might be perfect for a vibrant art piece, while satin could offer the durability needed for functional items. Remember that a well-prepared surface and quality topcoat can enhance the longevity and beauty of your finished work, regardless of the finish you choose.
Sealing and Protecting Your Acrylic Painted Wood
One of the most satisfying aspects of completing an acrylic painting project on wood is the potential to secure and shield your artwork for years to come. Proper sealing is essential not only to enhance the durability of your painted surface but also to protect it from environmental factors such as moisture, dust, and scratches. Without adequate protection, your masterpiece may fade or deteriorate over time, diminishing the beauty and longevity of your hard work.
To effectively seal your acrylic-painted wood, consider using a spray sealer or a paint-on sealant. Acrylic varnishes are available in various finishes, including matte, satin, and gloss, allowing you to choose one that suits your artistic vision. Matte sealers will maintain a smooth, non-reflective look, while gloss finishes will amplify color vibrancy and depth. For a balanced option, satin sealers provide a subtle sheen without the extreme shine of gloss, making them an excellent choice for many projects.
Applying the sealant is straightforward. Start by ensuring your painted surface is completely dry. Use a soft brush or a clean spray can to apply a thin, even coat. Allow this initial layer to dry thoroughly before adding additional coats; often, two to three layers will provide optimal protection. Always follow the manufacturer’s recommendations for drying times and re-coat intervals. After sealing, your painted wood not only gains a protective barrier but also a polished finish that enhances its aesthetic appeal.
In addition to choosing the right sealant, it’s crucial to consider how your acrylic-painted wood will be used. For high-traffic items or pieces used outdoors, a more robust sealant specifically designed for such environments may be necessary. Regular maintenance, such as gently dusting your sealed artwork and avoiding abrasive cleaners, will help preserve its charm. By following these sealing practices, you can ensure that your acrylic artwork on wood remains vibrant and beautiful for years to come.
Common Mistakes to Avoid When Painting Wood
When embarking on an acrylic painting project on wood, it’s all too easy to get caught up in the excitement and overlook crucial steps that can make or break your results. A common misstep is neglecting surface preparation. Always ensure that your wood is properly sanded and cleaned. Failure to do this can lead to poor adhesion, resulting in paint peeling off over time. Don’t skip the degreasing process; even slight residue from handling the surface can impede the paint’s grip.
Another frequent mistake is applying acrylic paint too thickly. While it might seem tempting to use a robust coat for better coverage, thick layers can lead to uneven drying and cracking. Instead, opt for multiple thin layers, allowing proper drying time in between to achieve a smooth, even finish. Be patient; your artwork will thank you in the long run.
One more aspect often overlooked is the choice of brush or applicator. Different brushes yield varying effects, and using the wrong type can create unwanted textures. Invest in a variety of brushes designed for acrylics, as well as sponges or rollers for other effects. Discovering the right tools can significantly enhance the quality of your work.
Lastly, it’s vital to understand the implications of temperature and humidity on your painting process. Extreme conditions can affect drying times and paint application. Always strive to paint in an environment with moderate temperatures and low humidity to ensure optimal results. Avoid common pitfalls, and your journey into acrylic painting on wood can be truly rewarding, yielding beautiful results that stand the test of time.
Maintenance Tips for Acrylic Painted Wood Projects
Maintaining the beauty of your acrylic-painted wood projects is essential for their longevity and visual appeal. To keep your creations looking fresh and vibrant, regular maintenance is key. A simple yet effective starting point is routine cleaning. Use a soft, damp cloth to gently wipe down the surface, avoiding harsh chemicals that can degrade the paint. For tougher stains, consider a mild soap solution, but ensure you test it on an inconspicuous area first. Remember, keeping the painted surface dust-free not only enhances its appearance but also prevents grime buildup that can wear down the paint over time.
Another important aspect of caring for your acrylic-painted wood is monitoring environmental factors. Acrylic paint is sensitive to humidity and temperature fluctuations. To protect your artwork, avoid placing it in direct sunlight or near heat sources like radiators or vents, as these can cause the paint to fade or crack. If your project is an outdoor piece, consider using a UV-resistant sealant to shield it from the elements. This not only preserves the integrity of the color but also adds an extra layer of protection against moisture.
Here are some additional tips for maintaining your acrylic-painted wood projects:
- Refresh the Finish: If your paint starts to look dull, a simple application of a clear acrylic sealant can revitalize its appearance.
- Avoid Scrubbing: When cleaning, refrain from vigorous scrubbing, as this can remove the paint or create scratches. Gentle cleaning is always best.
- Repairing Damage: If you notice chips or scratches, don’t hesitate to touch them up with a matching acrylic paint. This is a quick fix that can prolong the life of your project.
- Store Properly: For smaller wooden items, store them in a cool, dry place and consider covering them to prevent dust accumulation.
By incorporating these maintenance practices, you can ensure your acrylic-painted wood projects remain as captivating as the day you completed them, allowing you to enjoy them for years to come.
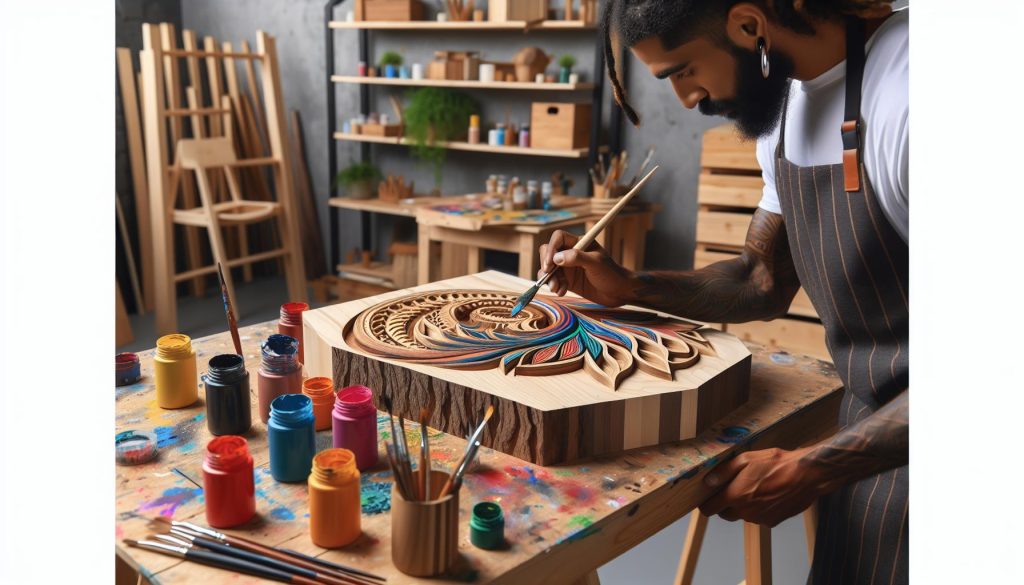
Creative Ideas for Acrylic Painting on Wood
Transforming flat wooden surfaces into vibrant art pieces with acrylic paint opens up a world of creative possibilities. From intricate designs to bold, abstract expressions, the versatility of acrylics allows artists and hobbyists to explore various styles that can breathe new life into old wood. Whether you’re crafting home decor, unique gifts, or simply indulging your creative side, there are endless ideas to get you inspired.
One delightful approach is to create personalized wall art using wooden panels. Start with a simple shape or cut-out-think of stars, hearts, or geometric patterns-and let your imagination run wild with colors and designs. You can use stencils to achieve clean lines and intricate details, or try your hand at freehand painting for a more organic feel. Consider incorporating mixed media-adding elements like beads, fabric scraps, or printed photos for a multidimensional effect.
Furniture painting is another exciting avenue. Why not rejuvenate a piece of old furniture by applying a bold color scheme or a playful design? Consider painting a coffee table with a colorful mural, or give chairs a fresh update with a soft gradient effect. Don’t shy away from using techniques such as dry brushing or layering colors to create depth and texture, which can elevate your furniture into statement pieces that reflect your personal style.
To add some seasonal flair, create themed decorations. For instance, design festive ornaments for holidays or painted signs that celebrate the seasons. Use a variety of techniques like splatter painting for a playful look or layering techniques for a vintage effect. These decorations not only enhance your home but also make for thoughtful gifts that showcase your artistic efforts.
Finally, consider functional art-items that are both beautiful and useful. Think about painting coasters, trays, or planters to bring personality into everyday objects. Investing your creativity into functional items can turn mundane items into expressions of your style, making them perfect conversation starters.
With so many inspiring directions, acrylic painting on wood allows limitless creativity. The key is to experiment and enjoy the process, turning each piece into a unique reflection of your artistic vision.
Eco-Friendly Options for Acrylic Painting on Wood
The choice of materials for acrylic painting on wood can greatly impact both your artistic results and environmental footprint. Many artists today are looking for more sustainable and eco-friendly options to reduce their impact on the planet while creating beautiful art pieces. Thankfully, there are several eco-conscious practices and materials available that can help achieve your creative goals without compromising the environment.
Start by selecting acrylic paints that are labeled as eco-friendly, non-toxic, and water-based. These paints typically contain fewer harmful chemicals compared to traditional acrylics, making them safer for you and the environment. Many brands offer green certifications that assure the paint is sustainably produced. Additionally, consider using natural pigments derived from plant sources, which not only provide vibrant colors but also minimize the use of synthetic substances.
In addition to choosing the right paint, the surface preparation is critical. Look for reclaimed wood or sustainably sourced materials to use as your canvas. Repurposing old furniture or leftover wood from construction projects not only reduces waste but also adds a unique character to your artwork. Sanding and priming your wood surface with low-VOC, natural sealers ensures that it remains ready for painting without introducing additional harmful chemicals into your workspace.
When it’s time to clean up, opt for bio-based cleaning products to wash your brushes and tools. This practice prevents toxic chemicals from entering the water supply and is generally safer for the environment. Store your acrylic paints in reusable containers to cut down on plastic waste, and consider using paper palettes or biodegradable options for mixing colors.
By making informed choices and utilizing eco-friendly materials and practices, you can create stunning acrylic wood art while actively contributing to a healthier planet. Your artistic creations can reflect not just your style but also your commitment to sustainability, inspiring others to follow suit in their creative endeavors.
FAQ
Q: Can I use acrylic paint on raw wood?
A: Yes, you can use acrylic paint on raw wood. Ensure the surface is clean and sanded for better adhesion. Applying a primer can enhance the coverage and durability of the paint, as discussed in the section on preparing wood surfaces for acrylic painting success.
Q: What type of wood is best for acrylic painting?
A: Softwoods like pine and fir are excellent for acrylic painting due to their smoother surfaces and ease of handling. However, hardwoods like maple can also work well if properly prepared. For more details on surface preparation, refer to the relevant sections of the article.
Q: How do I prepare wood for acrylic paint?
A: Begin by cleaning the wood to remove dust and grime. Sand the surface to create a smooth finish, and consider applying a primer to improve adhesion. This preparation process is key for achieving a professional-looking result, as highlighted in our article.
Q: How long does acrylic paint take to dry on wood?
A: Acrylic paint typically dries to the touch within 30 minutes to 1 hour on wood, but full curing may take 24 hours or more. It’s important to allow adequate drying time between coats to prevent smudging, as indicated in the best techniques section.
Q: What finish should I choose for my acrylic-painted wood?
A: The best finish depends on your project needs; gloss offers vibrancy and durability, while matte provides a more subdued look. Satin is a middle ground, providing a soft sheen. More details on finishes can be found in the respective section of the article.
Q: Can I mix acrylic paints with stains for wood?
A: Yes, mixing acrylic paints with wood stains can create custom colors; however, be cautious with ratios to maintain the integrity of the paint. Test small amounts to achieve the desired effect. For a deeper understanding, explore our section on comparing acrylic paint to other wood finishes.
Q: How can I protect my acrylic-painted wood projects?
A: To protect your acrylic-painted wood, apply a clear sealant or varnish suitable for acrylics once the paint has fully cured. This protects against scratches and moisture, enhancing longevity. Refer to the sealing section for step-by-step guidance.
Q: What should I avoid when painting wood with acrylics?
A: Avoid painting on unprepared wood and skipping primer application, which can lead to poor adhesion and peeling. Additionally, do not rush the drying process between coats. Common mistakes to avoid are discussed extensively in the article.
Final Thoughts
Now that you understand how to effectively use acrylic paint on wood, it’s time to unleash your creativity! Remember, proper preparation and the right sealing methods can elevate your projects. Don’t miss out on exploring our guides on the best acrylic paint for your crafts and essential wood preparation techniques to ensure stunning results.
Looking for inspiration? Check out our DIY tutorials or join our newsletter for exclusive tips and tricks straight to your inbox. Whether you’re a beginner or a seasoned artist, there’s always something new to learn. Experiment, share your creations with us in the comments, and importantly, have fun with your projects! Your next masterpiece is just a brushstroke away.