Acrylic paint is a versatile medium that opens up a world of creativity, especially for custom jewelry projects. Did you know that acrylics dry quickly and can be easily manipulated to achieve vibrant colors and intricate designs? Whether you’re looking to personalize pieces or experiment with unique textures, understanding the different types of acrylic paint is essential. In this guide, we will explore the best acrylic options for jewelry making, ensuring you have the knowledge to elevate your designs and create stunning, one-of-a-kind pieces. Dive in to discover how to enhance your jewelry projects with this dynamic medium!
Understanding Acrylic Paint Types for Jewelry
Understanding the various types of acrylic paint is essential for creating stunning jewelry pieces. Acrylic paint is versatile, quick-drying, and water-soluble when wet, which makes it an excellent choice for artistic applications. One of its standout qualities is the range of finishes available; you can choose from matte, glossy, or satin, each providing a different aesthetic appeal to your designs. For jewelry making, selecting the right type of acrylic paint can significantly affect the outcome of your project.
When considering acrylic paints for jewelry, it is crucial to look at their formulation. Some paints are specially formulated for plastic surfaces, while others work better on metals or wood. Here are a few key types to consider:
- Standard Acrylic Paint: This is the most common type and is suitable for a variety of surfaces. However, it may require sealing to withstand wear and tear.
- Metallic Acrylic Paint: Perfect for adding a touch of elegance, these paints have reflective qualities that can make your jewelry stand out.
- Transparent Acrylic Paint: Great for layering, this type allows you to build depth and create unique effects, especially on light-colored or transparent materials.
- Fabric Acrylic Paint: If your jewelry incorporates fabric components, this type of paint will adhere well and stay flexible after drying.
Choosing the right acrylic paint not only enhances the aesthetic quality of your jewelry but also ensures durability. Look for paints labeled as non-toxic and water-resistant to ensure they will stand up to everyday wear. Whether you’re a novice or an experienced jewelry maker, understanding these options enables you to make informed decisions and elevate your creative projects.
The Benefits of Using Acrylic Paint in Jewelry Making

Using acrylic paint in jewelry making opens up a world of creative possibilities that can transform even the simplest pieces into stunning works of art. One of the most exciting benefits of acrylic paint is its incredible versatility. Whether you’re working on metal, wood, or resin jewelry, acrylics can adhere well to various surfaces, allowing you to explore a wide range of design styles and techniques. This adaptability makes it an excellent choice for both novice crafters and experienced artisans looking to enhance their projects.
Another advantage of acrylic paint is its vibrant color palette. Colors stay bright and true, allowing for bold statements in your jewelry designs. This quality is particularly beneficial for those who love layering and mixing colors, as acrylics can seamlessly blend to create custom shades that reflect your personality and style. The quick-drying nature of these paints is also a significant time saver, enabling you to complete projects more efficiently without long waits between coats or layers.
Acrylic paints are typically non-toxic and water-resistant once cured, ensuring that your jewelry pieces remain safe for wear and can withstand everyday use. This durability gives you peace of mind, allowing you to focus on creativity rather than worrying about the longevity of your designs. Plus, the availability of different finishes-such as glossy, matte, or metallic-provides additional options for personalizing each piece, whether you’re aiming for a modern aesthetic or a more traditional look.
In conclusion, are compelling. Its versatility, vibrant color selection, quick drying time, and durability make it an ideal medium for adding your artistic touch to any jewelry project. By embracing acrylics, you can create unique, eye-catching designs that reflect your style while ensuring that your jewelry stands the test of time. Embrace the possibilities and let your creativity shine!
Essential Tools for Working with Acrylic Paint

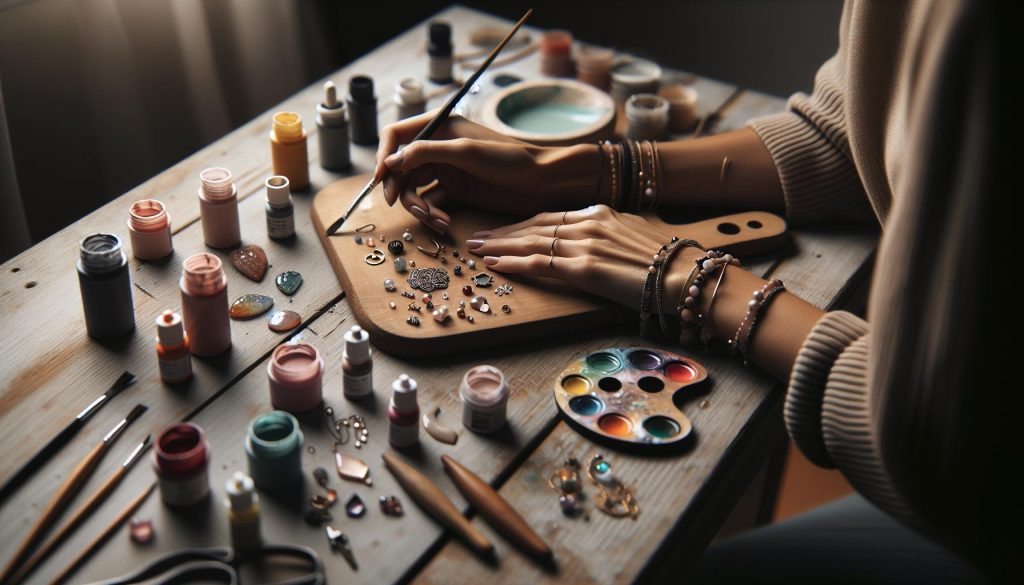
Creating beautiful jewelry with acrylic paint can be an incredibly rewarding experience, but having the right tools at your disposal is essential for achieving professional-looking results. A well-equipped workspace not only enhances your creativity but also makes the process enjoyable and efficient. Here’s a guide to the essential tools that every aspiring acrylic jewelry artist should consider.
To start, a set of high-quality acrylic paints is paramount. Look for brands that offer a wide range of vibrant colors and good coverage, as this will allow for deeper layering and more complex designs. You’ll also need a variety of brushes; fine detail brushes are excellent for intricate designs, while broader ones are suitable for covering larger areas. Additionally, having a palette for mixing colors will help you experiment with new shades and techniques.
Your workspace should include tools for preparation and protection, such as a surface cover (like an old newspaper or a craft mat) to prevent any mess. Safety gear, such as gloves and a mask, is also advisable, especially if you’re working with spray paints or sealing agents. Finally, a sealant for acrylic paint is crucial for protecting your finished pieces from chipping or fading, ensuring your jewelry maintains its beauty over time.
- Essential Tools:
- Acrylic paints in various colors
- Detail and flat brushes
- Mixing palette
- Protective gear (gloves, mask)
- Sealant for finished pieces
By investing in these tools and fostering a creative environment, you can elevate your acrylic jewelry designs and have fun experimenting with colors and textures. Remember, every artist’s toolkit will look a bit different, so feel free to adapt this list based on your personal style and project needs. Embrace the process, and let your artistic vision flourish!
Step-by-Step Guide to Painting Jewelry with Acrylics

Painting jewelry with acrylics opens up a vibrant world of creativity and personalization. This versatile medium allows artists to express their unique vision through custom colors and intricate designs, making even the simplest pieces stand out. Whether you’re embellishing metal, wood, or resin, following a systematic approach can help you achieve stunning results. Here’s a that will empower both beginners and seasoned crafters.
Start by preparing your materials and workspace. Ensure that you have a clean, well-lit area to work, and gather all your tools: acrylic paints, brushes, a mixing palette, and your choice of jewelry pieces. Before you begin painting, it’s essential to clean the surfaces of your jewelry items. Any dust or oils can interfere with the adhesion of the paint, so wipe them down with rubbing alcohol. If you’re working on a porous surface like wood, consider sealing it first with a clear acrylic sealer to prevent paint absorption.
Next, sketch out your design on paper or lightly onto the jewelry surface using a pencil. This acts as a guide and helps you visualize the final look. When you’re ready, start with a base coat of acrylic paint. Use larger brushes to cover larger areas and fine brushes for detailed designs. Remember, acrylic paint dries quickly, so work efficiently but also allow time for the base coat to dry before adding additional layers or details. If you want to create depth, consider layering different colors or utilizing techniques like dry brushing or sponging.
Once your artwork is complete and dry, the final step is crucial: sealing your painted jewelry. This not only enhances the vibrancy of your design but also provides protection against scratches and fading. Select a quality acrylic sealer, either in spray or liquid form, and apply it according to the product instructions. Allow it to cure fully to ensure durability. Your beautifully painted jewelry is now ready to wear or gift!
By following these steps, you can transform ordinary materials into extraordinary pieces of art that reflect your personal style. Enjoy the process of exploration and creativity-each piece you create will add to your unique jewelry collection and storytelling.
Mixing Colors: Techniques for Custom Shades
Mixing colors can be one of the most exciting aspects of working with acrylics, especially when it comes to creating custom shades for jewelry. Unlike some other media, acrylic paint allows for vibrant color combinations that can bring your jewelry designs to life. Understanding the basics of color theory can help you create beautiful, unique pieces that stand out. By blending primary colors-red, blue, and yellow-you can create a wide spectrum of colors ranging from pastel to bold hues.
To ensure consistent results and a cohesive look in your projects, consider these techniques for mixing colors:
Basic Mixing Techniques
- Direct Mixing: Use a palette or mixing tray to combine two or more colors directly. Start with a small amount of each color and gradually mix them until you achieve the desired shade.
- Layering: Apply one layer of paint, let it dry, and then add another layer in a different color. This creates depth and complexity, as the colors will interact visually even if they aren’t mixed on the palette.
- Adding White or Black: To create lighter shades, add white to your base color. To darken a shade, add a touch of black. This can help you create a range of tints and shades essential for highlights and shadows.
Experimentation is key when mixing colors. Don’t hesitate to create swatches on scrap pieces to visualize how your colors will look once applied to your jewelry. Document successful combinations for future reference and adjust as necessary based on the material you are painting.
Integrating metallics or iridescent colors can also elevate your designs. Mixing traditional colored acrylics with metallic paints can add a stunning dimension, allowing light to play off your jewelry beautifully. When combining multiple colors, aim for an even balance to prevent any one shade from overpowering the others, ensuring that your final piece maintains harmony.
By understanding and implementing these mixing techniques, you can confidently create custom shades that enhance your jewelry projects, making each piece truly reflective of your personal style. So, grab your palette, explore your creativity, and let your colors shine!
Finishing Touches: Sealing and Protecting Your Artwork
One of the most satisfying moments in crafting jewelry is realizing how much detail your paintwork adds to the final creation. However, to ensure that your designs maintain their vibrancy and withstand the test of time, sealing and protecting your acrylic artwork is essential. This final step not only enhances the aesthetic appeal but also safeguards your pieces from wear and environmental factors.
To adequately protect your jewelry, start by selecting an appropriate sealant. There are various options available, including spray sealants and brush-on varnishes. Look for a clear acrylic sealer designed for crafts, as these typically offer UV protection to prevent fading and yellowing over time. When applying sealant, make sure to work in a well-ventilated area and follow the manufacturer’s instructions for application and drying times.
Application Tips
- Clean the Surface: Before sealing, ensure your painted piece is free of dust and oils. A gentle wipe with a soft cloth can help keep the finish smooth.
- Multiple Coats: For enhanced protection, consider applying multiple thin coats of sealant. Allow each layer to dry completely before adding the next to avoid a sticky or uneven finish.
- Test First: Always test the sealant on a scrap piece or an inconspicuous area. This helps you determine how the sealant interacts with your specific paint and material.
After sealing, it’s important to let your jewelry cure fully before wearing or selling it. This can take several days, depending on temperature and humidity. During this period, storing your jewelry in a cool, dry place away from direct sunlight will help ensure that the finish sets beautifully.
With protective measures in place, your acrylic-painted jewelry can shine brightly while resisting scratches, dirt, and moisture. Understanding how to seal and protect your artwork not only prolongs its life but also ensures that your artistry continues to inspire and impress. So take that extra step-your creations deserve it!
Creative Project Ideas: Unique Jewelry Designs
The beauty of acrylic paint lies in its versatility, allowing jewelry makers to explore a myriad of creative projects that breathe life into unique designs. By harnessing the vivid colors and quick-drying properties of acrylics, you can transform simple materials into stunning statement pieces. One captivating project idea is to create hand-painted wooden pendants, where you can blend colors to produce beautiful patterns, or even seasonal themes like florals or animal motifs. Each pendant can be different, adding an assortment of colors and styles to your collection or for gifting.
Another intriguing technique involves resin casting with acrylic paints. First, pour a layer of clear resin into a mold and let it partially cure. Then, drop in swirls of acrylic paint and use a toothpick or a skewer to create mesmerizing designs. Once fully cured, you’ll have vibrant, one-of-a-kind charms that can be turned into earrings or bracelets. This method not only highlights the colors but also introduces a fascinating dimension to your designs.
For those inclined to experiment with texture, consider using acrylic paint on polymer clay jewelry. After sculpting your desired shape-be it beads, charms, or pendants-apply a base coat of paint. Once dry, use a sponge to dab on additional colors, creating a textured and dynamic look. Finish your pieces with a sealant to ensure durability and maintain the vibrancy of the paint.
Lastly, embrace the chicness of geode-inspired jewelry. Use acrylic paint to replicate the intricate patterns of geodes on metal bases or acrylic sheets. Layering paint with a sponge can mimic the natural variations found in gemstones, providing a striking contrast when paired with metals. This technique not only enhances your artistic skills but also makes your jewelry truly stand out in any setting.
The journey of crafting jewelry with acrylics is filled with endless possibilities, encouraging you to infuse your personal style and creativity into each piece. Don’t hesitate to experiment, mix techniques, and redefine traditional approaches to jewelry-making-your artistic journey is just beginning!
Troubleshooting Common Acrylic Painting Issues
When working with acrylic paints, especially for intricate jewelry projects, encountering issues can be frustrating. However, understanding and addressing these common problems can empower you to create beautiful pieces without the hassle. Whether your paint is clumping, drying too fast, or not adhering well to your chosen surfaces, there are solutions that can turn these setbacks into learning opportunities.
One of the frequent challenges is clumping or uneven application. This often occurs due to paint thickening over time or not being properly mixed. To prevent clumping, always stir the paint before use and consider adding a small amount of water or acrylic medium to maintain its consistency. If clumping happens mid-project, gently re-mix the paint, and try applying it in thinner layers to achieve a smoother finish.
Another common issue is drying too quickly, which can lead to brushstrokes showing or the paint not blending well. Acrylics dry fast, but you can slow this down by using a wet palette or misting the surface lightly with water as you work. This approach keeps the paint workable longer, allowing for better blending and layering techniques.
In some cases, you might notice poor adhesion of acrylic paint to certain materials. Surfaces like metal or plastic can require special preparation. To improve paint adhesion, apply a primer suitable for the material you’re using. For example, using a gesso or acrylic primer can create a better bond for the paint, ensuring that your designs don’t chip or peel over time.
Lastly, watch out for color fading or dullness after drying. This issue can stem from using low-quality paints or the absence of a sealant. Always opt for high-quality acrylics and finish your pieces with a clear sealer specifically designed for acrylic paint to enhance vibrancy and protect against wear. By recognizing and addressing these common hurdles, you can enhance your acrylic jewelry-making experience and achieve stunning results.
Best Practices for Maintaining Acrylic Painted Jewelry
Maintaining acrylic painted jewelry requires a blend of care and technique to ensure the longevity and vibrancy of your creations. Acrylic paint, known for its fast drying properties and ease of use, can resiliently hold its color, but it also needs protection from elements that may cause wear. Here are essential practices to keep your acrylic painted jewelry looking fresh and stunning.
First and foremost, protect your pieces from moisture. When acrylic paint is exposed to water, it can soften or peel, especially if no protective sealant is applied. To shield your artwork, always finish with a high-quality, waterproof sealer designed for acrylics. This not only establishes an additional layer of protection but also enhances the colors, making them pop even more. For everyday wear, consider applying a thin coat of sealant every few months, especially for items that encounter regular friction or abrasion, such as earrings and necklaces.
When it comes to cleaning, it’s crucial to handle your acrylic jewelry with care. Use a soft, damp cloth to gently wipe the surfaces. Avoid harsh chemicals or abrasive cleaners, as these can dull the finish or damage the paint. Instead, opt for mild soap mixed with water when deeper cleaning is necessary. If your pieces have metal components, ensure they are made of tarnish-resistant materials or treat them with a suitable metal polish that’s also gentle on acrylics.
To store your jewelry, choose a dry, cool place away from direct sunlight, which can cause colors to fade over time. Consider using divided trays or individual pouches to keep each piece separate and to prevent scratching. Additionally, if traveling with your jewelry, wrap each piece in protective cloth or bubble wrap to avoid damage during transit.
By incorporating these best practices into your routine, you can significantly extend the life and beauty of your acrylic painted jewelry, allowing your creativity to shine through your accessories for years to come.
Sourcing Quality Acrylic Paints for Your Projects
Sourcing the right acrylic paint can make a significant difference in your jewelry projects, impacting both the aesthetic and durability of your pieces. With a variety of brands and types available on the market, it’s vital to choose high-quality options that suit your creative needs, whether you’re a hobbyist or a seasoned artisan.
When considering acrylic paints for jewelry, look for options labeled as non-toxic and specially formulated for crafts. These are often more vibrant and possess better adhesion qualities compared to standard paints. Additionally, consider the viscosity of the paint; a thicker paint may be better for covering surfaces, while a more fluid paint can create delicate designs. Some renowned brands, like Liquitex and Golden, offer a range of acrylic paints that provide excellent coverage and strong pigments, perfect for achieving rich colors on your jewelry pieces.
To find the best paints, you can explore various retail sources, including art supply stores, craft shops, and online marketplaces. Online platforms often offer customer reviews, which can be invaluable; look for paints praised for their pigmentation, drying time, and ease of application. Additionally, purchasing small sample sets can help you experiment with different colors and finishes without committing to larger containers.
While selecting colors, don’t forget about your project’s overall theme. Many artists create custom shades by mixing acrylics, allowing for unique color combinations that resonate with personal styles or trends. It’s also wise to keep an eye out for seasonal collections or limited editions that can inspire new designs. Investing in a palette of both primary colors and specialty finishes can expand your creative possibilities, allowing you to tailor your projects to your vision.
In summary, sourcing quality acrylic paints is essential for creating stunning jewelry. Pay attention to the brand reputation, paint formulation, and color options while exploring different outlets. This thoughtful selection process will not only enhance your artistic expression but also ensure that your creations are vibrant and long-lasting.
Understanding Drying Time and Curing for Acrylics
Acrylic paints are highly favored in jewelry making for their versatility and vibrant colors, but understanding their drying and curing processes is crucial to achieving the best results. When you apply acrylic paint to your jewelry pieces, they typically dry to the touch within 15 to 30 minutes, depending on factors such as the thickness of the application and the surrounding environment. However, while drying refers to the point where the surface feels dry, it doesn’t mean the paint has completely cured. Curing is a deeper process that can take anywhere from days to weeks, where the paint achieves its maximum durability and adhesion.
To facilitate optimal curing, consider the following tips:
- Temperature and Humidity: Acrylics cure best in warm, dry environments. High humidity can prolong drying times and affect adhesion.
- Layering: If you plan to apply multiple layers, allow each layer to dry completely before adding the next. This practice not only enhances the finish but also ensures better adhesion between layers.
- Use of Sealants: After the acrylic paint has dried completely, it’s advisable to apply a sealant. This not only protects your artwork but can also enhance the longevity of the paint by preventing chipping and fading.
It’s essential to note that while shorter curing times might be tempting, rushing the process can lead to issues like smudging or peeling. Always allow your pieces ample time to cure, especially if they will be worn frequently. With patience and attention to the drying and curing stages, your acrylic-painted jewelry will maintain its stunning appearance and withstand the test of time, making your creative efforts all the more rewarding.
Inspiration: Artists Who Excel in Acrylic Jewelry Design
Jewelry enthusiasts and artists alike are constantly finding innovative ways to incorporate acrylic paints into their designs, creating stunning pieces that are both unique and customizable. Notable artists who excel in this medium demonstrate how acrylics can transform traditional jewelry design into vibrant works of art. For example, many contemporary jewelry makers use acrylics not only for their flexibility in color and application but also for the challenge of creating depth and texture within their artworks.
Acrylic paint can be utilized in various methods, including pouring, layering, and even marbling, allowing artists to express their creativity. Names like Kelli D. and David D. are rising stars in the acrylic jewelry community. Kelli D. is known for her intricate use of transparent layers, enabling an enchanting play of light through her pieces. David D. often experiments with bold color combinations, pushing the boundaries of conventional jewelry design. Their work emphasizes how acrylics can be a powerful medium for storytelling and personal expression.
To draw inspiration from these artists, you might consider exploring mixed media approaches. Combining acrylic paint with materials like resin, metal, or natural stones can lead to unexpected and stunning results. Experimenting with techniques such as incorporating gold leaf or using textures created through pressing objects into wet paint can give your work a distinct look.
For those starting their journey, exploring online platforms or attending local workshops led by these artists can be incredibly beneficial. These spaces foster community and can provide valuable feedback on techniques. Embracing the vibrant world of acrylic jewelry design encourages creativity and unique expressions, opening up endless possibilities for your personal flair in jewelry making.
Faq
Q: What are the best types of acrylic paint for jewelry projects?
A: For jewelry projects, artist-grade acrylic paints are ideal due to their vibrant colors and durability. These include heavy-body acrylics for texture and soft-body acrylics for smooth applications. Look for paints labeled as waterproof or suitable for mixed media to ensure longevity.
Q: How do I prepare jewelry pieces before painting with acrylics?
A: To prepare jewelry for painting, clean the surface thoroughly to remove any dust or oils. Lightly sand metal or plastic surfaces for better paint adhesion. If using resin or glass, consider a primer specifically designed for those materials to improve the paint’s sticking ability.
Q: Can I use regular acrylic paint on jewelry?
A: Yes, regular acrylic paint can be used on jewelry, but it’s essential to apply a sealant afterward. This ensures durability and prevents chipping or fading, especially on frequently handled pieces. Always test on a small area first to check for compatibility.
Q: How do I seal acrylic paint on jewelry?
A: To seal acrylic paint, apply a clear acrylic sealer or resin once the paint is dry. Spray sealants are ideal for larger pieces, while a paint-on sealer works well for intricate designs. Ensure the paint fully cures before sealing for the best results.
Q: What is the drying time for acrylic paint on jewelry?
A: Acrylic paints typically dry to the touch within 15-30 minutes. However, for a complete cure, it’s best to wait 24 hours. Environmental factors like humidity and temperature can affect drying times, so consider those when planning your project.
Q: Is acrylic paint washable on jewelry?
A: Generally, acrylic paint is not washable. Once cured and sealed properly, it can withstand light exposure to water, but prolonged exposure may lead to fading or chipping. To maintain the piece, avoid direct water exposure and clean with a damp cloth.
Q: Can acrylic paint be mixed with other mediums for jewelry?
A: Yes, acrylic paint can be mixed with mediums like gels or pastes to create interesting textures and effects on jewelry. Experimenting with different additives can greatly enhance the artistic outcome of your pieces, allowing for unique finishes and depth.
Q: What tools are essential for painting jewelry with acrylics?
A: Essential tools for painting jewelry include quality brushes (fine-tipped for detail work), a palette for mixing colors, sealant for finishing touches, and protective gear like gloves. Also, consider using masking tape for clean edges when necessary.
Final Thoughts
Now that you understand the best types of acrylic paint for your custom jewelry projects, it’s time to unleash your creativity! Whether you’re a seasoned jewelry maker or just starting, acrylic paint offers vibrant colors and versatility that can elevate your designs. Don’t miss the opportunity to experiment and bring your unique vision to life!
For more insightful tips, check out our guides on jewelry care and maintenance, or dive into DIY tutorials that can enhance your skills. If you’re interested in starting your own jewelry shop, we have resources available that can help with that journey.
Join our community by signing up for our newsletter! You’ll receive exclusive updates on the latest trends and techniques in jewelry making. Share your creations in the comments below, and let’s inspire each other! Remember, the world of jewelry is yours to explore-so get started today!