Taking care of your acrylic tips at home can be a game-changer, not just for your wallet but also for your nails’ health. Did you know that many people struggle with the removal process, leading to damaged nails and frustration? You no longer need to visit a salon, as this guide will walk you through safe, effective techniques to remove acrylic tips without the stress. Whether you’re looking to refresh your manicure or simply need a change, learning the right methods empowers you to take control of your nail care. Ready to discover tips and tricks that make this task manageable and rewarding? Let’s dive in!
How to Gather Your Supplies for Acrylic Tip Removal
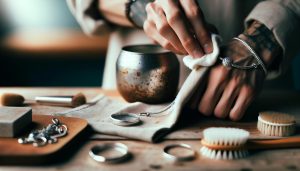
Gathering the right supplies for acrylic nail tip removal is critical to ensure a smooth and safe experience at home. Before diving into the process, ensure you have everything you need to avoid interruptions. An organized workspace with all necessary items within arm’s reach not only enhances efficiency but also minimizes the risk of accidents or mishaps.
Start by collecting these essential supplies:
- Acrylic Nail Remover: Acetone-based removers are effective at breaking down the acrylic material. Ensure it’s pure acetone for the best results.
- Cotton Balls or Pads: These will help absorb the acetone and facilitate the removal process.
- Aluminum Foil: Cut into squares, foil will cover the cotton balls, keeping the acetone moist against the acrylic for effective softening.
- Nail File: A coarse grit file to gently buff the surface of the acrylic nail before soaking can speed up the process.
- Nail Clippers: Use these to trim the length of the acrylic tips for easier removal.
- Wooden Cuticle Stick: This tool can help gently lift and push off the softened acrylic without damaging your natural nails.
- Moisturizer or Cuticle Oil: After removing the acrylics, it’s essential to hydrate your nails and cuticles.
Preparing your space is equally important. Choose a well-lit area to work, ideally near a sink for easy clean-up, and lay down some protective covering to catch any debris. Having a small bowl filled with warm water nearby can also help hydrate your nails and make the process more comfortable.
By ensuring you have all these supplies, you set yourself up for a successful and least damaging acrylic nail removal experience, allowing you to restore and care for your natural nails effectively. 1")
Understanding the Risks of DIY Acrylic Removal
DIY acrylic nail removal can be tempting, especially when considering the savings on salon visits. However, it’s essential to approach this process with caution. One critical risk associated with removing acrylics at home is the potential for damage to your natural nails. Improper techniques can lead to thinning or peeling of the nails, and in severe cases, the nails may become brittle or even infected if not handled carefully. It’s not just about the removal process; the tools and products used also play a crucial role in ensuring nail health.
Another significant concern is the use of acetone. While it is an effective solvent to dissolve acrylics, prolonged exposure to acetone can cause skin irritation or allergic reactions. Always ensure proper ventilation when using acetone and consider wearing gloves to protect your skin. Additionally, the temptation to rush the process can lead to aggressive scraping or pulling at the acrylics, which can result in painful damage to the nail bed and surrounding skin.
To mitigate these risks, it’s important to follow a well-structured approach. Gather all necessary supplies before starting, and take your time during each step of the removal process. If you encounter resistance when trying to lift the acrylic, it’s better to soak it for a little longer than to force it off. Prioritize patience over speed; your natural nails will thank you in the long run. By being informed and careful, you can safely transition from acrylics back to your natural nails without compromising their health.
Step-by-Step Guide to Safely Removing Acrylic Tips
To successfully remove acrylic tips at home without damaging your natural nails, it’s crucial to approach the process methodically and patiently. Start by gathering all necessary supplies to ensure a smooth experience. You will need acetone (preferably pure), cotton balls or pads, aluminum foil, a nail file, a buffer, and some moisturizer or cuticle oil for aftercare. Preparing these items beforehand minimizes the chance of interruptions and helps the process flow better.
Begin by filing the top layer of your acrylic nails using the nail file. This step is essential because it helps the acetone penetrate the acrylic more effectively. You only need to lightly buff the surface; there’s no need to go deep as this can harm your natural nails. After filing, soak a cotton ball in acetone and place it directly on the nail, ensuring it fully covers the acrylic. Wrap it snugly with a piece of aluminum foil to keep the cotton in place and to create warmth, which will expedite the soaking process.
Maintain this setup for about 15-20 minutes. This time allows the acetone to break down the acrylic. Once the timer goes off, check one nail to see if the acrylic is lifting. If it isn’t coming off easily, don’t force it-re-soak for an additional 10 minutes. When the acrylic is ready, gently push it off with a manicure stick or a similar tool, being careful to avoid your natural nail bed. If there are stubborn bits, soak a little longer instead of scraping aggressively.
After all the acrylic is removed, rinse your nails thoroughly with warm water to wash off any acetone residue. Follow up with a generous application of moisturizer or cuticle oil to hydrate your nails and skin, helping to mitigate any dryness caused by the acetone. Regularly applying cuticle oil in the days following your removal will also support the health and recovery of your natural nails, ensuring they stay strong and resilient. 2")
Essential Tips for Pain-Free Removal Process
To ensure a seamless and pain-free experience while removing acrylic tips at home, it’s essential to approach the process with care and attention. One significant aspect is maintaining a calm and comfortable environment. Light some scented candles or play your favorite music to create a pleasant atmosphere, making the removal process less of a chore and more of a self-care ritual.
Using the right technique can significantly reduce discomfort. Start with gently buffing the acrylic surface, not just to remove the shiny top coat but to allow acetone to penetrate more effectively. Remember, less is more when it comes to filing; over-filing can lead to damage to your natural nails. Additionally, consider using soft cotton balls soaked in acetone instead of felt pads, as they can conform better to the shape of your nails, ensuring that the acetone covers them adequately.
While waiting for the acetone to work its magic, patience is vital. Instead of constantly checking the nails, engage in a distracting activity like reading or watching a show. This helps manage any anxiety or restlessness during the soaking period. If you find that the acrylic isn’t lifting easily, reapply the acetone-soaked cotton and wrap them again. Remember that forcing the acrylic off can lead to pain and damage; it’s essential to allow the process to work naturally.
Finally, moisturizing your nails immediately after removal cannot be overstated. A high-quality cuticle oil or a rich hand cream will restore hydration and nurture your nails post-acrylic. Consistently applying this treatment for several days after removal strengthens your nails and aids recovery, ensuring they look their best. Embrace this moment of self-care-the transition back to natural nails can be both refreshing and empowering!
Aftercare: Caring for Your Natural Nails Post-Removal
Caring for your natural nails after removing acrylic tips is crucial to restoring their health and ensuring they look vibrant and strong. Many people underestimate the impact acrylics can have on the natural nail bed, leading to brittle and damaged nails if not addressed properly post-removal. The transition back to naked nails can feel refreshing, but it’s vital to implement a nurturing aftercare routine to support their recovery.
Start with gentle cleaning to remove any residual debris or acetone. Use a mild soap and warm water to cleanse your nails thoroughly. After drying, consider a light buffing with a soft nail file to smooth any rough edges that might have developed during the acrylic removal process. Rectify any mistakes made during removal by keeping it simple and gentle to avoid further damage.
Next, hydration is key. Your nails and cuticles have likely suffered from dehydration due to the acetone and the extended wear of acrylics. Incorporate a high-quality cuticle oil or hydrating nail cream into your routine. Apply it generously and massage it into the nails and surrounding skin. Ensuring consistent moisture will help maintain nail flexibility and strengthen their resilience. Additionally, consider wearing a pair of cotton gloves overnight after applying oil to maximize hydration.
A nutrient-rich nail supplement can be a game changer. Vitamins like biotin, keratin, and collagen can help boost nail growth and health. Look for supplements specifically aimed at enhancing nail strength and consider integrating them into your diet for longer-lasting benefits. Meanwhile, maintaining a balanced diet rich in vitamins and minerals will support not only your nails but your overall health as well.
Finally, it’s important to give your nails a breather. Avoid reapplying acrylics or heavy nail polish for at least a couple of weeks to allow them to recover fully. If you feel the need to apply nail polish, choose breathable options or gels that allow moisture to pass through. This extra care will go a long way in ensuring your natural nails bounce back strong and healthy, ready for whatever nail art or designs you wish to explore next!
Common Mistakes to Avoid When Removing Acrylics
When it comes to removing acrylic nails at home, many find themselves facing unexpected challenges that lead to mistakes. Understanding these pitfalls is crucial for a successful and safe removal process. One of the most common errors is rushing the removal. Acrylics are designed to last, so it’s essential to allow adequate time for the solution (particularly acetone) to penetrate. Skipping this step can result in damage to your natural nails, forcing you to take drastic measures that could worsen the situation.
Another frequent mistake is using excessive force to pry off the acrylics. While it might seem tempting to pull them off at the first sign of looseness, this method can lead to painful tearing of the natural nail. Instead, gently soak the nails and use a wooden stick or cuticle pusher to ease the acrylic away from the nail bed gradually. This technique minimizes trauma and promotes healthier nail recovery.
Using low-quality or incorrect tools is yet another blunder that can hinder the removal process. Attempting to use random household items or non-nail specific tools can result in injury or poor outcomes. It’s vital to gather the right supplies beforehand, including a high-quality acetone, cotton balls, and a nail file. Proper tools will make for a more efficient and less painful experience.
Lastly, not following up with proper aftercare is a mistake that many overlook. After the acrylics are removed, your nails need hydration and nourishment to recover from the drying effects of acetone. Skipping this step can lead to brittleness and damage over time. Incorporate a hydrating cuticle oil and consider using a nail strengthener to support healthy growth post-removal.
By avoiding these common mistakes, you can ensure your at-home acrylic removal experience is not only effective but also maintains the integrity of your natural nails. 3")
Alternatives to Professional Removal Services
When considering options for removing acrylic tips without stepping into a salon, there are several effective alternatives that can help you achieve a successful outcome. One of the most popular methods is using warm water and a moisturizing product, which provides a gentler approach to breaking down the acrylic material without relying heavily on harsh chemicals like acetone.
Start by soaking your nails in a bowl of warm water mixed with a few drops of dish soap or a gentle oil, such as olive or coconut oil. This method not only makes the acrylic more pliable but also helps in hydrating your natural nails. After soaking for about 15-20 minutes, you may be able to gently push back the acrylic tips with a cuticle pusher or a wooden stick, minimizing stress on your nails. If resistance is encountered, re-soak for an additional few minutes instead of forcing the removal, which can lead to tearing or damage.
Alternatives to Acetone
For those seeking to limit their exposure to acetone, some users have found success with soy-based nail polish removers or other non-acetone solutions designed for polish removal. These alternatives tend to be milder on nails while still helping to dissolve the bond between the acrylic and your natural nails. Just apply the remover to a cotton ball, place it on the acrylic, secure it with aluminum foil to keep it snug, and let it sit for about 30 minutes. This technique, though slower than traditional acetone, can be less abrasive.
It’s also worth exploring the use of a nail strengthener or nutrient-rich oil immediately post-removal. Implementing a coat of nail strengthener can fortify your nails, helping them recover from the dehydration often experienced after acrylic wear. Pairing this practice with regular applications of cuticle oil can keep your nails nourished and in good health as you transition back to a more natural look.
By employing these gentle methods and alternatives, you can effectively remove acrylic tips at home while promoting the health and integrity of your natural nails-all without the need for salon visits. 4")
Best Practices for Nail Health After Acrylics
After removing acrylic tips, it’s crucial to prioritize the health of your natural nails to ensure they recover and remain strong. One of the most effective approaches is to rehydrate and nourish your nails, which may have become weakened during the acrylic wear. This rejuvenation process can significantly improve nail strength and appearance, making your transition back to natural nails a positive experience.
Start by applying a quality cuticle oil daily to nourish the nail bed and surrounding skin. Products containing vitamin E, jojoba oil, or almond oil are excellent choices due to their moisturizing properties. Regular massage of the cuticle oil not only hydrates but also stimulates blood circulation, promoting healthier nail growth. Additionally, consider using a moisturizing hand cream to keep your hands and nails hydrated overall, especially if you’ve used acetone or other drying removers.
Incorporate nail strengthening treatments into your routine. Look for nail strengtheners that contain proteins like keratin or calcium. These ingredients can help reinforce the structure of your nails. Apply these treatments as directed, often several times a week, to maximize their benefits. Moreover, adopting a balanced diet rich in biotin, zinc, and omega fatty acids can help support new nail growth from the inside out. Foods such as eggs, nuts, fish, and leafy greens are excellent additions to your diet that promote keratin production, essential for healthy nails.
Lastly, be mindful of how you care for your nails during the healing process. Avoid harsh chemicals and consider giving your nails a break from any nail polish or artificial enhancements for at least a few weeks. This allows your natural nails to recover fully and regain their strength. If you notice any persistent issues such as brittleness or peeling, consult a dermatologist or a nail care professional for personalized advice.
By following these practices, you can ensure your nails not only look beautiful but also remain healthy and resilient after acrylic removal.
Troubleshooting: What to Do If Acrylics Won’t Come Off
While the idea of removing acrylic nails at home can be enticing, there are times when they simply won’t budge. If you’ve followed the typical methods using acetone and you’re still struggling, don’t worry; there are other strategies you can employ to tackle stubborn acrylics without causing damage to your natural nails.
Start by ensuring your workspace is set up for success. Begin with a fresh soak in warm, soapy water for about 10-15 minutes. This helps to soften the acrylic and create a more pliable surface. If you’ve already submerged your nails in acetone, consider switching to a more vigorous soaking approach. Fill a bowl with warm water and mix in a bit of dish soap or oil to enhance the softening process. This may take a little longer, but patience is key.
If the acrylics remain firmly in place, try using a buffer or a coarse nail file to gently chip away at the edges of the acrylic. Be cautious with this method; apply light pressure to avoid injury to your natural nail. To further aid in the process, apply a small amount of acetone directly to a cotton ball and press it against your nails while wrapping them in aluminum foil. The heat generated from your body combined with the acetone can create almost a sauna effect, helping to dissolve the nails more effectively.
Other Solutions to Try
- Cuticle Pushers: Use a metal or wooden cuticle pusher to gently pry up any lifted corners of the acrylic. Work slowly and gently to avoid damaging the nail underneath.
- Oils: Natural oils such as olive oil or coconut oil can also help loosen the adhesive properties of the acrylic. Warm the oil and soak your nails for 15-20 minutes before attempting to remove them.
- Professional Help: If all else fails, don’t hesitate to seek professional help. Many salons offer affordable removal services that can save you a lot of time and potential damage.
Remember, the most crucial element in this troubleshooting phase is to remain gentle and avoid excessive force. Rushing the process can lead to nail breakage or damage, making your recovery journey much longer. By adopting a methodical approach and utilizing these strategies, you can dissolve those stubborn acrylics and return to your natural nails in no time.
Tools You Need for Future Acrylic Nail Applications
When it comes to applying acrylic nails, having the right tools at your fingertips can make all the difference in achieving salon-quality results at home. Investing in essential equipment not only enhances your application process but also ensures that your nails remain healthy and well cared for. Here’s a detailed look at the must-have tools for future acrylic nail applications.
Start with a quality acrylic nail kit, which typically includes products such as acrylic powder, liquid monomer, and a brush specifically designed for acrylic application. Using a suitable brush is critical; a size #8 or #10 round brush is ideal for beginners, as it holds sufficient product and allows for control during application. Additionally, don’t forget to have a practice wheel or nail tips handy to perfect your technique before working on your natural nails.
Maintain the health and appearance of your nails by incorporating a quality nail file and buffer into your toolkit. A coarse grit file (180-240) is perfect for shaping your nails and smoothing edges, while a finer grit buffer helps achieve a polished finish. Keeping your natural nails buffed can minimize the risk of chipping and enhance the overall look of your acrylics.
Additional Essential Tools
- Cuticle Pusher: A metal or wooden cuticle pusher is essential for preparing your nails by gently pushing back the cuticles and ensuring a clean canvas for application.
- Lint-Free Wipes: These are crucial for cleaning your nails and wiping away any excess products without leaving behind fibers or lint.
- Acetone Remover: Keep a bottle of acetone handy not just for removal but also for cleaning your brush and workspace.
- Nail Glue: A strong adhesive is important for affixing tips or securing any additional enhancements.
With the right tools stocked in your kit, you can confidently tackle your acrylic nail applications at home, ensuring they look impeccable while preserving the health of your nails. Embrace the process of learning and refining your skills, and soon you’ll find your acrylic nail expertise blooming!
Expert Insights on Acrylic Nail Maintenance at Home
Maintaining acrylic nails at home can be a rewarding part of your beauty routine if done correctly. Many enthusiasts believe that proper upkeep not only enhances the longevity of your acrylics but also promotes healthier natural nails underneath. One crucial tip is to consistently moisturize your cuticles and surrounding skin using cuticle oil. This simple practice keeps your nails hydrated and helps prevent lifting or cracking, ensuring that your acrylic tips remain intact as long as possible.
Additionally, be mindful of how you manage everyday tasks. Protect your nails from excessive exposure to water and harsh chemicals by wearing gloves when cleaning or washing dishes. Constant water exposure can weaken the adhesive bond of your acrylics, leading to potential lifting. It’s also wise to avoid using your nails as tools-this means steering clear of prying open lids or scratching surfaces, as these actions can cause stress fractures in the acrylic.
Another expert insight revolves around regular fills. Getting fills every two to three weeks, depending on your nail growth, can help maintain the appearance and stability of your acrylics. During this appointment, a technician can refill the area closest to the cuticle and ensure the overall integrity of the nail is preserved. If you’re maintaining your acrylics at home, consider purchasing a quality acrylic powder and liquid monomer to make your repairs easier and more professional-looking.
Finally, keeping an eye on the condition of your acrylics is essential. If you notice any signs of breakage or lifting, address it promptly. Fixing issues early on can prevent more significant problems, saving your nails from further damage. With these maintenance strategies in place, you’ll be empowered to enjoy stunning acrylic nails that reflect your style while supporting the health of your natural nails.
Q&A
Q: How do I know if my acrylic nails need to be removed?
A: You should consider removing your acrylic nails if you notice lifting, discoloration, or discomfort, as these signs indicate potential damage to your natural nails. Regular maintenance and checks can help you identify when it’s time for removal without waiting for significant issues.
Q: What are the best alternatives to professional acrylic nail removal?
A: Alternatives to professional removal include using acetone or a soaking method combined with gentle scraping. Always follow up with a nourishing nail treatment and moisturizer. Check the “Essential Tips for Pain-Free Removal Process” section of the article for more details on effective techniques.
Q: Can I remove acrylic nails without acetone?
A: Yes, you can use alternatives like nail polish remover or a warm soap and water soak. However, these methods may be less effective and take longer. For a more efficient removal process, consider following the tips in the “Step-by-Step Guide to Safely Removing Acrylic Tips” section of your article.
Q: What should I do if my acrylic nails won’t come off?
A: If acrylic nails won’t come off, do not force them. Try soaking them in acetone longer or reapply heat. If you continue having issues, it might be best to consult a professional. Refer to the “Troubleshooting: What to Do If Acrylics Won’t Come Off” section for further guidance.
Q: How can I ensure my natural nails stay healthy after removing acrylics?
A: To maintain healthy nails post-removal, avoid harsh chemicals, moisturize regularly, and consider using a nail strengthening treatment. The “Aftercare: Caring for Your Natural Nails Post-Removal” section provides in-depth advice on promoting nail health after acrylic usage.
Q: What tools do I need for removing acrylic nails at home?
A: Essential tools for at-home acrylic removal include acetone, foil, a buffer file, cuticle oil, and a gentle scraper. Check the “Tools You Need for Future Acrylic Nail Applications” section to ensure you have everything required for a safe and effective removal process.
Q: How long does it typically take to remove acrylic nails at home?
A: The removal process can take anywhere from 30 to 60 minutes, depending on the method used and how well the acrylic has adhered to the natural nail. For optimal efficiency, follow the “Step-by-Step Guide to Safely Removing Acrylic Tips” to minimize your time.
Q: Why is it important to follow specific steps when removing acrylic nails?
A: Following specific steps is crucial to prevent damage to your natural nails and minimize pain or discomfort. Proper techniques ensure a safer removal process and help maintain nail health. The article covers essential steps to follow in depth for a successful DIY experience.
In Summary
Now that you know how to safely remove acrylic tips at home, you’ll not only save money but also enjoy the freedom of DIY nail care. Remember, taking your time and following the steps ensures a damage-free process. If you have any lingering questions or need tips on maintaining healthy nails post-removal, check out our detailed guides on nail care and DIY beauty tips.
Don’t forget to sign up for our newsletter for more insider tricks and exclusive content on nail and jewellery care. Whether you’re a seasoned pro or just starting your beauty journey, we’re here to empower you every step of the way. Share your experiences in the comments below – your insights might help someone else looking to follow the same path! Explore more topics like cleaning techniques for jewellery or beginner’s tutorials on nail art to keep your creativity flowing. Your beauty routine has never been so accessible!