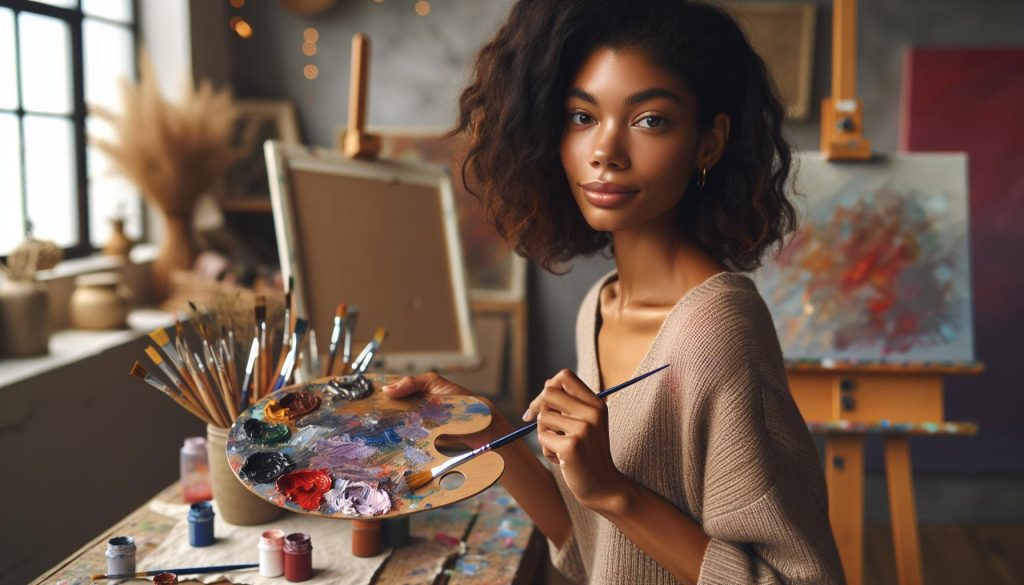
Are you ready to unleash your inner artist? Acrylic painting is not only a vibrant medium but also an incredibly accessible way to create stunning artwork. In “How to Acrylic Paint Like a Pro: Beginner’s Complete Masterclass,” you will discover essential techniques to transform your artistic vision into reality, even if you’re just starting out. Many beginners struggle to find the right approach or feel overwhelmed by the myriad of techniques available, but this masterclass will guide you through the fundamentals step by step. From mastering color mixing to exploring texture and layering, you’ll learn how to bring your ideas to life with confidence. So grab your brushes and prepare to dive into a world of creativity, where each stroke opens up exciting possibilities! Continue reading to explore effective methods that will elevate your acrylic painting skills and ignite your passion for art.
Choosing the Right Acrylic Paints for Your Projects

Choosing the right acrylic paints can significantly transform your creative experience, making it essential for any aspiring artist. Acrylic paints come in various qualities, including student and professional grades, each offering different benefits tailored to your artistic needs. Student-grade paints are generally more affordable and ideal for beginners, as they provide dependable results without breaking the bank. However, for those seeking deeper pigments and greater durability, professional-grade acrylics are often worth the investment, featuring richer color saturation and stability.
When selecting paint, consider the consistency that suits your style. Acrylic paints are available in various forms, including fluid, heavy body, and soft body. Fluid acrylics are perfect for intricate details and fine lines, while heavy body acrylics maintain brushstrokes and textures beautifully. Soft body paints can be versatile, allowing smooth application and blending, making them excellent for both sweeping washes and detailed work.
It’s also important to pay attention to the color range in the acrylic set you choose. Look for essential colors as well as a few unique shades to broaden your palette. A basic set typically includes primary colors-red, blue, yellow-along with black and white, providing a solid foundation for creating a wide array of hues through mixing. Additionally, keep in mind that different brands can vary in terms of pigmentation and finish; testing a few before committing to a larger purchase can help you find the paints that resonate with your style.
In summary, the right acrylic paint not only enhances your creative journey but also aligns with your goals as an artist. By considering factors such as paint grade, consistency, and color variety, you can select the perfect paints to bring your visions to life with confidence and ease.
Essential Tools Every Beginner Needs

To embark on your acrylic painting journey confidently, having the right set of tools is crucial. Think of your tools as the foundation that will support your creativity and help you express your artistic vision. With the right supplies, even a beginner can create stunning works of art and learn to develop their own unique style.
The essential tools for acrylic painting are not numerous but highly effective. Start with a set of brushes in various shapes and sizes, including flat, round, and detail brushes. Each type serves a different purpose, from broad strokes to fine details, giving you the versatility needed for your projects. Look for synthetic brushes, as they work well with acrylics and are easier to maintain than natural hair brushes.
Next, invest in a palette-this can be a dedicated palette or even a disposable paper palette-for mixing your colors. It’s important to have a surface that’s easy to clean, as acrylics can dry quickly and become hard to remove. Additionally, consider a palette knife for mixing and applying paint, especially when you want to achieve texture or impasto effects.
Having a good canvas or painting surface is equally important. Beginners often choose pre-stretched canvases or canvas boards, which provide a reliable surface that handles paint well. However, you can also experiment with canvas paper or wood panels as your skills progress. Lastly, don’t forget a water container for rinsing brushes and a clean rag or paper towels to wipe away excess paint or clean up spills.
With these basic tools at your disposal, you’re set to dive into the wonderful world of acrylic painting. The combination of proper supplies will facilitate your learning process, enabling you to focus on mastering techniques and developing your creative voice. Remember, investing in quality tools not only elevates your work but also enhances the joy of the painting experience.
Mastering Basic Techniques: Strokes and Blending
To truly excel in acrylic painting, mastering basic techniques is essential, and among the most fundamental are strokes and blending. Using different brush strokes can dramatically influence the texture and mood of your painting, allowing you to convey everything from smooth skies to textured landscapes with ease. A well-executed stroke can become a signature element of your personal style, setting your work apart.
Begin by familiarizing yourself with various brush strokes. Experiment with the following techniques to enhance your skills:
- Flat Strokes: Using a flat brush, apply broad strokes across your canvas. This technique is excellent for painting large areas and achieving smooth backgrounds.
- Round Strokes: Round brushes are perfect for creating curves and soft edges, ideal for elements like flower petals or natural forms.
- Dry Brushing: By using a dry brush with minimal paint, you can create a broken texture that mimics natural surfaces, such as wood or stone.
- Cross-Hatching: This method involves layering strokes in different directions to build depth and complexity in shadows or to create a sense of movement.
Once you’re comfortable with strokes, blending becomes the next natural step. The beauty of acrylic paints is their versatility; they can be blended smoothly or left with a bit of texture, depending on your artistic intent. For seamless blending, remember to work quickly as acrylics dry fast. One popular technique is to layer colors wet-on-wet: apply one color, and while it’s still wet, introduce another color next to it, gently mixing the edges to create a gradient effect.
To achieve more defined blending effects, like gradients, consider the following tips:
- Use a Soft Brush: A soft, wide brush can allow for smoother transitions between colors.
- Mind Your Water Use: Adding a small amount of water can help the paint flow better and blend more easily, but be cautious not to dilute the color too much.
- Layering: If you prefer more control, wait for the first layer to dry and then go back in with additional colors to build depth.
Practicing various strokes and blending techniques not only elevates your painting skills but also enhances your understanding of how colors interact. This knowledge is invaluable, especially as you start to incorporate advanced methods like glazing and pouring in your future works. The joy of acrylic painting lies in its experimentation, so don’t hesitate to explore and find what resonates with you!
Creating Texture: Tips for Stunning Effects
Creating texture in acrylic paintings can transform a flat canvas into a captivating masterpiece that draws the viewer’s eye. One exciting aspect of acrylic paint is its adaptability, allowing artists to achieve a wide range of textures using various techniques and tools. Whether you’re aiming for the softness of clouds or the roughness of a tree bark, mastering texture will elevate your work and provide depth unlike any other medium.
To begin, consider employing simple tools that can dramatically change the outcome of your painting. For instance, a palette knife can create sharp, bold textures or even thick impasto effects where the paint stands proud from the surface. Another innovative approach is to use sponges; gently dabbing with a sponge can mimic organic patterns found in nature, perfect for creating foliage or abstract backgrounds. Don’t underestimate the power of unconventional materials; using items like toothbrushes or fabric can yield unique and unexpected textures. Experimenting with these tools allows for endless creative possibilities.
Further enhancing the recognition of textures involves layering multiple media. For instance, try mixing acrylics with modeling paste or gel mediums which add thickness and body to your paint. These mediums can be sculpted or manipulated while wet to form intricate patterns, imitating everything from rough stone to soft fabric. Once dried, you can also paint over these textures, allowing for an interplay of depth and color that adds dynamism to your artwork.
Lastly, consider the role of color and light in emphasizing texture. Dark shades can create the illusion of shadow, enhancing the texture’s depth, while lighter shades can highlight raised areas. Glazing is another advanced technique where transparent layers of paint are applied over dried textured surfaces, further enriching the visual experience. Using a combination of these methods will not only make your art more engaging but also showcase your unique artistic voice.
Embracing texture in acrylic painting not only enhances the visual quality but also invites viewers to experience your artwork on a more tactile level. As you grow in confidence and skill, let your creativity guide you in exploring new textures that resonate with your artistic vision.
Color Theory for Acrylic Painters: A Practical Guide

Understanding color theory is essential for acrylic painters seeking to elevate their artwork from basic to breathtaking. The way colors interact can affect mood, depth, and overall composition, which can transform a painting’s impact on viewers. To master this aspect of painting, familiarizing yourself with the color wheel is an excellent starting point. The color wheel visualizes the relationships between primary, secondary, and tertiary colors, serving as a foundational tool for mixing and harmonizing colors in your work.
When mixing colors, consider the following key concepts:
- Complementary Colors: These are pairs of colors located directly opposite each other on the color wheel, such as blue and orange. Using them in your painting can create vibrant contrasts that energize your work.
- Analogous Colors: These colors are next to each other on the wheel (like blue, blue-green, and green). They provide a more harmonious and subdued palette, ideal for landscapes or serene portraits.
- Tints and Shades: A tint is created by adding white to a color, making it lighter, while a shade is made by adding black, darkening the hue. Understanding how to manipulate tints and shades will allow you to create depth and dimension in your paintings.
Furthermore, it’s important to consider the emotional responses elicited by different colors. Warm colors (reds, oranges, yellows) often invoke feelings of warmth or excitement, while cool colors (blues, greens, purples) tend to convey calmness or melancholy. Strategically using these emotional cues can enhance the narrative of your artwork, guiding the viewer’s feelings and attention.
As you experiment with these concepts, keep a color chart to document the mixtures you create. This practice not only reinforces your understanding but also provides a personalized reference for future projects. Remember, color theory is not about rigid rules but rather a guideline that assists in your creative expression. Embrace the joy of discovery, and let your understanding of color enhance your acrylic painting journey.
Step-by-Step: Painting Your First Landscape

Creating your first landscape painting can be an exciting and rewarding experience. The beauty of landscapes lies in their diversity-from serene sunsets to rugged mountains-allowing you to inject your own vision and emotions into your work. To get started, gather your supplies, choose a scene that inspires you, and embark on this artistic journey with confidence.
Begin by setting up your workspace. Ensure you have the essential tools: acrylic paints, brushes in various sizes (flat and round), a canvas or acrylic paper, a palette for mixing colors, and water for cleaning your brushes. Before you begin painting, sketch a light outline of your landscape on the canvas using a pencil or thin paint. This step will help you plan the composition without overwhelming your workspace.
Next, focus on the background. Use a large brush to apply a wash of color, blending hues to create depth and atmosphere. For example, a soft blue for the sky can gradually transition into a lighter tone near the horizon. Remember to work from background to foreground, which allows for natural layering. Once your background is established, start adding mid-tones and highlights to develop the scene. Use a smaller brush to define shapes like trees, hills, or buildings, adding dimension and interest.
Adding Details and Finishing Touches
As your landscape comes to life, pay attention to the details. Incorporating textures using techniques like dry brushing can mimic the appearance of foliage or rocky surfaces. Keep your brushstrokes varied to add energy to your painting-use long, sweeping motions for water and short, dabbing strokes for grass.
Finally, step back and evaluate your work. Adjust colors where needed, and consider adding final touches like highlights on water or clouds to capture the light. Acrylics dry quickly, so you can layer additional paint or add mixed media elements like pastels or charcoal to enrich your landscape.
By following these steps, your landscape painting will not only reflect your vision but also build your confidence as an artist. Embrace the process, and remember that each stroke brings you closer to mastering the art of acrylic painting. Happy painting!
Exploring Advanced Techniques: Glazing and Pouring
Exploring advanced acrylic painting techniques such as glazing and pouring can transform your artwork from good to extraordinary. Both methods allow you to create depth, luminosity, and unique effects that can enhance your overall painting style. Whether you’re seeking to add subtle color shifts or bold, flowing designs, incorporating these techniques can elevate your skills and artistic expression.
Glazing involves applying a transparent layer of paint over a dried layer, allowing the underlying colors to show through. This technique can be used to modify the value or intensity of colors in your painting, ultimately enhancing its depth and richness. Start by mixing your acrylic paints with a glazing medium or water to thin them, ensuring the application is smooth and transparent. For example, if you want to warm up a cool landscape, you could glaze a thin layer of warm yellow or orange over the sky area after the underlying colors have dried. Remember to use a soft brush for applying glazes, as this helps to create a seamless blend and avoids disturbing the underlying layers.
Pouring, on the other hand, offers a dynamic way to create vivid, fluid artwork. It involves mixing acrylic paint with a pouring medium, resulting in an easily spreadable, pourable consistency. Start by choosing a variety of colors you’d like to use and mix them individually with the pouring medium, ensuring they’re properly emulsified to prevent separation. You can pour the paint directly onto your canvas, allowing it to flow and blend organically. Utilizing different pouring techniques like the dirty pour, where different colors are layered in a cup before pouring, can yield exciting and unexpected results. This technique is perfect for abstract work, as it emphasizes spontaneity and movement in your art.
To make the most of glazing and pouring, consider the following practical tips:
- Experiment with ratios: Adjust the amount of medium you add to paint to find the perfect consistency for your artistic vision.
- Layer wisely: With glazing, remember to allow each layer to dry completely before applying the next to avoid muddying the colors.
- Use a varnish: Once your poured painting is dry, applying a varnish can enhance color vibrancy and provide a glossy finish.
- Embrace unpredictability: In pouring, accept that some outcomes may be unexpected; this can lead to unique, happy accidents in your artwork.
Incorporating glazing and pouring into your acrylic painting repertoire not only expands your technical skills but also encourages a more exploratory and creative approach to your art. By mastering these techniques, you’ll find new ways to express your artistic voice while creating striking visuals that captivate and inspire both you and your audience. Happy painting!
Troubleshooting Common Acrylic Painting Mistakes
Mistakes in acrylic painting can be a source of frustration, but recognizing and troubleshooting them can elevate your techniques and enhance your artwork. One common issue is paint drying too quickly, leaving you with harsh lines instead of smooth transitions. This often happens in dry environments or when using heavy-bodied acrylics. To mitigate this, try using a slow-drying medium and keep a spray bottle of water on hand to mist your canvas lightly as you work. This technique can help maintain moisture and allow for longer blending times, leading to more elegant effects.
Another frequent mistake is muddy colors, which can occur when too many colors are mixed together on the palette or canvas. To avoid this, remember to clean your brush thoroughly between color changes and use a limited color palette. This not only keeps your colors vibrant but also encourages a more cohesive look in your work. If you find yourself with a muddy mess, consider quickly layering fresh paint over the affected area to restore vibrancy; however, ensure that each layer is completely dry before applying the next to prevent further muddiness.
Additionally, many beginners struggle with brush strokes being too visible or uneven, which can disrupt the overall smoothness of a painting. A solution for this is to apply thinner layers of paint, gradually building up the desired opacity rather than applying thick coats all at once. Techniques such as using a soft, dry brush for blending can also help soften visible strokes. Embrace the practice of glazing to achieve depth without harsh edges; applying transparent layers of color can unify your painting beautifully.
Lastly, don’t overlook the potential for accidents or unexpected results. Acrylic paint is forgiving, allowing you to paint over mistakes once they dry. If you encounter a problem that seems insurmountable, take a step back and evaluate whether it could be converted into a new creative direction instead. Embracing these challenges as part of your artistic journey can lead to surprising and delightful discoveries in your acrylic painting process.
Inspiration: Famous Acrylic Artists and Their Styles
Great masters of acrylic painting have carved unique niches within the art world, inspiring countless artists and enthusiasts alike. One notable figure is David Hockney, whose vibrant landscapes and innovative use of color have made him a global icon. Hockney is renowned for his bold acrylics, such as “A Bigger Splash,” which exemplify how acrylics can achieve stunning luminosity and depth. His approach encourages artists to experiment with intense color saturation and unconventional perspectives, igniting a passion for playful exploration in one’s own work.
Similarly, Yayoi Kusama has used acrylic to bring her dreamlike visions to life, focusing on polka dots and infinity rooms. Her use of repetitive motifs and bright colors in acrylics demonstrates how this medium can convey powerful emotional experiences. Kusama’s work shows the importance of embracing personal style and letting imagination flow freely-guidance that any artist, beginner or advanced, can take to heart.
To draw further inspiration, consider Chuck Close, known for his photorealistic portraits created with acrylic paint. Close’s meticulous technique of creating large-scale pieces from a grid not only showcases technical prowess but also exemplifies how patience and precision can lead to breathtaking results. His work challenges artists to think differently about detail and scale, transforming everyday imagery into iconic portraits, and serves as a reminder of the potential of acrylics for detailed work.
When contemplating your own journey, look at how each of these artists has shaped their style and techniques. Whether it’s Hockney’s bold color use, Kusama’s whimsical patterns, or Close’s attention to detail, each offers valuable lessons. Engage with their works and let their unique styles guide you in developing your own voice and technique in acrylic painting. By studying their methods, you can unlock new ideas, invigorating your own artistic practice while embracing the versatility of acrylics.
Showcasing Your Art: Best Practices for Display
Displaying your artwork effectively can transform any space and elevate the visual impact of your creations. Whether you’re showcasing a bold landscape or an intricate abstract, the way you present your acrylic paintings is crucial to how they are perceived. Utilizing the right methods can draw attention to the details and emotions you poured into your artwork, inviting viewers to connect more deeply with your vision.
Framing and Presentation
The first step in showcasing your art is selecting the appropriate frame. Choose frames that complement your artwork without overpowering it. For vibrant pieces, consider simple, understated frames that let the colors shine. If your painting has a modern feel, floating frames or minimalist designs may enhance its contemporary appeal. You can also experiment with different hanging techniques, such as using clips or wire for a casual gallery look that allows for effortless rotation of artwork.
Lighting Matters
Light is one of the most important elements in displaying art. Natural light can bring out the richness of acrylic colors but be cautious, as prolonged exposure to direct sunlight can fade and damage your work. For indoor displays, consider using adjustable track lighting or picture lights to highlight your pieces. Position the lights at an angle to minimize glare while accentuating texture and depth. Soft, diffused lighting often works best as it provides a warm glow that enhances the overall viewing experience.
Creating a Cohesive Display Space
When displaying multiple pieces, aim for a cohesive arrangement that allows each work to breathe while contributing to a unified aesthetic. You might choose to arrange paintings by color palette, theme, or style. A gallery wall can be effective; just remember to keep a consistent spacing between frames. Also, consider varying the sizes of paintings in your arrangements to create visual interest, using larger pieces as focal points complemented by smaller artworks.
In summary, the way you showcase your acrylic art can significantly impact how it is received by others. Thoughtful framing, optimal lighting, and cohesive arrangements not only enhance the aesthetic appeal of your pieces but also foster a deeper connection with your audience. By paying attention to these details, you can elevate your art display to a professional level, allowing your creativity to shine.
Taking Your Skills Further: Online Resources and Courses
To elevate your acrylic painting skills, you can tap into a wealth of online resources and courses tailored for artists at all levels. The digital realm is brimming with platforms that offer structured learning experiences, allowing you to explore everything from basic techniques to advanced artistic styles. Engaging with these resources not only broadens your technical knowledge but also exposes you to various artistic perspectives.
One excellent starting point is YouTube, where countless artists share tutorials and demos for free. Channels dedicated to acrylic painting often cover specific techniques, such as glazing, pouring, or texturing, providing step-by-step instructions that can enhance your skills. For instance, watching a live demonstration can clarify brush techniques that might be challenging to grasp through text alone.
If you’re seeking more in-depth learning, online course platforms like Skillshare and Udemy offer classes specifically focused on acrylic painting. Here, you can find courses ranging from beginner to advanced levels, typically taught by experienced artists. Many of these courses include community features, allowing you to interact with fellow learners, share your work, and receive constructive feedback. Investing in a course can lead to significant improvement in your technique and artistic confidence.
Additionally, social media platforms like Instagram and Pinterest can serve as both inspiration and education. Following notable acrylic painters can give you insights into their process and style. Consider joining groups or forums on platforms like Facebook, where you can participate in discussions, ask questions, and connect with other artists passionate about acrylics.
By leveraging these online resources, you can continuously learn and experiment, pushing your artistic boundaries and finding your unique voice in acrylic painting. Embrace the journey of learning, and don’t hesitate to share your progress within the artistic community for feedback and encouragement.
Building a Creative Community: Joining Local Art Groups
Joining a local art group can be one of the most rewarding steps in your artistic journey, especially when delving into the world of acrylic painting. These communities not only provide essential support and feedback but also serve as a vibrant exchange of ideas, techniques, and inspiration. Surrounding yourself with fellow creatives sparks motivation and encourages you to push boundaries, enhancing your skills in ways that solo practice often can’t.
When searching for a local art group, consider the following aspects to find a community that aligns with your artistic goals:
- Workshops and Classes: Many art groups organize workshops focused on specific techniques or materials. Participating in these sessions can help you master the fundamentals or explore new methods, such as glazing or texturing.
- Group Critiques: Engaging in constructive critiques of one another’s work is an invaluable practice. It not only sharpens your analytical skills but also provides fresh perspectives on your art, cultivating a growth mindset.
- Themed Exhibitions: Many local art groups host exhibitions or challenges based on certain themes. This encourages you to step out of your comfort zone and try painting subjects or styles you might not typically explore.
- Networking Opportunities: Becoming part of an art community opens doors to meet local artists, suppliers, and potential mentors who can guide you in your artistic endeavors.
In addition to formal art groups, don’t underestimate the value of informal gatherings. Look for local meet-up events or online platforms where artists share their work and plans to create together. Whether it’s a casual painting day in a park or a coffee meetup to discuss techniques, these interactions are great for building relationships and gaining insights from others.
Ultimately, being a part of a creative community fosters collaboration and resilience. Embrace your local art group not just as a resource for learning, but as an empowering environment where you can confidently express yourself, share your passion for acrylic painting, and develop lasting friendships with like-minded individuals.
Frequently Asked Questions
Q: How do I choose the right acrylic paint for my project?
A: To choose the right acrylic paint, consider factors like color vibrancy, consistency, and finish (matte or glossy). Begin with a basic set of high-quality paints and expand based on your projects. Refer to the section on “Choosing the Right Acrylic Paints for Your Projects” for more detailed guidance.
Q: What essential brush types should beginners use for acrylic painting?
A: Beginners should use a variety of brush types, including flat, round, and filbert brushes. Each type offers different stroke possibilities, helping you create diverse textures. Explore the “Essential Tools Every Beginner Needs” section for more information on selecting brushes.
Q: What techniques can help with blending acrylic paints effectively?
A: Blending acrylic paints can be achieved by using a damp brush, working quickly, and layering colors while they are wet. This allows for smooth transitions. The “Mastering Basic Techniques: Strokes and Blending” section provides further insights into effective blending methods.
Q: How can I create texture in my acrylic paintings?
A: Create texture in acrylic paintings by using techniques like palette knife application, layering thick paint, or incorporating materials like sand or fabric. For additional tips, refer to “Creating Texture: Tips for Stunning Effects.”
Q: What basic mistakes should I avoid when starting to acrylic paint?
A: Beginners should avoid using too much water, which can dilute colors, and neglecting to clean their brushes properly. Additionally, rushing the drying process can lead to issues with layering. Check the “Troubleshooting Common Acrylic Painting Mistakes” section for more corrections.
Q: How do I understand color theory for acrylic painting?
A: Understanding color theory involves learning about color wheels, primary, secondary, and complementary colors. This knowledge will help you mix colors effectively and create harmonious artworks. Refer to “Color Theory for Acrylic Painters: A Practical Guide” for deeper insights.
Q: When should I start exploring advanced techniques in acrylic painting?
A: Once you feel comfortable with basic techniques and have experimented with different styles, you can start exploring advanced techniques. Suggested methods include glazing and pouring. The “Exploring Advanced Techniques: Glazing and Pouring” section can guide you further.
Q: How can I display my acrylic artwork professionally?
A: Display your acrylic artwork professionally by framing it with quality materials and considering placement for optimal lighting. Additionally, protecting the piece with a varnish can enhance its appearance. Visit “Showcasing Your Art: Best Practices for Display” for more tips.
Insights and Conclusions
Congratulations on completing “How to Acrylic Paint Like a Pro: Beginner’s Complete Masterclass”! By now, you have gained essential skills to create stunning acrylic artwork that reflects your unique style. Remember, practice is key, so don’t hesitate to grab your brushes and canvas to apply what you’ve learned today.
If you’re looking to deepen your artistic journey, explore our related guides on color mixing techniques and selecting the best brushes for acrylic painting. Join our community by signing up for our newsletter, where you can receive exclusive tips and resources to elevate your painting skills even further.
We’d love to hear about your painting experience-feel free to share your thoughts in the comments below or showcase your artwork on social media. Keep creating, and let your creativity shine!