Cleaning your acrylic paint brushes is essential not just for the longevity of your tools but also for achieving the best results in your painting projects. Did you know that neglecting proper brush care can lead to irreversible damage, making it difficult to achieve fine details and smooth strokes? Brushes that are not thoroughly cleaned can become stiff and unusable, ultimately costing you money and undermining your creativity. By mastering the techniques for cleaning and maintaining your acrylic brushes, you can save your investment and enhance your artistic expression. In this guide, you’ll discover step-by-step methods that will help you tackle even the toughest paint residue, ensuring your brushes stay in top condition for every project ahead. Let’s dive in and transform the way you care for your tools!
How Acrylic Paint Affects Brush Performance

Acrylic paint is celebrated for its vibrant colors and versatility, but it can significantly impact brush performance if not managed properly. Unlike oil paints, acrylics dry rapidly, which can present challenges for artists. As the paint dries, it hardens on the bristles, potentially affecting their shape and functionality. Over time, accumulated paint can lead to stiff, unusable brushes and uneven application, compromising the quality of your work. Understanding how acrylic paint interacts with your brushes is essential to maintain their performance and extend their lifespan.
The type of bristles used in your brushes also plays a critical role in how they perform with acrylic paints. Synthetic brushes are generally favored for acrylics because they hold their shape and resist the harshness of drying paint better than their natural counterparts. This characteristic allows for more precise strokes and easier clean-up. Additionally, the specific brush shapes-flat, round, or filbert-can affect how the paint adheres and blends on your canvas. For instance, a flat brush is perfect for broad strokes and even washes, while a round brush excels at detail work. Choosing the right brush for your acrylic application can make a considerable difference in the final outcome.
It’s also vital to consider how your painting technique can influence brush performance. Techniques such as layering, glazing, or dry brushing require a different approach to brush care. For example, using layers of paint can cause more build-up in the bristles, necessitating more frequent cleaning to maintain optimal performance. Knowing when to clean-or even how to re-shape your brushes after use-can prevent issues like fraying or an altered shape, keeping your tools in top-notch condition for your next masterpiece. Ultimately, taking a proactive approach to care and cleaning is the best way to ensure that your brushes remain responsive and effective when working with acrylics.
Essential Tools for Effective Brush Cleaning

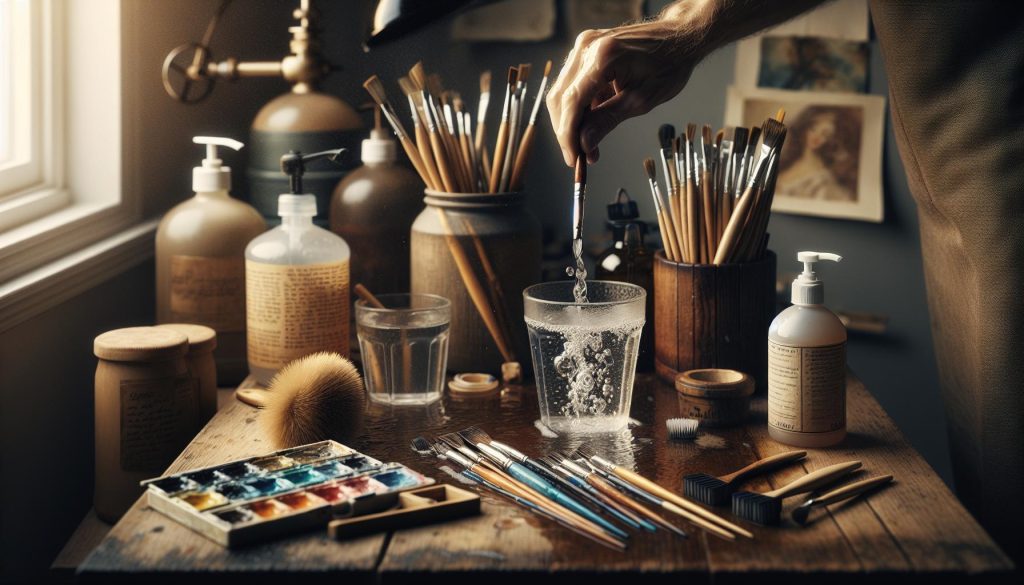
To keep your paint brushes in prime condition, having the right tools for cleaning is essential. Proper maintenance not only enhances the lifespan of your brushes but also ensures that your artistic efforts yield the best results. Starting with a few key items can significantly improve your brush cleaning routine and ultimately save you money on replacements.
One of the most valuable tools for brush cleaning is a dedicated brush cleaner or gentle soap, which is designed to dissolve acrylic paint without damaging the bristles. Look for a cleaner specifically formulated for acrylics, as it tends to be more effective than standard dish soap. Additionally, using a palette knife can help scrape off excess paint from the brush before the actual cleaning process begins, preventing any clogging of the bristles.
Another indispensable tool is a brush holder or cleaning basin. A shallow dish or bowl filled with water allows you to rinse your brushes easily while keeping their bristles submerged. This method prevents paint from drying at the ferrule (the metal part of the brush), which can lead to a permanent hardening that alters the brush’s shape. If you’re working with multiple brushes, having a grid-style holder can keep them organized and prevent cross-contamination of colors.
Finally, consider investing in microfiber cloths or paper towels for drying your brushes after cleaning. Unlike regular towels, microfiber cloths are ultra-soft and won’t fray or shed fibers that could get stuck in your bristles. If you want to elevate your cleaning game further, a comb specifically designed for cleaning brushes allows you to carefully detangle any paint buildup lodged between the bristles.
With these essential tools at your disposal, you’ll be well-equipped to effectively clean and maintain your acrylic paint brushes. Whether you are an aspiring artist or a seasoned professional, investing time in proper brush care can make a significant difference in your painting experience.
Step-by-Step Guide to Cleaning Acrylic Brushes
To keep your acrylic brushes in optimal condition and ensure a seamless painting experience, a systematic cleaning approach is vital. Here’s a step-by-step method that turns cleaning from a chore into an easy practice, enhancing your creative journey and extending the life of your brushes.
Start by removing as much paint as possible from the bristles before you begin washing. Use a palette knife or a cloth to gently scrape or wipe off the excess paint. This pre-cleaning step minimizes the amount of paint that can dry and harden in the bristles, which can damage them over time.
Next, fill a shallow bowl or dish with lukewarm water, as hot water can warp the bristles. A few drops of gentle soap or a dedicated brush cleaner designed for acrylics can work wonders in dissolving leftover paint. Submerge the bristles and swirl the brush in the water gently, being careful not to bend or damage the bristles. Rinse the brush frequently in clean water, and don’t forget to clean the ferrule, where paint often accumulates.
After thoroughly rinsing, use a microfiber cloth or paper towel to gently shake and pat the brush dry. Avoid pulling on the bristles, as this can alter their shape. Once cleaned, reshape the bristles to their original form using your fingers before laying the brushes flat on a towel to air dry. Never store wet brushes upright in a jar, as this can damage the bristles and lead to the loss of their shape.
Incorporating these steps into your painting routine ensures that your brushes remain in top shape, saving you money on replacements and keeping your artistic tools in prime condition for future projects. Regular maintenance not only enhances your painting experience but also allows for versatile creative expression without the hindrance of poor-quality tools.
Using Soap and Water: Best Techniques

Using soap and water for cleaning acrylic paint brushes can transform a tedious task into a simple routine that helps maintain your brushes for a longer lifespan. This method effectively dissolves the paint and removes residue without compromising the integrity of the bristles. With the right techniques, you can rejuvenate your brushes and ensure they perform at their best for your next creative endeavor.
Start with gentle soap. Choose a mild dish soap or a dedicated brush cleaner that is safe for synthetic and natural bristles. Avoid harsh chemicals that can degrade the delicate fibers. In a shallow bowl, mix lukewarm water with a few drops of soap, ensuring that the temperature is comfortable – too hot can warp and damage the bristles. Swirling the brush in the soapy mixture gently helps to break down the paint that may be clinging tightly. Remember to pay special attention to the ferrule, the metal part of the brush where it connects to the handle, as paint often accumulates there.
Rinsing is just as crucial as washing. After swishing the brush in the soapy water, rinse it in clean, lukewarm water. Make sure to rinse until the water runs clear, indicating that all paint and soap have been removed. Running the brush under a gentle stream is ideal, as it mimics natural conditions without applying excessive pressure to the bristles. Always reposition the brush to avoid bending or fraying while rinsing.
For the best results, reshaping your brushes post-cleaning is essential. After rinsing, use a clean microfiber cloth or paper towel to gently squeeze out excess water, taking care not to pull on the bristles. Then reshape them to their original form with your fingers before laying them flat to air dry. This simple act not only preserves the integrity of the brush’s shape but also ensures that they are ready for your next painting session. Regular use of soap and water not only keeps your brushes in optimal condition but also enhances the quality of your work, allowing you to focus on your artistic pursuits without compromising on tool performance.
Advanced Cleaning Methods for Stubborn Paint
Maintaining the performance of your brushes is crucial, especially when dealing with stubborn acrylic paints that can cling tenaciously to the bristles. When basic soap and water methods fall short, advanced cleaning techniques become essential tools in your brush maintenance arsenal. For instances where paint has dried hard or accumulated inside the ferrule, these methods will ensure your brushes remain in pristine condition, prolonging their usability and maintaining your painting experience.
One effective technique is using specialized brush cleaners that are specifically formulated to dissolve dried acrylic paint. Look for products that contain solvents, as these can break down the paint more effectively than soap. Soak the affected brush in the cleaner for several minutes, allowing the solution to penetrate and loosen the stubborn paint. After soaking, gently reshape the bristles and rinse them thoroughly with warm water to remove any residue. Be sure to follow the manufacturer’s instructions for the cleaner to avoid any damage to the brush.
For an at-home solution, consider using a mixture of warm water and a few drops of olive oil or vegetable oil. The oil helps to break down the paint while providing a conditioning effect on the bristles. Create a paste with the oil and warm water, then apply it to the bristles, working it in gently. This method not only tackles stubborn paint but also nourishes the bristles, helping maintain their flexibility and performance. After cleaning, rinse thoroughly and reshape the brush.
If paint is exceptionally stubborn, a fine, soft-bristled toothbrush can be a valuable ally. This tool is adept at reaching into tight spaces and removing residue without damaging the brush. After applying your chosen cleaning solution or oil blend, gently scrub the bristles and the ferrule with the toothbrush. This technique is especially useful for brushes that have intricate shapes or sizes that are hard to clean effectively with fingers alone.
By employing these advanced cleaning strategies, you can ensure that your brushes remain in tip-top shape. Regular maintenance not only enhances the quality of your work but also saves you money in the long run by extending the lifespan of your brushes. Keep your tools clean, and they will reward you with the performance and precision you need for your creative endeavors.
Preventing Acrylic Paint Build-Up on Brushes
Maintaining the integrity of your brushes is essential in avoiding the frustration of acrylic paint build-up. Not only does this accumulation hinder your painting experience, but it can also ruin the fine edges and shapes that are vital for detailed work. One of the simplest yet most effective strategies to prevent paint from clinging to your brushes is to keep a consistent cleaning regimen. By rinsing your brushes in water immediately after use, you can significantly reduce the likelihood of paint drying within the bristles or the ferrule.
Additionally, consider the importance of brush storage and handling. Always store your brushes upright with the bristles facing up to avoid bending or damaging the hairs. If you’re using multiple brushes during a session, try to designate specific brushes for each color to minimize cross-contamination and reduce the need for more frequent cleanings. Furthermore, a brush holder with compartments can keep your brushes separated and protected from each other, helping to preserve their shape.
Using a brush conditioner can also be a game changer. These products are designed to be applied after cleaning your brushes, providing a layer of protection that helps prevent paint from adhering stubbornly in the future. Choose conditioners that suit the type of bristles you’re using, whether synthetic or natural, to ensure compatibility and the best performance.
Lastly, always remember that good habits make a significant difference. Make it a point to clean your brushes thoroughly at the end of each painting session and inspect them for any remaining paint. By taking these proactive steps, you not only preserve the life of your tools but also enhance the quality and precision of your artistic endeavors, allowing you to paint with confidence and clarity.
Proper Drying and Storage of Cleaned Brushes
Cleaning your brushes is just the first step; how you dry and store them can significantly impact their longevity and performance. Proper drying techniques are crucial to ensure that moisture doesn’t collect in the ferrule, the metal part connecting the bristles to the handle, which can lead to mold or degradation of the adhesives. After rinsing your brushes thoroughly, gently blot the bristles on a clean paper towel or cloth to remove excess water. Avoid rubbing, as this can damage the bristles and alter their shape. For best results, lay the brushes flat on a clean, dry towel instead of standing them upright, which can cause water to seep down into the ferrule.
When it comes to storage, organization is key to preserving your brushes’ shape and functionality. A dedicated brush holder or container that keeps brushes upright and separated is ideal. This prevents the bristles from bending or becoming misshapen. If you lack a holder, wrapping brushes in a cloth or storing them in a pencil case can serve as a temporary solution, keeping them secure and protected. Ensure that any brush you store is completely dry to prevent moisture-related damage, which can ultimately lead to bristle loss and a shorter lifespan for your tools.
Another often-overlooked aspect of brush maintenance is periodic inspection. Regularly check your brushes for any signs of wear or lingering paint. Performing a quick visual and tactile inspection will help identify brushes that may need special attention or replacement. By integrating these drying and storage habits into your routine, you not only extend the life of your brushes but also maintain their performance, allowing for a more enjoyable and successful painting experience.
How Often Should You Clean Your Brushes?
Maintaining the cleanliness of your acrylic paint brushes is essential not just for their longevity, but also for the quality of your painting. Brushes retain remnants of paint that can harden if left uncleaned, negatively impacting their performance and potentially ruining future projects. The frequency with which you clean your brushes largely depends on your painting habits and the types of projects you undertake.
If you’re working on a single project, rinsing your brushes in water regularly during the process is vital. A quick rinse after every few strokes or color changes can prevent paint from drying in the bristles. For more intensive sessions, it is advisable to dedicate time for a thorough cleaning once you’re done painting for the day or after major color changes to avoid cross-contamination. As a general guideline, consider cleaning your brushes at the end of each use, but keep in mind that a diligent artist will often clean them multiple times during a single session.
For artists who engage in longer, more complex projects, adopting a cleaning routine can be invaluable. Regularly inspect the brushes for any paint build-up. If you notice dried paint on the bristles, make it a priority to clean them immediately, as neglect can lead to irreversible damage. Furthermore, for brushes that see heavy use, consider deep cleaning once a week to ensure they remain in optimal condition.
Lastly, remember that acrylic paint can quickly dry and bond with the bristles if not cleaned regularly. Establishing a habit of cleaning your brushes-not just when they look dirty-will greatly extend their lifespan and maintain their effectiveness, ensuring that every stroke is as smooth and vibrant as intended.
Repairing Damaged Brushes: Tips and Tricks
Keeping your acrylic paint brushes in top shape not only enhances your artistic tools but also saves you money in the long run. Unfortunately, wear and tear are inevitable, but many brushes can be salvaged with a little care and creativity. If you find your brushes frayed, misshapen, or clogged with dried paint, there are effective methods to restore their performance.
Firstly, for brushes with hardened paint, soak the bristles in warm water mixed with a mild soap for about 30 minutes. This can help soften the paint, making it easier to remove. After soaking, gently wipe the bristles with your fingers or a soft cloth to dislodge any stubborn paint. For synthetic brushes, you can use a fabric softener mixed with water to condition the bristles back to their original form. Just a few drops in the rinse water can rejuvenate the bristles, enhancing flexibility and control.
If the bristles of your brushes have become splayed or bent, try reshaping them while wet. After cleaning, wrap the bristles in a clean paper towel and secure them with a rubber band or string. Once dry, this will help guide them back to their proper shape. For very fine brushes or specialty tips, consider investing in a cheap brush repair tool, which can help reshape and maintain fine points without damaging the bristles.
Lastly, regular maintenance goes a long way. By incorporating routine cleaning practices into your workflow, you can prevent severe damage to your brushes. Always rinse your brushes immediately after use and keep your brushes stacked in a holder upright, protecting the bristles. These simple habits will not only prolong the life of your brushes but can transform them into reliable companions for your creative endeavors.
Saving Money: Extend the Life of Your Brushes
Maintaining your acrylic paint brushes is not just about cleanliness; it’s a smart investment that can significantly reduce your art supplies budget over time. With the right care, you can extend the life of your brushes, ensuring they perform at their best while saving money in the long run. Brushes can be costly, especially specialty ones. By implementing a few simple habits, you can keep your brushes in prime condition, allowing you to focus on your creativity instead of reordering supplies.
Start by embracing a proactive cleaning routine. Rinsing your brushes in water immediately after use prevents paint from hardening and clogging the bristles. A quick rinse can save you the headache of dealing with stubborn paint later. Additionally, using a gentle soap designed for paintbrushes can help maintain the integrity of the bristles. Soaking them in a mixture of warm water and soap for about 30 minutes after a heavy painting session can work wonders to restore their shape and function.
Another vital practice is proper storage. Brushes should be stored upright in a holder or a brush case, bristle-side up, to prevent any bending or damage. If you need to transport them, consider investing in a protective roll bag that keeps each brush separate and safe. These simple adjustments in care and storage can drastically reduce wear and tear, helping to maintain the brush’s original form and flexibility.
Lastly, don’t overlook the value of occasional refurbishing. For brushes that may have seen better days due to wear, a conditioning treatment with a fabric softener in the rinse water can bring back their softness and flexibility. Reshaping the bristles with care after cleaning can also help maintain their intended use. By taking the time to properly clean and care for your brushes, you not only enhance your painting experience but also extend the life of your tools, ensuring that you save money while enjoying your artistic journey.
Eco-Friendly Alternatives for Brush Cleaning
Using eco-friendly alternatives for cleaning your acrylic paint brushes not only benefits the environment but can also be effective in maintaining your tools. Conventional solvents can be harsh, both on your brushes and the planet, so opting for greener solutions makes for a sustainable art practice.
One of the simplest and most accessible methods is to use vegetable oil or olive oil. These oils can help dissolve dried paint without damaging the bristles. Just apply a small amount to your brush and gently work it into the bristles. Follow up by rinsing with warm soapy water, and you’ll have clean brushes without the harsh chemicals.
Another popular alternative is vinegar. Heat a small amount of vinegar and immerse your brushes in it for about 10-15 minutes. This method is particularly effective for paint that has already dried on the brushes. After soaking, gently wipe the bristles with a cloth or paper towel and then rinse under warm water. The acidity of vinegar will help break down the paint while being safe for your brushes.
Natural Soap Solutions
Using natural soaps like castile soap is a fantastic option as well. This biodegradable soap is gentle on both your brushes and the environment. Create a lather with the soap and water, then work it into the bristles using your fingers. Rinse thoroughly, and your brushes will be clean and in prime condition for future painting sessions.
Additionally, if you’re looking to combine effectiveness with sustainability, consider making a cleaning solution from baking soda and water. Mix one tablespoon of baking soda in a cup of warm water, and soak your brushes for a few minutes. It’s a great way to tackle stubborn paint residues without resorting to harsh chemicals.
By embracing these eco-friendly cleaning methods, you not only keep your brushes in great shape but also contribute to reducing environmental waste. The next time you finish a painting session, reach for these natural alternatives and enjoy the peace of mind that comes from caring for both your artistic tools and the planet.
Common Mistakes When Cleaning Paint Brushes
One common pitfall many artists face when cleaning their acrylic paint brushes is neglecting to act quickly after their painting session. Acrylic paint dries rapidly, and if brushes are left uncleaned, the paint can harden and destroy the bristles, making them unusable. Procrastination in cleaning not only leads to damage but also significantly reduces the life span of the brushes, increasing your art supplies costs over time.
Another frequent mistake is using hot water during the cleaning process. While it might seem intuitive to use hot water to dissolve paint, doing so can actually cause the paint to set faster and tougher against the bristles. Warm water is preferable because it helps to loosen the paint without setting it. Additionally, using excessive amounts of soap can create a lather that’s difficult to rinse out, leaving residue on the bristles and affecting their performance.
Improper rinsing techniques can also be detrimental. Some artists merely swirl their brushes around in water without thoroughly cleaning the base of the bristles. This can lead to remnants of paint lingering in the brush, which may affect future projects. It’s essential to rinse brushes under a gentle stream of water while using your fingers to work any leftover paint out from the ferrule and bristles.
Lastly, many overlook the importance of storing cleaned brushes correctly. Placing brushes directly on their bristles can cause them to bend or splay over time. Instead, store them upright in a container or laying flat to preserve their shape. Taking the time to be mindful of these common cleaning missteps can save your brushes from damage, enabling you to maximize your artistic potential while keeping costs low.
By being aware of these pitfalls and taking conscious steps to avoid them, you can not only extend the life of your brushes but also enhance your overall painting experience.
FAQ
Q: How do you remove dried acrylic paint from brushes?
A: To remove dried acrylic paint, soak brushes in warm soapy water for 30 minutes, then gently work the bristles with your fingers or a comb. For stubborn paint, use isopropyl alcohol or a paint thinner as a last resort. Always follow up with proper cleaning techniques to maintain brush health.
Q: What is the best soap for cleaning acrylic paint brushes?
A: The best soap for cleaning acrylic paint brushes is a mild dish soap. It effectively breaks down the paint while being gentle on the bristles. For additional cleaning power, you can use a brush cleaner specifically formulated for acrylics, which helps preserve the brush’s integrity.
Q: Can I use vinegar to clean my acrylic paint brushes?
A: Yes, vinegar can be used to clean acrylic paint brushes. Soak the brushes in a solution of equal parts vinegar and water for about 10-15 minutes, then gently clean the bristles. Rinse thoroughly with warm water and follow with soap for best results.
Q: How often should I clean my acrylic paint brushes?
A: It’s best to clean your acrylic paint brushes immediately after each use to prevent paint from drying and damaging the bristles. If that’s not possible, at least rinse them during longer painting sessions to minimize build-up and extend their lifespan.
Q: What should I do if my brush won’t clean completely?
A: If your brush won’t clean completely, try using a dedicated brush cleaning solution or a mix of warm water and a few drops of vinegar. Gently work the solution into the bristles and rinse repeatedly. If the paint remains stubborn, consider conditioning the brush with hair conditioner or olive oil.
Q: Is it safe to wash acrylic paint brushes in the sink?
A: Washing acrylic paint brushes in the sink is not recommended since the paint can clog pipes. Instead, rinse them in a separate container or basin and dispose of the wastewater properly. This method helps protect your plumbing and the environment.
Q: How can I prevent acrylic paint from ruining my brushes?
A: To prevent acrylic paint from ruining your brushes, clean them immediately after use, avoid letting paint dry on the bristles, and store them upright with bristles facing up. Additionally, use quality brushes appropriate for acrylics to enhance longevity.
Q: What is a DIY method for cleaning acrylic brushes?
A: A DIY method for cleaning acrylic brushes involves mixing equal parts water and dish soap in a bowl. Soak the brushes, then gently scrub using your fingers or a sponge. Rinse thoroughly with warm water and reshape the bristles before drying.
In Conclusion
Congratulations on mastering the art of cleaning acrylic paint brushes! By following these essential steps, you’re not just prolonging the life of your tools but also saving money in the long run. Remember, clean brushes result in better painting results, so don’t wait to give your tools the care they deserve.
For more tips on maintaining your artistic supplies, check out our guides on storing art materials and DIY cleaning solutions. If you have any questions or want to share your own tips, feel free to leave a comment below-we love hearing from our creative community!
Don’t forget to subscribe to our newsletter for ongoing advice and exclusive resources to enhance your painting journey. Explore further and stay inspired! Happy painting!