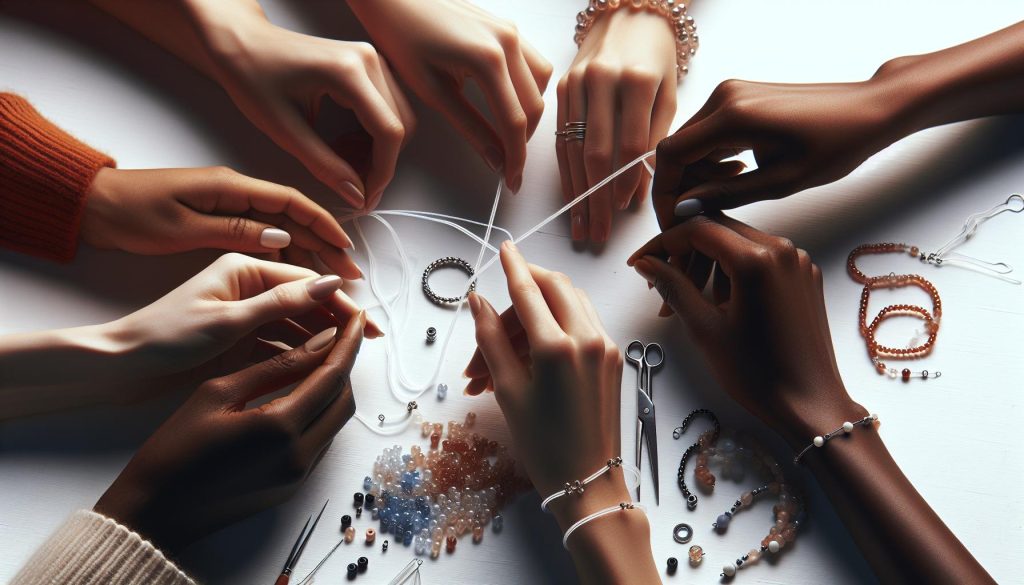
Tying jewelry elastic securely is crucial for ensuring that your beautiful creations stay intact and wearable for years to come. Did you know that the knots you tie can make the difference between a necklace that lasts and one that falls apart? Whether you’re a seasoned jewelry maker or just starting out, mastering the art of effective knotting can save you time, materials, and frustration. In this guide, we’ll walk you through step-by-step techniques to tie knots that not only hold but also look polished. By learning these essential skills, you’ll gain confidence in your crafting abilities and create pieces that truly reflect your style. Let’s dive in and secure those knots for creations that shine brightly, worry-free!
How to Choose the Right Jewellery Elastic
Choosing the right jewellery elastic can dramatically impact the durability and aesthetic appeal of your creations. Not all elastics are created equal, and the choice often boils down to the specific needs of your project, including the type of beads used, item weight, and the intended wear of the jewellery. For instance, if you’re crafting a delicate bracelet with light beads, a thinner elastic might suffice. However, for heavier pieces or designs frequently worn, opting for a thicker, stronger elastic will ensure longevity and prevent breakage.
When selecting elastic, consider the following factors:
- Material: Look for high-quality elastic made from nylon or silicone. These materials offer excellent stretchability and durability, ensuring that your bracelets and necklaces retain their shape over time.
- Diameter: The thickness of the elastic should correspond to the size and weight of your beads. Standard diameters range from 0.5mm to 1mm for lighter projects, while heavier beads might require 1mm or more.
- Color: Clear elastic is often preferred for its invisibility when finished, but colored options can also add a creative touch when used strategically in design.
Always test the elasticity by stretching a sample before use; this gives you a better idea of how it will handle your jewellery’s wear and tear. Additionally, consider the visibility of your knots and how the elastic interacts with the beads. Selecting the right jewellery elastic not only ensures your creations are sturdy but also enhances their overall appearance, setting the foundation for stunning, long-lasting pieces.
Essential Tools for Tying Secure Knots
Creating secure knots while tying jewellery elastic is essential for ensuring that your beautiful creations stand the test of time. To achieve this, having the right tools is just as important as mastering the knotting technique itself. Being well-equipped not only makes the process smoother but also elevates the quality of your finished pieces.
One of the primary tools you’ll need is a pair of sharp scissors. These will help you cut your elastic cleanly, preventing fraying that can compromise your knots. Additionally, a pair of flat-nose pliers can be invaluable. They provide a firm grip when securing knots and can also help with adjusting beads on your elastic without causing damage. A bead board or mat can also be beneficial, as it keeps your beads organized and in place while you work, reducing the chances of losing any materials during the process.
Having a needle designed for elastic can also make a significant difference. These needles are typically larger with a wide eye, allowing you to thread thicker elastics easily. For some projects, you might want to include a thread conditioner, which keeps the elastic flexible and easier to handle, preventing it from becoming tangled or knotted during your work. Lastly, a magnifying glass or a good light source is essential, especially for intricate designs or for those who may have trouble seeing small details. This combination of tools ensures that you can create stunning, durable pieces without the frustration that comes from trying to manage high-stress knotting situations.
Investing time in preparing your workspace with these essential tools will not only improve the efficiency of your jewellery-making process but also enhance the quality of your crafts, resulting in pieces that are not only aesthetically pleasing but also built to last.
Step-by-Step Guide to Tying Your Knot
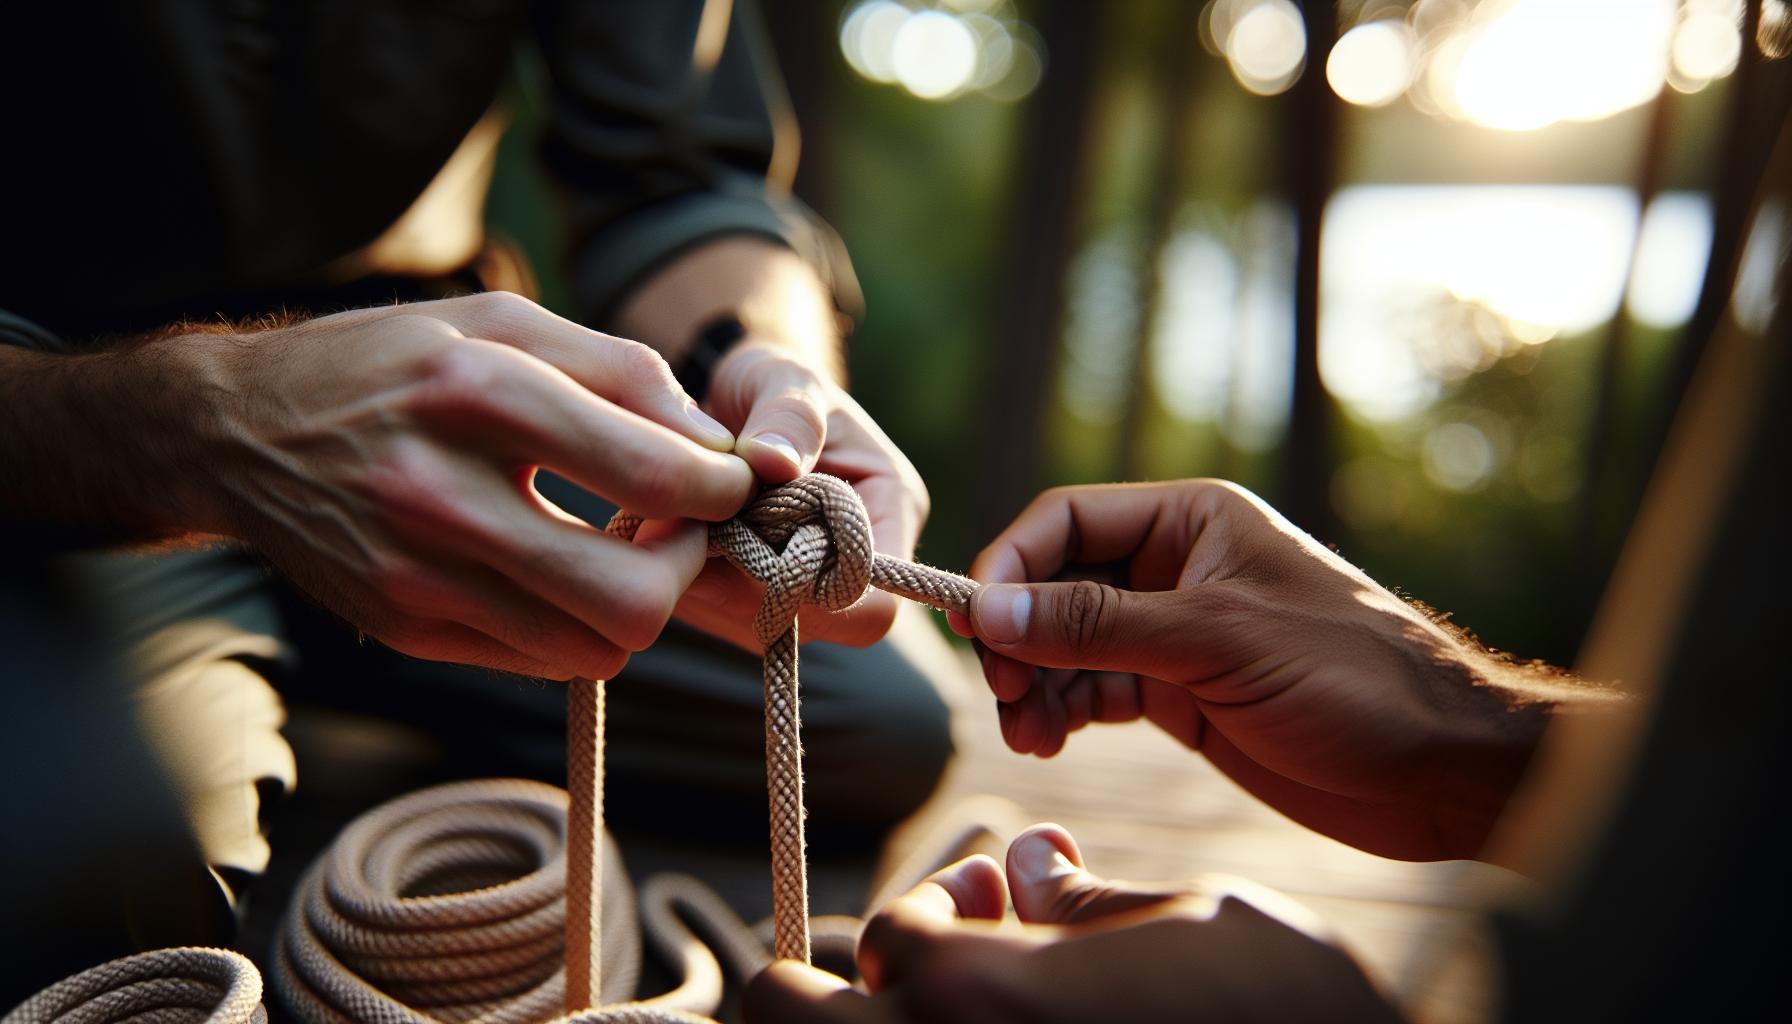
Creating reliable knots in jewellery elastic is crucial for ensuring that your designs not only look fantastic but also hold up over time. When you’re ready to tie your knot, follow this simple step-by-step guide to ensure a secure finish.
Start by laying your elastic flat on your work surface after threading your beads. This will give you a clean area to work, allowing you to focus on the knotting process. Begin by making a loop with the two ends of the elastic overlapping, forming a simple criss-cross. Hold the loop in one hand while using the other to wrap the longer end around the shorter piece. Aim to wrap it around about 3-4 times for a robust hold.
Once wrapped, bring the end of the longer piece through the loop you created. This is where the real magic happens. As you pull the ends of the elastic, you’ll tighten the knot snugly against your beads. To ensure security, pull each end firmly but not excessively, as you don’t want to compromise the elasticity of the material.
After you’ve tightened the knot, it’s essential to test it. Gently tug on the strands to see if there’s any give. A well-tied knot should feel solid without any slippage. If it seems loose, don’t hesitate to untie and redo the knot; better to be safe than sorry, especially with precious beads involved. To finish, you can trim any excess elastic close to the knot for a clean look, but make sure to leave a tiny bit of length to prevent unraveling.
By mastering these simple steps, you’ll enhance your jewellery-making skills, ensuring your pieces are not only beautiful but also durable enough to be cherished for years to come. Happy crafting!
Common Mistakes to Avoid When Knotting

Creating beautiful jewellery with elastic can be especially rewarding, but even experienced crafters can make errors that compromise the integrity of their designs. One of the most common pitfalls is making knots too loosely. A loosely tied knot may appear secure at first, but it can easily unravel over time, leading to a messy piece or lost beads. Always ensure you pull the ends of the elastic firmly to create a snug fit, while being mindful not to stretch the material beyond its elasticity.
Another frequent mistake is underestimating the importance of the knot type. Beginners may rely on a standard overhand knot without knowing that there are more effective options designed for elastic. For instance, a double knot provides additional security, ensuring that even if one part of the knot wears down, the other will still hold. Evaluate the type of knot best suited for your specific design and materials to enhance durability.
Using the wrong elastic material is also a major misstep. Not all elastic cords are created equal; some are designed for light jewellery, while others are ideal for heavier pieces. Before starting a project, consider the weight and type of beads you’ll be using, and select an elastic that can confidently support your design. This will prevent strain on the knots and extend the lifespan of your jewellery.
Lastly, a common yet avoidable error arises from neglecting to test the knot before finishing up your project. Always give your knots a gentle tug post-tying to assess their strength. If the knot slips or feels weak, take a moment to redo it. It’s better to invest the time upfront ensuring each piece is secure than to face the disappointment of a broken bracelet days after completing it.
By being aware of these common mistakes, you can elevate your jewellery-making skills and produce stunning, long-lasting pieces that you or your clients will cherish for years to come.
Best Knots for Different Jewellery Types
Creating successful jewellery pieces with elastic cord hinges on selecting the right knot for your design. With various types of jewellery, from stretchy bracelets to delicate necklaces, knowing which knot provides the best security and aesthetics can elevate your work significantly. Let’s explore the most effective knots for different jewellery types, ensuring your creations not only look fantastic but are also built to last.
For stretch bracelets, a simple double knot is often the go-to choice. This knot is robust yet discreet, providing excellent security without adding bulk. To tie, simply create an overhand knot, then tie a second knot on top of it for redundancy. Another popular option is the surgeon’s knot, which incorporates an extra twist during the first half of the overhand knot, resulting in a tighter grip on the elastic. This is particularly useful if you’re using larger beads, as it prevents them from putting too much strain on the knot.
When working with necklaces, especially those featuring beads with larger holes or heavier components, consider using a reef knot. Often used in sailing, this knot is especially good for maintaining security without deformation. To create a reef knot, tie two overhand knots with the working ends going in opposite directions; this creates a secure connection that holds well under tension. Additionally, for bead weaving projects or pieces that require a bit more flexibility, the figure-eight knot can be beneficial. This knot not only looks refined but allows for needed mobility, accommodating movement without compromising structure.
For earrings, especially those that are long or dangly, a half-hitch knot works well. This knot secures the elastic at intervals within the design, keeping the beads in place while allowing for the desired flow. Simply create a half-hitch around your desired framework and slide the beads into position. If you’re attaching clasps or other elements to the elastic, a lark’s head knot can provide a sleek and secure finish. This knot is easy to tie and creates a beneficial anchor point for jewelry components that may endure frequent wear.
Choosing the right knot not only ensures the structural integrity of your jewellery but also contributes to the overall design aesthetic. Always remember to tailor your knot choice to the materials and desired effect, enhancing both the function and beauty of your creations. As you experiment, keep an eye on how different knots influence your designs, and don’t shy away from trying new techniques for optimal results.
How to Test Your Knot’s Security
Testing the security of your knots is essential to ensure the longevity of your jewellery pieces made with elastic. A poorly tied knot can lead to disintegration of your beautiful creations, resulting in lost beads or broken designs. Here’s how you can confidently assess your knot’s reliability before you wear or gift your handcrafted jewellery.
Start by performing a simple pull test. Gently tug on both ends of the elastic near the knot. The knot should feel firm and not slip or loosen. If you notice the knot compressing or shifting, it may need re-tying. It’s advisable to apply tension gradually rather than yanking sharply, as this mimics the way the knot will be subjected to stress during daily wear.
Next, consider the weight test. Attach the jewellery piece to a small weight, like a bag of rice or a stack of coins. Let the weight hang for a few minutes, watching for any signs of stress on the knot or elastic. If the knot holds without any noticeable signs of strain, it’s likely secure enough for normal use.
Additionally, inspect the knot visually. Is it neatly tied and does it show any fraying of the elastic? Knots that appear bulky or tangled can compromise security. A well-tied knot should be compact and secure but not so tight that it causes the elastic to stretch excessively.
Finally, reflect on your knot choice. Different knots have varying levels of security based on their design and application. For instance, knots designed for bracelets might vary from those used in necklaces due to differences in movement and tension. By understanding the specifications of your chosen knot, you can ensure it aligns with your project’s demands.
By taking these steps, you can confirm the security of your knots and enjoy your jewellery creations with confidence, knowing they are built to last.
Techniques for Hiding Knots in Jewellery
Crafting jewellery with elastic can be a wonderfully creative endeavor, but one challenge that many crafters face is the visibility of knots. An unsightly knot can detract from the beauty of your piece, so learning how to conceal it effectively is essential for achieving a polished look. Fortunately, there are several techniques you can employ to ensure that your knots remain discreet, allowing your designs to shine.
One popular method for hiding knots is the use of beads or other decorative elements. By strategically placing a larger bead at the knot location, you can draw attention away from the knot itself. This not only conceals the knot but also enhances the overall aesthetic of your piece. Consider using decorative knots, such as tying a few additional beads in a cluster where the knot is positioned; this can create a focal point that adds visual interest.
Additionally, using a clasp system can be an effective strategy. Incorporating a decorative clasp not only serves a practical function but can also cleverly disguise the knot. Some clasps, like toggle or magnetic clasps, can be positioned right over the knot, making it virtually invisible. Moreover, when working with multi-strand designs, a well-placed connector or spacer can cleverly shield the knot while unifying the strands.
Another technique involves hiding the knot within a hidden section of the jewellery piece. For instance, if you are creating a bracelet or necklace, consider keeping the knot nestled within a section of beads that are tightly strung together. In some cases, you can even use the ends of the elastic to thread back through a bead or two, hiding the knot within the piece and using the surrounding beads for added security.
For those crafting delicate pieces, a touch of clear nail polish or regular jewellery glue can help to seal the knot and prevent it from loosening, while also adding a slight sheen that camouflages it against the elastic. These techniques not only ensure a neat appearance but also contribute to the longevity of your jewellery. By implementing these strategies, you can transform traditional knot issues into an opportunity for creative expression, making each piece a beautiful testament to your craftsmanship.
Care Tips for Maintaining Elastic Longevity
To ensure that your elastic jewellery remains beautiful and functional over time, it’s crucial to implement a few simple care strategies. Elastic, while versatile and easy to work with, can wear down if not maintained properly. By following these tips, you can enjoy your creations longer and prevent premature breakage.
One essential care tip is to avoid exposing your elastic jewellery to harmful substances. This includes harsh chemicals found in perfumes, lotions, and cleaning products. When these chemicals come into contact with the elastic, they can weaken the material, leading to fraying and breakage. Always apply these products before putting on your jewellery, and wait for them to dry before wearing.
Additionally, consider storing your pieces in a cool, dry place, away from direct sunlight. Extreme temperatures and UV light can damage elastic, causing it to lose its elasticity and flexibility. Use fabric pouches or dedicated jewellery boxes, and keep the pieces separated to avoid tangling or friction that could lead to wear.
Cleaning is another critical aspect of maintenance. If your elastic jewellery has accumulated dirt or oils, gently wipe it with a soft, damp cloth after each wear. This will help remove any debris without exerting too much stress on the elastic. For deeper cleans, use a mild soap diluted in water, making sure to rinse thoroughly and allow it to dry completely before storing.
Lastly, be mindful of the activities you engage in while wearing your elastic jewellery. Removing your pieces during exercise, swimming, or when performing household chores can significantly reduce wear and tear. Treat your creations with care, and they will reward you with lasting beauty and functionality. By following these simple practices, you can extend the life of your elastic jewellery and keep it looking vibrant for years to come.
Alternatives to Elastic for Jewellery Making
When creating jewellery, elastic is often celebrated for its stretch and ease of use, but it isn’t the only option available. Jewel makers seeking durability or a different aesthetic may find alternatives that suit their needs just as well, if not better. Exploring these alternatives can inspire creativity and bring fresh ideas to your designs.
One prominent alternative is using beading wire, which provides a sturdy framework for a variety of beads and charms. Unlike elastic, beading wire is less prone to stretching and breakage, making it an excellent choice for designs that need to withstand daily wear. This material typically comes in various thicknesses and is coated for added protection against wear and tear. For designs like necklaces and bracelets, it often requires crimp beads and clasps to secure the ends, which gives a polished finish and enhances durability.
For a more luxurious appeal, consider chain links. While slightly heavier than elastic, chains can add sophistication and a unique texture to your jewellery pieces. They offer a variety of styles, from delicate and fine to chunky and bold. Chains can easily incorporate pendants or charms for customization, allowing for personal expression without the constraints of elastic’s stretch.
Another innovative option is leather or cord, which brings a rustic charm to your creations. Leather is sturdy and can be fashioned into a myriad of styles, from bracelets to necklaces. It can hold beads securely while allowing for straightforward knotting or sliding closures. Paracord, known for its strength, is a fun alternative that comes in bright colors and patterns, enabling wearers to express their style boldly.
For those interested in more advanced crafting techniques, metal threading and soldering techniques can create stunning designs with rigidity and elegance. This method involves connecting pieces with metal components to assemble intricate designs that possess permanence and beauty. While this requires more skill and tools, it allows for complete customization and professional-looking results.
Exploring these alternatives not only diversifies your jewellery-making toolbox but also provides durability and versatility in your designs. As you consider your next project, think about how these options can enhance both the functionality and aesthetic of your creations, thereby expanding your artistic expression in the world of jewellery making.
Repairing Broken Elastic: A Simple Guide
Repairing broken elastic can seem daunting, but it’s a manageable task that can save your favorite jewellery pieces from being discarded. Elastic is a popular choice for bracelets and other jewellery due to its elasticity and ease of wear, but it can wear out over time due to exposure to elements like sun and sweat. Thankfully, with a few simple tools and techniques, you can restore your elastic jewellery to its former glory.
Start by gathering your tools: you’ll need a pair of scissors, replacement elastic (usually chosen based on the thickness required), and a needle or tweezers for threading. To begin, carefully cut the broken elastic strands at the point where they connect-make sure not to damage the beads that are still intact. Once you’ve removed the old elastic, measure out a new length that is approximately two to three inches longer than the original strand to ensure enough material for secure knots.
Next, thread the new elastic through the beads, keeping track of the original order. If the piece includes spacers or charms, check that they are threaded correctly. A helpful tip is to use a needle or tweezers to ease the elastic through tight spaces. Once all beads are in place, tie your knot-consider using a surgeon’s knot for extra security, as this type of knot is less prone to slipping by creating friction. Make sure to leave a small loop of elastic behind before trimming the excess, ensuring both ends are securely tied.
Common Methods for Testing Your Repair
Once your knot is complete, it’s essential to test its strength. Gently tug on the thread to ensure it can withstand tension without slipping. You can also give the bracelet a light shake to simulate wear and confirm that everything feels secure. If, for any reason, the knot feels loose, don’t hesitate to redo it-precision is key for repair success. Regularly checking your elastic jewellery can help you catch potential breakage before it happens, allowing you to maintain it effectively.
By mastering these simple repair techniques, you not only extend the life of your cherished jewellery but also empower yourself with the knowledge to handle similar issues in the future. The joy of creating and maintaining your own pieces is a fulfilling aspect of jewellery making that opens doors to greater creativity and personalization in your collection.
Innovative Designs Using Elastic in Jewellery
Creating opens up a world of creative possibilities. Elastic not only provides comfort and flexibility but also allows designers to explore unique styles that conventional materials might limit. With its resilience and stretch, elastic can transform simple beads into fashionable statement pieces, thereby appealing to a wide audience, from casual wearers to fashion aficionados.
One popular design technique involves layering different strands of elastic to create textured, multi-dimensional bracelets or necklaces. By mixing various colors and sizes of beads, you can achieve an eye-catching look that moves with you. For added flair, consider incorporating charms or pendants that dangle freely along the elastic, creating a playful interaction with movement. This approach not only enhances the aesthetic appeal but also allows the wearer to customize their jewellery with personal sentiments or meanings attached to each charm.
Furthermore, elastic is an excellent medium for creating adjustable pieces. Using a sliding knot technique, you can design bracelets or anklets that fit virtually anyone. This adaptability makes elastic jewellery a perfect gift option, as it can be easily personalized to fit different sizes without the need for tools or expertise. The elegance of simplicity-paired with the utility of elasticity-ensures that your designs are both practical and stylish.
Innovative uses of elastic also extend to incorporating mixed materials. Combining elastic cords with metal pieces or resin elements can elevate your designs from casual to chic. Imagine a bracelet featuring glossy resin beads interspersed with metallic accents, all held together by a sturdy elastic base. This fusion not only looks striking but also serves as a testament to modern jewellery-making techniques that balance durability and style.
In conclusion, the versatile nature of elastic opens doors for creative experimentation, making it a favourite among jewellery designers. Whether you’re crafting a fun, everyday piece or a chic statement item, elastic allows for endless creativity while ensuring that your jewellery remains comfortable and wearable. Embrace the potential of elastic in your designs and watch as your creations come to life, inviting admiration and interest from others.
Expert Tips for Professional-Looking Knots
Creating secure and professional-looking knots is essential for anyone working with jewellery elastic. Not only do these knots ensure the longevity of your designs, but they also maintain a polished appearance. A poorly tied knot can detract from even the most beautiful piece, while a clean, secure knot can elevate your work and instill confidence in the wearer.
To achieve that professional finish, you can start by selecting the right type of knot based on your project. A double knot is often preferred as it provides extra security, especially for elastic materials prone to loosening. Additionally, consider using a dot of clear adhesive on your knots to prevent them from coming undone over time. This method not only reinforces security but also helps maintain the integrity of the knot, providing a neat finish that won’t fray.
Another key tip is to leave a sufficient length of elastic after tying your knot-about 1 to 2 inches. This allowance enables you to trim the elastic without risk of cutting it too short. When tying your knot, ensure that the strands are close together and tightly secured. After tying, gently stretch the elastic to help the knot settle into itself, which can reduce the likelihood of it slipping.
Finally, always inspect your knots under good lighting to ensure they are tight and clean. A magnifying glass may be useful to catch any imperfections you might miss with the naked eye. Remember, the goal is not only functionality but also aesthetics-professional-looking knots can make your jewellery stand out and enhance its overall appeal. The attention to detail you apply at this stage reflects your dedication to the craft and the quality of your finished product.
Q&A
Q: What is the best elastic for tying jewelry?
A: The best elastic for tying jewelry typically varies based on the type of project. However, stretchy beading cords like Clear Elastic or Power Cord are popular choices for their durability and flexibility. For detailed guidance, visit our section on How to Choose the Right Jewellery Elastic.
Q: How do I know if my jewelry elastic is strong enough?
A: To test your jewelry elastic’s strength, stretch a small piece and check for any signs of weakness or breakage. Ensuring the elastic can hold its shape without snapping is crucial. Further tips can be found in How to Test Your Knot’s Security.
Q: What are the signs that jewelry elastic needs replacing?
A: Signs that jewelry elastic needs replacing include visible fraying, loss of elasticity, or if the knots begin to slip. Regularly inspect your pieces to maintain their integrity and consult our section on Care Tips for Maintaining Elastic Longevity for preventive measures.
Q: Can I use regular thread for tying jewelry instead of elastic?
A: While regular thread can be used for some types of jewelry, it’s not recommended for stretch designs. Elastic experts recommend specialized elastic cords for a secure fit and durability, as discussed in Best Knots for Different Jewellery Types.
Q: How can I prevent my knots from slipping?
A: To prevent slipping, use multiple knots, and apply a drop of glue or clear nail polish to the knot after tying. This additional step enhances security and extends longevity. For effective tying methods, explore our Step-by-Step Guide to Tying Your Knot.
Q: What techniques can I use to hide knots in jewelry?
A: Techniques to hide knots include using small beads at the ends or integrating the knot within a clasp or design element. This not only conceals knots but enhances the overall aesthetic. More on this can be found in our Techniques for Hiding Knots in Jewellery section.
Q: Is it better to tie a square knot or a surgeon’s knot for jewelry?
A: A surgeon’s knot is generally more secure than a square knot due to its additional twist, making it ideal for elastic jewelry. It provides better friction, reducing the chance of slipping. Refer to our Best Knots for Different Jewellery Types for more insights.
Q: How do I store elastic jewelry to prevent damage?
A: Store elastic jewelry flat or rolled in a soft pouch to prevent stretching and breaking. Avoid exposure to direct sunlight and heat to prolong its lifespan. Consult our guides on Repairing Broken Elastic: A Simple Guide for additional care tips.
In Summary
Now that you’ve mastered the art of tying secure knots in your jewelry elastic, your creations are sure to stand the test of time! Don’t just stop here-explore our detailed guides on jewelry care and cleaning techniques to keep your pieces looking stunning, or dive into our DIY tutorials for even more fun crafting ideas. If you’re thinking about starting your own jewelry shop, check out our insights on business essentials that can set you up for success.
Remember, discussions are welcome! Share your experiences or questions in the comments, and don’t forget to sign up for our newsletter for exclusive tips and updates. By taking these steps, you can elevate not only your crafting skills but also your entire jewelry journey. Keep creating and styling with confidence!
Expert Guide & Insights: How To Tie Elastic Nod
When exploring how to tie elastic nod, consumers, collectors, and fashion enthusiasts frequently encounter conflicting advice regarding material composition, wearability, authenticity verification, and long-term maintenance. In this specialized guide section, we provide an expert breakdown of key considerations, care recommendations, and practical solutions.
| Key Consideration | Primary Mechanism / Feature | Recommended Action | Value / Durability Impact |
|---|---|---|---|
| Material Integrity & Alloys | Purity standards (925 silver, 14k/18k gold, titanium, acrylic polymers) | Check official hallmark stamps and certificates before purchase | ★★★★★ High durability & heirloom retention |
| Daily Wear & Environmental Factors | Exposure to moisture, sulfur, sweat, perfume, and abrasive friction | Remove accessories before swimming, heavy workouts, or applying cosmetics | ★★★★☆ Prevents tarnish, chipping, and fading |
| Long-Term Storage & Cleaning | Atmospheric oxidation and chemical exposure over time | Store in airtight zip pouches with silica desiccant; polish with soft cloth | ★★★★★ Restores original mirror luster |
Frequently Asked Questions: How To Tie Elastic Nod
What should I know about how to tie elastic nod?
Detailed examination reveals that addressing how to tie elastic nod depends on proper handling, choosing hypoallergenic materials, and adhering to routine cleaning protocols.
How can I preserve the quality and appearance of my pieces?
Always store items individually to prevent scratch contact, avoid harsh chemical detergents or chlorine pools, and use specialized polishing cloths designed for precious metals and acrylics.
Get our latest guides, news, and insights highlighted in your Google Search & AI Overviews.