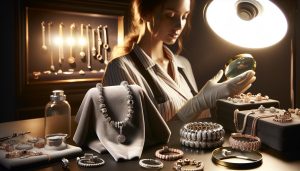
Earrings are more than just accessories; they’re intimate pieces of jewelry that sit close to your skin. Whether you’ve just acquired a stunning new pair or recently had your ears pierced, it’s essential to prioritize their cleanliness to avoid infections and ensure safe wear. In this guide on how to sterilize earrings using medical-grade safety methods, we’ll explore the best practices for maintaining your jewelry’s hygiene. By learning to properly sterilize earrings, you not only protect your health but also prolong the life of your cherished pieces. Get ready to discover foolproof techniques that empower you to wear your earrings with confidence and peace of mind!
How Sterilization Keeps Earrings Safe for You
Many people underestimate the importance of sterilizing their earrings, yet it plays a crucial role in maintaining both their health and the longevity of their jewelry. Just as you wouldn’t wear unwashed clothes, using properly sterilized earrings is essential to prevent infections and skin irritations. Sterilization effectively eliminates harmful bacteria, viruses, and fungi that can accumulate on earrings, especially in the delicate environment of freshly-pierced ears.
When it comes to medical-grade sterilization, the techniques employed go beyond simple cleaning. Methods like autoclaving, which uses high-pressure steam, are designed to ensure that every last microorganism is obliterated. This is particularly important for individuals with sensitive skin or those newly adorned with body piercings, as their immune systems can be more reactive to impurities. Regular sterilization of earrings not only protects your health but can also preserve the integrity of the materials used in your jewelry, preventing tarnishing and degradation over time.
Understanding how to sterilize earrings safely is not just for professional jewelers; it’s a valuable skill for anyone who adores their jewelry collection. With the right knowledge and tools, you can keep your earrings in pristine condition. For example, using specialized cleaning solutions that contain antiseptic properties is a great way to enhance the sterilization process for metal earrings. For those with gems, always consider the appropriate cleaning method that matches the stone’s durability to avoid risking damage.
To maintain your earrings in the best possible condition, develop a regular cleaning schedule. This will help identify any signs of wear and tear early on and ensure that your earrings remain not only beautiful but safe to wear. Creating a ritual around earring care fosters a deeper appreciation for your pieces while ensuring your ears remain healthy and free from infections.
Understanding Medical-Grade Sterilization Techniques
Sterilizing earrings is not just a precaution; it’s a fundamental practice rooted in medical-grade techniques designed to ensure your jewelry is safe and hygienic. Techniques for achieving medical-grade sterilization include methods such as autoclaving, which utilizes high-pressure steam to eradicate microorganisms. This approach is often employed in medical facilities and is effective due to its ability to penetrate materials thoroughly, ensuring that all surfaces are treated and any harmful pathogens are destroyed. For earring wearers, especially those with new piercings or sensitive skin, such rigorous methods can prevent complications arising from infections.
Another frequently used method is the use of chemical sterilants, such as hydrogen peroxide or ethyl alcohol. These substances not only clean but also have disinfectant properties that can eliminate a wide range of microbes. When employing these methods at home, it’s essential to follow manufacturer instructions to ensure efficacy while avoiding potential damage to your earrings. For example, some jewelry materials may react negatively to certain chemicals, which is why understanding the composition of your earrings is crucial before choosing a sterilization method.
Additional medical-grade practices may include UV-C light sterilization, which uses ultraviolet light to effectively kill bacteria and viruses without the use of chemicals. This method is gaining popularity for its ability to sterilize delicate materials that might be sensitive to heat or moisture. Understanding these various techniques empowers you to select the best approach depending on your earrings’ materials and your personal hygiene needs. By adopting medical-grade sterilization techniques, you not only protect your health but also prolong the life and appearance of your cherished accessories.
Essential Tools for Sterilizing Earrings at Home
To ensure that your earrings remain pristine and safe for regular use, having the right tools at your fingertips is essential. Just like any important maintenance task, good preparation can make all the difference, especially when it comes to nurturing those delicate pieces of jewelry that hang so beautifully from your ears. Here, we explore the indispensable tools that can elevate your at-home earring sterilization routine to a professional standard.
Essential Tools for Effective Sterilization
When you’re taking the DIY approach to sterilizing your earrings, consider stocking up on the following essential items:
- Isopropyl Alcohol (70% or higher): A powerful antiseptic that effectively kills germs and bacteria. Soak your earrings in alcohol for a few minutes before rinsing them off with distilled water to ensure cleanliness.
- Hydrogen Peroxide: Another excellent disinfectant that can be diluted with water for cleaning various materials. Use it safely on metal earrings but avoid certain porous stones or materials.
- Ultraviolet-C (UV-C) Sterilizer: This tool uses UV light to eliminate pathogens without chemicals. Perfect for delicate materials or when you’re on the go, a portable UV sterilizer can be a game changer for quick cleaning.
- Soft Microfiber Cloth: Invest in a quality cloth to gently dry and buff your earrings after cleaning. This helps avoid scratches and offers a shine that makes your jewelry truly pop.
- Small Bowl or Container: Use a dedicated bowl for soaking your earrings to avoid the risk of contamination from other surfaces.
- Jewelry Cleaning Brush: A fine, soft-bristled brush is perfect for removing dirt and debris from intricate designs without causing damage.
- Gloves: Wear disposable gloves while handling your earrings post-sterilization to minimize the risk of transferring oils or bacteria from your hands.
Beyond these tools, understanding your earring materials is crucial. For example, particular metals may react negatively to stronger solutions, so always check for material compatibility before commencing the sterilization process. With the right tools and a little patience, maintaining your earrings’ hygiene at home can be effective and straightforward, giving you peace of mind as you enjoy wearing them.
Step-by-Step Guide to Sterilizing Your Earrings
To ensure the longevity and safety of your earrings, a thorough sterilization process is essential. Regularly sterilizing your earrings helps prevent infections and keeps your jewelry looking its best. Here’s a straightforward guide to help you achieve that medical-grade cleanliness right at home.
Begin by gathering your essential tools: isopropyl alcohol (70% or higher), hydrogen peroxide, a soft microfiber cloth, disposable gloves, and a small bowl. For added confidence, a UV-C sterilizer can provide an additional chemical-free option for sterilization. Start the process by removing your earrings and placing them in a clean bowl. If you’re using isopropyl alcohol, thoroughly soak the earrings for a few minutes to allow the antiseptic properties to work effectively. After soaking, rinse them gently with distilled water to eliminate any residue.
Next, for those using hydrogen peroxide, dilute it with a bit of water (typically a 1:1 ratio for metal earrings) and soak your earrings for a brief period. Again, follow up with a thorough rinse using distilled water. For a chemical-free approach, using a UV-C sterilizer for a few minutes can eliminate harmful pathogens without any residue.
Once rinsed, place your earrings on a clean, dry microfiber cloth. Gently pat them dry and use a soft jewelry cleaning brush to remove any lingering dirt or impurities from intricate designs. Remember to wear gloves during this handling to prevent transferring oils or bacteria from your hands. Finally, allow your earrings to air dry completely before storing them or putting them back on. Regularly repeating this process ensures that your earrings remain as fresh and safe as the day you first wore them.
How to Clean Different Earring Materials
Cleaning earrings effectively depends significantly on the materials from which they are made. Each type requires specific care to maintain its beauty and integrity while ensuring thorough sterilization. Understanding how to approach the cleaning process for different materials will help not only in achieving the best results but also in prolonging the lifespan of your jewelry pieces.
Metal Earrings
For earrings made of metals such as sterling silver, gold, or stainless steel, a mixture of isopropyl alcohol and hydrogen peroxide is often your best bet for sterilization. Start by soaking the earrings in a solution of 70% isopropyl alcohol for about five minutes. Rinse them with distilled water to remove all traces of the alcohol, as residues can tarnish the finish over time. If using hydrogen peroxide, dilute it with an equal part of water, soak, and follow with another distilled water rinse. This method effectively eliminates germs while maintaining the shine and quality of the metal.
Gemstone and Diamond Earrings
When dealing with gemstones or diamonds set in metal, caution is key. For these earrings, instead of soaking, use a soft microfiber cloth dipped in a diluted mixture of isopropyl alcohol. Gently wipe down the gemstones, being careful not to immerse the earrings entirely, as some gemstones can be sensitive to moisture. Rinsing should only involve careful dabbing with a damp cloth to avoid water damage or loosening any settings.
Fabric or Leather Earrings
Earrings made from fabric or leather need a different approach entirely. First, check for any care instructions provided by the manufacturer. For sterilization, use a lightly dampened cloth with a bit of isopropyl alcohol to gently wipe the surfaces. Avoid soaking them, as excessive moisture can cause leather to warp or fabric to become misshaped. After cleaning, allow them to air dry in a well-ventilated space. Regularly applying a leather conditioner can also help maintain the material’s suppleness and prevent cracking.
Acrylic and Plastic Earrings
For vibrant acrylic or plastic earrings, cleaning involves a simple wash. Use mild soap and water to create a gentle solution, and apply it with a soft cloth. Rinse thoroughly with clean water and dry using a microfiber cloth. As these materials can be sensitive to harsh chemicals, avoid alcohol-based cleaners, which can cause discoloration or surface damage.
In conclusion, knowing your earring materials is crucial for effective cleaning and sterilization. By tailoring your cleaning method to fit the specific characteristics of each material, you can ensure your earrings remain in pristine condition while safeguarding your health. Remember to conduct regular cleaning to avoid any buildup of dirt and bacteria, keeping your jewelry as dazzling as the first day you wore it.
Common Mistakes When Sterilizing Earrings
When it comes to sterilizing earrings, it’s easy to overlook a few critical steps that can undermine your efforts. Many people assume that any cleaning solution will work or that a quick wipe-down is sufficient. This is a common misconception that can lead to infections or allergic reactions. Ensuring the safety and cleanliness of your earrings requires attention to detail and a clear understanding of what not to do.
One frequent mistake is not considering the material of the earrings. Different materials-such as metal, gemstones, fabric, and acrylic-have their own care requirements. For example, using a harsh chemical cleaner on delicate gemstones can result in damage, while soaking metal earrings for too long may cause tarnishing. It’s essential to match the sterilization method to the earring material to prevent damaging them.
Another common error is neglecting thorough rinsing. After applying a cleaning solution, particularly alcohol or hydrogen peroxide, it’s vital to rinse the earrings thoroughly with distilled water. Residual cleaning agents can not only tarnish the surface but could also lead to skin irritations or allergic reactions when the earrings are worn. Remember, a good sterilization process should eliminate germs while also ensuring no harmful residues are left behind.
Lastly, many overlook the importance of sterilizing earring backs and hooks. While the focus may be on the decorative fronts, the parts that make contact with your skin can harbor bacteria just as much, if not more. Neglecting these areas can lead to infections, especially if the earrings are new or if you’ve recently had your ears pierced. Always treat your earring backs with as much care as the decorative elements.
By avoiding these common mistakes, you can ensure that your earring sterilization process is effective, allowing you to enjoy your jewelry without the worry of irritations or infections. Strong earring care habits will keep your jewelry looking great and safeguard your health, so make sure you’re informed and prepared!
Aftercare Tips for Newly Sterilized Earrings
Maintaining the integrity and safety of your earrings after they have been sterilized is crucial for preventing infections and ensuring your jewelry remains a source of enjoyment. Newly sterilized earrings deserve special attention not just immediately after cleaning, but also in the days that follow. Here’s how to keep your earrings in pristine condition while protecting your ears.
First and foremost, consider wearing your newly sterilized earrings with caution. For the first couple of days after sterilization, it’s wise to limit exposure to environments that may introduce contaminants. Steer clear of places with heavy dust, smoke, or allergens, as these can irritate your newly cleaned earrings and your ears. When putting on your earrings, practice good hygiene: always wash your hands before handling them to prevent transferring dirt and oils.
Daily Care Tips
Implement a gentle daily care routine to keep your earrings clean:
- Wipe Down: Use a soft, lint-free cloth to wipe your earrings daily, especially if you wear them frequently. This prevents buildup from natural oils and cosmetics.
- Apply Minimal Products: Avoid applying hairspray, perfume, or lotions near your earrings, as these can contain chemicals that may tarnish the metal or irritate your skin.
- Rotate Your Accessories: If you wear earrings daily, consider rotating between pairs. This gives your ears a break and lowers the chance of irritation.
Storing Earrings Properly
Proper storage can greatly enhance the longevity of your earrings. After sterilization, place them in a clean, dry area away from direct sunlight. Use an earring holder or pouch to keep them separate and prevent scratches. For metal earrings, consider adding anti-tarnish strips in storage boxes to control humidity and prevent tarnishing.
Incorporating these aftercare tips into your routine ensures that your earrings remain clean, safe, and gorgeous. Being proactive not only enhances the life of your jewelry but also protects your health, allowing you to wear your favorite pieces with total confidence.
The Importance of Regular Earring Maintenance
To keep your earrings not only looking beautiful but also safe for your ears, regular maintenance is essential. Just like any cherished item, earrings require attention to detail to avoid risks of tarnishing, damage, or infections. A well-maintained pair of earrings not only enhances your overall appearance but also promotes healthy ear conditions, avoiding the discomfort that comes from wearing neglected jewelry.
One of the primary benefits of regular maintenance is the prevention of allergic reactions. Many individuals are sensitive to certain metals, especially when the protective coatings on earrings wear off. By frequently cleaning your earrings, you can easily remove any buildup of dirt, oils, or chemical residues that could irritate your skin. Regular inspections allow you to assess the condition of the earring components; for instance, check for loose stones or worn clasps that might fail.
Moreover, keeping a systematic cleaning and maintenance routine can significantly extend the life of your earrings. Depending on the material, certain earrings may require specific cleaning agents or methods. For instance, sterling silver needs anti-tarnish solutions and gentle polishing, while gemstones may require more delicate treatment.
Additionally, consider the environment where your earrings are stored. Keeping them in a clean, dry place and using anti-tarnish pouches can drastically reduce the need for frequent repairs. It’s also a good practice to rotate your jewelry pieces, allowing each to rest and recover, thereby minimizing wear and tear.
By implementing these practices, you empower yourself to enjoy your earrings to their fullest potential while safeguarding your health. Regular maintenance is a small effort that yields great returns-prolonging the life of your jewelry and ensuring that every wear is a delight.
DIY vs. Professional Sterilization: What You Need to Know
Choosing between DIY and professional sterilization for your earrings can have a significant impact on their safety and longevity. While many people are tempted to handle things on their own, understanding the pros and cons of each method is essential for ensuring your earrings remain not only beautiful but also hygienic.
DIY sterilization typically involves using readily available household items or over-the-counter solutions. For instance, a mild soap and water solution or alcohol wipes can work effectively for routine cleaning. This method can be cost-effective, convenient, and allows you to incorporate earring care into your regular cleaning routine. However, it’s important to note that DIY methods may not eliminate all microbial life, especially if done improperly. If your earrings are heavily tarnished or are made from delicate materials prone to damage, this may also pose a risk of compromising their integrity.
On the other hand, professional sterilization offers a higher level of assurance, particularly for new earrings or those used in sensitive piercings. Professionals often utilize medical-grade techniques and equipment, which are designed to eliminate 99.9% of microbial life, including resistant spores. For instance, autoclaving, which employs steam under pressure, or the use of UV sterilizers can ensure that your jewelry is not just clean but truly safe to wear. However, this service typically comes at a cost and may require visits to a jeweler or a specialist.
It’s also worth considering the intended use of the earrings. If they are for daily wear, especially in freshly pierced ears, opting for professional sterilization can provide peace of mind. Conversely, for established earrings that only require light maintenance, well-executed DIY cleaning could suffice. Regardless of the chosen method, establishing a consistent cleaning schedule and being vigilant about the condition of your earrings can contribute significantly to their longevity and your ear health.
In summary, while DIY methods can be effective and convenient, professional sterilization offers a level of safety and thoroughness that may be necessary for new or sensitive jewelry. Understanding your options allows you to make informed decisions that not only preserve the beauty of your earrings but also promote optimal ear health.
Signs Your Earrings Need Immediate Sterilization
Recognizing when your earrings need immediate sterilization is essential for maintaining not only their appearance but also your ear health. Earrings can harbor bacteria and other pathogens, especially if they’ve been worn during activities that expose them to dirt and moisture. Here are some key signs that indicate it’s time for an urgent cleaning session.
First, pay attention to any signs of irritation or redness around your earlobes. This could be a reaction to the earring’s material or a sign of infection. If you experience any discomfort, such as itching or swelling, it’s crucial to sterilize your earrings right away. In such cases, soaking your earrings in a disinfecting solution is advisable, especially for materials that can withstand soaking, like metal.
Another indication that your earrings require immediate sterilization is if you’ve been in a particularly dirty environment, such as at the gym or a festival. In these settings, earrings can accumulate sweat, dirt, and bacteria. To ensure your jewelry remains hygienic, give them a thorough sterilization after exposure to such conditions.
Additionally, if you notice any visible tarnish, grime, or buildup on your earrings, don’t wait until they look worse. A quick cleaning can prevent further tarnishing and maintain their beauty. For quick reference, here are some actionable steps to keep in mind:
- If irritation occurs, do not wear your earrings until they are sterilized.
- Always sterilize after wearing earrings to events or environments that are high-risk for dirt and moisture.
- Regularly inspect your earrings for any buildup; if you see it, take immediate action.
Establishing a proactive approach to earring sterilization not only keeps your jewelry looking beautiful but also safeguards your health, ensuring you can wear your favorites with confidence. Remember, professional options are available if DIY doesn’t suit your needs, particularly for more delicate pieces or severe cases of irritation.
Storing Earrings Post-Sterilization: Best Practices
Storing your earrings properly after sterilization is a crucial step to maintain their pristine condition and prevent contamination. Just like securing your freshly cleaned earrings protects them from grime and bacteria, using the right storage methods can prolong their lifespan and keep your ears healthy. Engaging in good storage practices ensures that your earrings remain in top shape, making them ready to wear whenever you need them.
To avoid the risk of contamination and maintain the shine of your earrings, consider using a dedicated jewelry box or organizer designed specifically for earrings. Such storage solutions often come with separate compartments or cushioned slots that keep your earrings from clinking together, which can lead to scratches or, in some cases, damage to the earring itself. Investing in a quality jewelry box with anti-tarnish lining can further safeguard your pieces against oxidation, helping maintain their sparkle.
If you’re short on space or prefer a more accessible option, a soft, clean pouch or a small ziplock bag can serve as an acceptable temporary solution. Just ensure that the pouch or bag is dry and free from debris before placing your earrings inside. After storing, keep your earrings in a cool, dry place away from direct sunlight and humidity, which can degrade certain materials over time.
Moreover, take the time to label your storage solutions if you have multiple pairs. This habit not only adds a touch of organization but can also help you quickly locate your favorite earrings, reducing the likelihood of frequent handling-which can lead to contamination. Remember that routine checks of your storage area can catch any signs of moisture or dust accumulation before they become a problem. By following these best practices, you can relish in the joy of wearing beautiful, clean earrings without any worries about hygiene or damage.
Earring Health: Preventing Infections and Allergies
Taking care of your earrings is essential for maintaining not just their appearance but also your health. Did you know that improperly cleaned or sterilized earrings can lead to skin irritations, infections, or allergic reactions? This is particularly important for those with sensitive skin or who frequently wear non-medical-grade jewelry. Understanding how to keep your earrings in optimal condition is key to enjoying your jewelry without the worry of health issues.
To avoid complications such as infection or allergic reactions, it’s critical to choose the right materials and to ensure that your earrings are properly sterilized before each use, particularly if you are switching between different styles or materials. Materials such as surgical stainless steel, titanium, and sterling silver are known for their hypoallergenic properties and are less likely to cause reactions. Regularly sterilizing your earrings, especially after prolonged periods of wear, can eliminate bacteria and other pathogens that may lead to infections.
Additionally, incorporating simple daily practices can enhance earring health. Always wash your hands before touching your earrings or inserting them into your ears. If you tend to wear your earrings in situations where they could accumulate grime-such as at the gym or while cooking-it’s wise to clean them afterward. Use soft cloths or microfiber to wipe down your earrings, and consider soaking them in a mix of mild soap and warm water for an extra clean. A thorough drying process is also critical; moisture can lead to bacterial growth.
Lastly, be alert to signs that your earrings may need sterilization immediately, such as redness, swelling, or discomfort around the piercing. If you notice any of these symptoms, it might be wise to remove the earrings and consult a healthcare professional. Keeping your earrings clean and your ears healthy not only ensures your jewelry lasts longer but also provides peace of mind as you wear your favorite pieces every day.
Q&A
Q: How often should I sterilize my earrings?
A: It’s advisable to sterilize earrings before first use and every few months afterward, especially if worn frequently. Regular sterilization helps prevent infections and maintains hygiene, particularly for sensitive ears. Refer to the section on “Regular Earring Maintenance” for more tips.
Q: What is the best method to sterilize earrings at home?
A: The best method includes using medical-grade disinfectant wipes or a solution of isopropyl alcohol. Soak the earrings for a few minutes, then wipe and rinse them thoroughly. Check the “Step-by-Step Guide to Sterilizing Your Earrings” for detailed instructions.
Q: Can I use boiling water to sterilize my earrings?
A: Yes, boiling water can effectively sterilize metal earrings. Simply immerse the earrings in boiling water for about 10 minutes and then let them cool. Ensure this method is suitable for your specific earring materials to avoid damage.
Q: How can I tell if my earrings need to be sterilized?
A: Sterilize your earrings if you’ve worn them in public places, after experiencing an infection, or if they appear dirty. Regular checks for discolored parts or unusual smells can also indicate the need for sterilization.
Q: Is professional sterilization necessary for earrings?
A: Professional sterilization is not always necessary but advisable if you have sensitive skin or have experienced reactions in the past. A professional can guarantee thorough cleaning. For detailed comparisons, see “DIY vs. Professional Sterilization.”
Q: Are there specific sterilization methods for different materials?
A: Yes, different materials require different sterilization techniques. For instance, gold and silver can be boiled, while pearls should be cleaned with a damp cloth and disinfectant solution. Refer to “How to Clean Different Earring Materials” for more insights.
Q: What are the signs of an allergic reaction to earrings?
A: Symptoms such as redness, swelling, itching, or rashes near the earlobes indicate an allergic reaction. If you experience these, consider immediately sterilizing your earrings and consult a healthcare professional for advice.
Q: Can I sterilize earrings with alcohol wipes?
A: Yes, medical-grade alcohol wipes are effective for sterilizing earrings. Simply wipe down the earrings thoroughly, ensuring all surfaces are covered, and allow them to air dry. This method is fast and convenient for maintaining earring hygiene.
To Wrap It Up
Now that you’re equipped with essential methods for sterilizing earrings safely, it’s time to take action! Remember, ensuring your earrings are free from bacteria not only enhances longevity but also protects your health. Feel free to explore related topics like our comprehensive guide on jewelry care or check out tips on cleaning metals and gems to maintain your favorite pieces. If you have any lingering questions or thoughts, drop a comment below-we’d love to hear from you!
Don’t forget to subscribe to our newsletter for more expert tips and exclusive content. Empower yourself with knowledge to care for, create, and style your jewelry confidently. The journey of maintaining your beloved accessories doesn’t stop here-keep discovering and enhancing your jewelry collection with us!