Acrylic can add a pop of color and flair to jewelry, but it can also become damaged or unsightly over time. If you’re wondering how to safely remove acrylic from your precious pieces without compromising their beauty, you’re in the right place. This article delves into effective, at-home methods to refresh your jewelry, ensuring it remains a cherished accessory rather than a source of frustration. Whether you’re trying to restore a family heirloom or simply care for your favorite statement piece, knowing how to safely remove acrylic is essential to preserving both the integrity and aesthetic of your jewelry. Read on to discover practical tips and techniques that will empower you to tackle this task with confidence!
Understanding Acrylic: What You Need to Know
Acrylic is a popular material in the jewelry world, known for its vibrant colors, versatility, and affordability. However, its unique properties also require specific care, especially when it comes to removal from jewelry settings. Understanding acrylic can help you make informed decisions about both wearing and caring for your jewelry.
Made from polymethyl methacrylate (PMMA), acrylic resembles glass but is more lightweight and shatter-resistant. It can mimic gemstones and is often used in both fashion and fine jewelry. While its durability is admirable, acrylic is also susceptible to scratching and chemical damage, particularly from harsh solvents like acetone. When considering a DIY removal process, it’s crucial to use the right methods to protect not only the acrylic itself but also the metals and stones it may be set with.
When acrylic is improperly removed, it can lead to damaging both the jewelry and the acrylic piece itself. If you’re unsure about your approach, or if the piece is particularly valuable or sentimental, consulting a professional jeweler can be a wise choice. Their expertise can save you time and prevent potential mishaps during removal.
In summary, taking the time to understand acrylic’s characteristics will provide you with the knowledge needed for safe handling and removal of acrylic jewelry, ensuring both aesthetics and longevity for your cherished pieces.
Essential Materials for Safe Removal
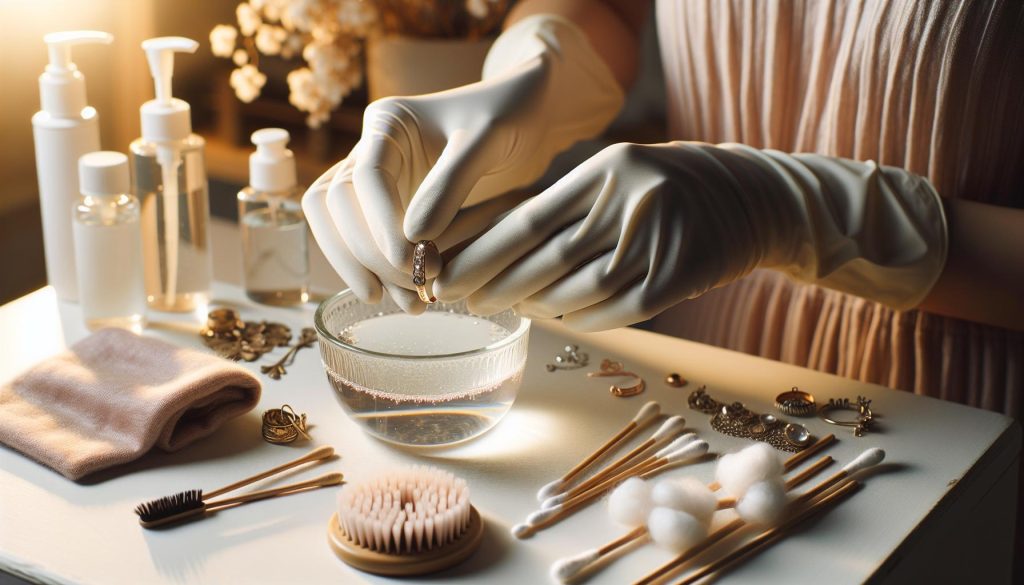
To safely remove acrylic components from your cherished jewelry without causing damage, having the right materials on hand is essential. The process requires care and precision, so equipping yourself with the necessary tools will not only streamline the task but also protect your pieces. Here’s a list of recommended materials to ensure a seamless removal experience.
- Soft Cloths: Use lint-free, soft cloths to handle your acrylic pieces gently. These will minimize the risk of scratches while providing a clean surface during the removal process.
- Non-Acetone Nail Polish Remover: If a solvent is necessary, opt for a non-acetone formula. Acetone can damage acrylic, so a gentler alternative is vital for protecting your jewelry.
- Mild Soap Solution: Prepare a mild soapy water solution to clean the area around the acrylic without introducing harsh chemicals.
- Small Tweezers: A pair of precision tweezers is helpful for gently prying apart components without using excessive force.
- Screwdriver Set: If screws hold your acrylic pieces in place, a set of small, appropriate screwdrivers will help you carefully disassemble the components.
- Plastic or Wooden Picks: Use these tools to gently push or pry acrylic away from metal settings, reducing the risk of scratching or damaging both the acrylic and the metal.
Having these materials prepared can make the task of removing acrylic from your jewelry safer and more efficient. The key to a successful removal lies in patience and a gentle touch, so ensure that you take your time and work in a well-lit area for better visibility. Being methodical about the process not only preserves the integrity of your jewelry but also makes for a satisfying project that rewards careful handling with beautiful results.
Step-by-Step Guide to Removing Acrylic
To successfully remove acrylic from jewelry, it’s essential to approach the task thoughtfully, ensuring that you preserve the integrity of your cherished pieces. Start by preparing the work area-a well-lit space helps you see the details clearly, minimizing the risk of mistakes. Here’s a step-by-step guide that can help you through the process with confidence.
Gather Your Materials
Before you begin, ensure you have all the necessary tools listed previously: soft cloths, non-acetone nail polish remover, a mild soap solution, tweezers, a small screwdriver set, and plastic or wooden picks. Having everything on hand will streamline the removal process.
Soaking Method
If the acrylic is particularly stubborn, begin by soaking the jewelry. Create a gentle mix of warm water and a few drops of mild soap in a bowl. Submerge the piece for about 20 minutes, allowing the acrylic to soften. This step is crucial, as soaking can make it much easier to remove without risking damage to the underlying materials.
Gentle Removal Techniques
After soaking, use a soft cloth to wipe the surface and then gently scrape the softened acrylic with a plastic or wooden pick. Avoid using metal tools, which can scratch or damage your jewelry. If there are any remaining bits, dip a cotton swab in non-acetone nail polish remover and carefully apply it to the area, monitoring to avoid contact with any sensitive parts of the jewelry.
Final Touches
Once all the acrylic is removed, wash the jewelry in a mild soap solution and rinse thoroughly with clean water. Pat it dry with a soft cloth, making sure it’s completely dry before storing it away. This final wash helps remove any residues left from the removal process, restoring your piece to its former glory.
By following these precise steps, you can safely and effectively remove acrylic from your jewelry at home, ensuring your pieces are maintained beautifully for years to come. Remember, patience is key-take your time to avoid any mishaps, and enjoy the rewarding process of giving your jewelry a new lease on life.
Natural Alternatives to Chemical Removers
When it comes to removing acrylic from your jewelry, numerous natural alternatives can be just as effective as chemical removers without the harsh side effects. Many eco-conscious jewelry enthusiasts seek safe and gentle solutions that protect both their pieces and the environment. One standout method involves the use of simple household items that are likely already in your kitchen.
Warm water combined with a few drops of mild soap serves as an excellent starting point for breaking down acrylic. By soaking your jewelry in this solution for about 20 minutes, you allow the softness of the acrylic to facilitate an easier removal process. The soap’s gentle nature helps to lift oils and residues without damaging the jewelry itself. After soaking, simply use a soft cloth to wipe away debris, followed by scraping gently with a non-metallic tool like a plastic pick. This method is not only effective but minimizes the risk of scratching or damaging your jewelry.
Another great natural option is olive oil, which can be used discreetly to help loosen stubborn acrylic residues. Dabbing a small amount onto the affected area and letting it seep in for a few minutes can make removal much simpler. After application, you can gently scrape the softened acrylic away using a wooden pick or your fingernail. Rinse the piece with warm, soapy water afterward to eliminate any oil residue, restoring its shine.
It’s important to remember that patience is essential. Natural methods may take a little longer compared to harsher chemical alternatives, but they are gentler on your jewelry and can be more beneficial in the long run. For those who cherish their pieces and wish to maintain their quality, embracing these natural approaches is a sustainable and effective route to preserving the beauty of your jewelry.
Preventing Damage to Your Jewelry During Removal
One of the most critical aspects of removing acrylic from your jewelry at home is ensuring that you do not cause any unintentional damage to the piece itself. Poor removal techniques can lead to scratches, discoloration, or even structural integrity issues. To keep your favorite pieces looking their best, it’s important to adopt a careful approach.
Start by preparing your workspace to minimize risks. Choose a clean, soft surface to work on, such as a microfiber cloth or soft towel, to cushion your jewelry and prevent any accidental drops. Before touching your pieces, make sure your hands are clean and dry; oils from your fingers can transfer onto the jewelry and impact its finish. Always use tools that are gentle; for instance, opt for wooden or plastic tools instead of metal ones, which can scratch delicate surfaces.
When applying heat to soften acrylic for removal, be cautious. A hairdryer set on low can be effective, but ensure that it remains at a safe distance to avoid overheating the jewelry itself. Too much heat can warp acrylic, lead to color changes, or damage connected pieces, particularly if they are made of different materials. It is wise to test on a less visible area first to gauge how the acrylic reacts.
Additionally, during the adhesion removal process, work in small sections to allow yourself precise control. Instead of pulling or tugging at the acrylic directly, use soft movements and a gentle scraping technique. By taking your time and being mindful of the pressure applied, you’ll protect your jewelry from mishaps that could lead to costly repairs or the heartbreaking loss of a cherished item.
By adopting these preventative measures, you’re not only ensuring the longevity of your jewelry but also cultivating a careful and respectful approach to jewelry maintenance that every enthusiast should embrace.
Cleaning and Restoring Jewelry Post-Removal
Once you’ve successfully removed the acrylic from your jewelry, it’s essential to restore it to its former glory. This process not only revives the aesthetic appeal of your pieces but also helps in maintaining their longevity. Begin by thoroughly cleaning the item to remove any residual adhesive or cleaning agents that may linger post-removal. Utilize a gentle solution of warm water and mild soap, applying it with a soft cloth or a soft brush for intricate areas. This method is particularly effective for delicate components like gemstones and intricate metalwork, where harsher chemicals could cause damage.
Post-Cleaning Restoration
After cleaning, inspect the jewelry for any signs of wear or scratches that may have occurred during the removal process. If you notice any mild scratches on metal surfaces, consider using a specialized metal polish for restoration. Apply a small amount to a soft cloth and buff gently, following the manufacturer’s instructions for best results. For stones, particularly softer ones like opals or pearls, simply polishing with a microfiber cloth can enhance their natural luster.
Final Touches
Don’t forget to apply a protective layer, especially if your jewelry includes porous materials or natural stones. A application of a jewelry protectant spray can help shield from future damage and keep your pieces looking freshly restored. Once everything is cleaned and polished, give your jewelry a final inspection to ensure it meets your standards.
Lastly, always store your jewelry in a dedicated space, ideally in a fabric-lined box or pouches to avoid scratches and tangles. Keeping pieces away from excess moisture and direct sunlight can further prolong their life, making your efforts in cleaning and restoring all the more worthwhile. By embracing this care routine, you empower yourself to maintain the beauty and integrity of your collection for years to come.
Best Practices for Storing Jewelry After Cleaning
Ensuring your jewelry remains pristine after a thorough cleaning is crucial for its longevity and aesthetic appeal. Proper storage can significantly reduce the risk of scratches, tarnishing, and other forms of damage that can occur when pieces come into contact with one another. A captivating fact: many jewelry enthusiasts underestimate the importance of a dedicated storage space; it can be the difference between a jewelry collection that lasts a lifetime and one that shows signs of wear and tear much too soon.
To start, consider investing in high-quality storage solutions suited to the types of jewelry you own. Individual velvet or satin pouches are excellent for protecting pieces from dust and scratches, particularly for items with plated finishes or delicate stone settings. You may also opt for a wooden jewelry box with compartments, which helps organize your collection while minimizing movement that can lead to damage. For simpler pieces, using a tray with dividers can be an effective way to keep your jewelry visible while still protected.
Additional Tips for Effective Storage
- Avoid Humidity: Store your jewelry in a cool, dry place. Excess moisture can cause metals to tarnish and degrade materials.
- Consider Anti-Tarnish Solutions: For silver jewelry, include anti-tarnish strips or pouches in your storage to combat oxidation.
- Keep Away from Sunlight: Direct light can fade certain gemstones and degrade synthetic materials like acrylic.
- Separate Pieces: Avoid storing rings in the same compartment as earrings, as they can scratch each other’s surfaces.
In addition to these practices, it’s wise to regularly review your storage setup. Reorganizing your collection can not only help you rediscover pieces you haven’t worn in a while but also provides an opportunity to check for any needed repairs. Taking these steps will empower you to maintain the beauty of your precious jewelry, ensuring that each piece remains as vibrant and stunning as the day you acquired it.
When to Seek Professional Help for Removal
In the intricate world of jewelry care, knowing when to seek professional help can save you time, frustration, and potential damage-not just to the piece in question, but to your overall collection. If you find yourself faced with a stubborn layer of acrylic on your jewelry that won’t budge with home removal methods, or if you’re uncertain about the composition of the materials involved, it’s a wise decision to consult with a professional jeweler.
Professionals have a wealth of experience and specialized tools that can safely remove acrylic without risking scratches or damage to the underlying materials. This is especially true if your jewelry features fragile elements, like delicate stones or intricate metalwork. A skilled jeweler can assess the piece and determine the best method for removal, ensuring the piece retains its integrity and beauty. If you notice any signs of discoloration, cracking, or performance issues in your jewelry, such as stones becoming loose, it’s best to let an expert handle it.
It’s also advisable to seek professional help if you feel uncomfortable with the chemicals involved in DIY methods. Many acrylic removal techniques involve acetone or other solvents that can be harmful if mishandled. If you have sensitive skin, respiratory issues, or simply prefer to avoid harsh chemicals, entrusting your piece to an expert can provide peace of mind.
In summary, while DIY methods can be effective for minor acrylic removal, leveraging the expertise of a professional jeweler is key when facing complicated situations or if the jewelry has significant sentimental or monetary value. Your precious pieces deserve the best care, and sometimes that means relying on the seasoned hands of an expert to keep them safe and stunning.
Caring for Different Jewelry Materials: A Quick Overview
When it comes to jewelry, each material demands its own unique care and attention. Understanding how to maintain different types of jewelry can ensure that each piece remains beautiful and retains its value over time. Whether you’re dealing with delicate metals, sparkling gemstones, or versatile acrylics, knowing the best practices for cleaning and maintenance is essential for any jewelry enthusiast.
Metals
Different metals require varying methods for cleaning and care. For example, sterling silver can tarnish over time, so regular polishing with a microfiber cloth is recommended. Avoid using abrasive materials that might scratch the surface. Gold and platinum, on the other hand, are more resilient but can still benefit from occasional cleaning with a mild soap solution. For plated metals, like gold or rhodium plating, handle them gently to avoid wearing down the outer layer and maintain their shine.
Gemstones
Gemstones often require specific care depending on their hardness and composition. Softer stones such as opals and pearls should be cleaned with a soft, damp cloth only, as they can be easily scratched or damaged by chemical cleaners. Conversely, harder stones like diamonds and sapphires can withstand more vigorous cleaning and can be soaked in warm, soapy water. However, be cautious with porous stones like turquoise or lapis lazuli, which should be treated with care to prevent damage.
Acrylic
Acrylic jewelry is lightweight and versatile but can easily be affected by chemicals and environmental factors. It’s best to clean acrylic pieces with a gentle soap solution and a soft cloth, avoiding harsh chemicals that may cloud the surface or cause damage. Additionally, store acrylic jewelry away from direct sunlight and extreme temperatures to preserve its vibrancy. When wearing acrylic, keep it away from lotions, perfumes, and hairspray to prevent deterioration.
Storage and Maintenance Tips
Proper storage is crucial to prolonging the life of your jewelry. Always store pieces separately in soft pouches or compartments to prevent scratching. For necklaces, consider using a jewelry stand to keep chains untangled. Regularly inspect your jewelry for signs of damage, and address any issues promptly to avoid further deterioration.
By tailoring your care routine to the specific needs of each jewelry material, you not only enhance the longevity of your pieces but also enjoy wearing them more. With thoughtful maintenance, your collection can shine brightly for years to come.
Preventative Measures: Avoiding Acrylic in Jewelry
Acrylic jewelry, while trendy and lightweight, has its own set of challenges. Many jewelry enthusiasts fall in love with its vibrant colors and unique designs, only to find themselves grappling with how to care for it properly. One of the most effective strategies for handling acrylic jewelry is to actively avoid situations that could lead to damage, particularly during wear or cleaning.
To keep your acrylic pieces looking their best, try to sidestep any exposure to harsh chemicals. This means taking off your jewelry before using cleaning products, applying lotions, perfumes, or hairspray, and even before washing your hands. Additionally, it’s wise to avoid environments where your jewelry might be exposed to moisture or humidity, such as the shower or pool, as these conditions can cause clouding or deterioration over time.
Another key preventative measure is to be mindful of how you store acrylic jewelry. Opt for dedicated soft pouches or compartments that shield these delicate pieces from scratches or impact with harder materials. Never leave them in direct sunlight, as this can lead to fading and warping. Instead, a cool, dark place like a jewelry box is ideal for preserving their vibrancy.
By understanding the limitations of acrylic jewelry and adopting these few straightforward habits, you can extend the lifespan of your cherished pieces and minimize the need for difficult removal processes down the line.
Styling Tips for Your Newly Restored Jewelry
Adding a pop of color and personality to your ensemble, freshly restored acrylic jewelry can elevate any outfit and showcase your unique style. With its vibrant hues and artistic designs, these pieces serve not only as accessories but as statements. After diligently restoring your acrylic jewelry, it’s time to thoughtfully style them to draw attention and make your outfit shine.
Mix and Match
Acrylic jewelry is incredibly versatile, allowing you to play with various styles and textures. Pair your acrylic pieces with complementary materials, such as metals or gemstones, to create a layered look that adds depth. For instance, a bold acrylic necklace can stand out beautifully against a simple pendant or can be complemented by earrings of a different texture. Don’t shy away from mixing colors, but aim for a cohesive palette that reflects your aesthetic.
Consider Your Outfit
When styling your restored acrylic jewelry, think about the occasion and your outfit’s silhouette. For a casual day out, go for playful combinations using bright, oversized earrings or chunky bangles that can add flair to a straightforward tee and jeans. Conversely, if you’re dressing for a more refined event, consider elegant, minimalistic acrylic pieces that offer sophistication without overwhelming your ensemble. The key is to strike a balance between your jewelry and outfit; let one shine a little brighter than the other!
Layer Strategically
Layering is not only a trend but also a great way to define your personal style with acrylic pieces. Wear multiple necklaces of varying lengths to create an eye-catching focal point. Stack bracelets together, mixing different widths and colors to make a bold statement on your wrist. However, to avoid overwhelming your look, ensure that the layers are balanced; if one piece is brightly colored, consider keeping other pieces more subdued.
Accessorize Thoughtfully
Remember that the right outfit can amplify the beauty of your jewelry. When choosing clothing, consider how the colors and patterns interact with your acrylic pieces. Solid colors often work best as they allow the jewelry to be the centerpiece. Additionally, consider the neckline of your tops when choosing necklaces; a scoop neck can beautifully frame a statement piece, while a high neck might call for simpler, shorter chains.
By integrating these thoughtful styling tips, your newly restored acrylic jewelry will not only enhance your wardrobe but also reflect your unique style with grace and confidence. Embrace the creativity that jewelry styling allows and enjoy showcasing your aesthetic flair!
FAQ
Q: How can I safely remove acrylic paint from my jewelry without damaging it?
A: To safely remove acrylic paint, use a cotton swab dipped in rubbing alcohol or acetone. Gently rub the area until the paint lifts. Always test a hidden area first to check for any adverse reactions. For detailed removal tips, refer to the “Step-by-Step Guide to Removing Acrylic” section.
Q: What household items can help in removing acrylic from jewelry?
A: Common household items like rubbing alcohol, vinegar, and baking soda can effectively remove acrylic. Mix vinegar and baking soda into a paste, apply gently on the acrylic, let it sit for a few minutes, and then wipe clean. For a proper cleaning technique, see “Essential Materials for Safe Removal.”
Q: When should I consider seeking professional help to remove acrylic from jewelry?
A: If the acrylic is embedded deeply into delicate materials or if you are unsure about the removal process, seek professional help. Professionals will ensure the jewelry isn’t damaged. Learn more in the “When to Seek Professional Help for Removal” section of our article.
Q: Can acrylic damage my precious jewelry over time?
A: Yes, acrylic can potentially cause damage if left untreated, as it may trap moisture and grime, leading to tarnishing. Regular maintenance is key. Visit our “Preventing Damage to Your Jewelry During Removal” section for preventive tips.
Q: What are safe alternatives to chemical removers for acrylic on jewelry?
A: Safe alternatives include natural solutions like lemon juice, vinegar, and olive oil. These options are gentle yet effective. For step-by-step instructions, check the “Natural Alternatives to Chemical Removers” section in our full guide.
Q: How do I clean my jewelry after acrylic removal?
A: After removing acrylic, clean your jewelry with warm soapy water and a soft cloth. Rinse thoroughly and dry completely. Find more detailed cleaning tips in “Cleaning and Restoring Jewelry Post-Removal.”
Q: Is it safe to use nail polish remover on jewelry?
A: Nail polish remover may contain strong chemicals that can damage certain jewelry materials. Always check the material type and perform a spot test. Refer to “Essential Materials for Safe Removal” for suitable options.
Q: What are the risks of trying to remove acrylic from jewelry at home?
A: The main risks include damaging the metal or gems and possibly worsening the stain. It’s essential to use gentle techniques. For detailed advice on DIY methods, explore our main article.
Concluding Remarks
Now that you know how to safely remove acrylic from your precious jewelry at home, it’s time to put this knowledge into action and revive your beloved pieces! Remember, taking proactive steps in jewelry care not only enhances their beauty but also extends their lifespan. If you have any questions or experiences to share, drop a comment below-we love hearing from you!
For more must-know tips on jewelry maintenance, don’t miss our guides on cleaning metals and gems or Explore our DIY tutorials to learn how to create your own stunning pieces. Join our newsletter for regular insights on styling advice and the latest trends in jewelry care.
Every piece of jewelry tells a story, and with the right care, those stories can shine through beautifully. Let’s keep the conversation going as you embark on your jewelry care journey!
Get our latest guides, news, and insights highlighted in your Google Search & AI Overviews.