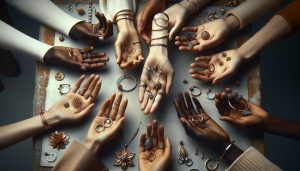
Did you know that making your own earrings can be a fulfilling and creative outlet? In today’s world, where personalization is key, crafting beautiful handmade jewelry allows you to express your unique style while saving money. Whether you’re a seasoned jewelry maker or just starting out, this DIY guide will equip you with the knowledge and skills to create stunning earrings that perfectly complement your wardrobe. You’ll discover essential tips on materials, techniques, and designs that not only make the process enjoyable but also empower you to embrace your creativity. Get ready to transform simple supplies into eye-catching accessories that reflect your personality and flair. Let’s dive into the fascinating world of earring making!
How to Choose the Right Materials for Earrings
Choosing the right materials for your earrings can make all the difference between a fun craft and a stunning piece of jewelry. When embarking on your DIY earring-making journey, it’s essential to consider not only aesthetics but also durability and comfort. A good rule of thumb is to select materials that match the level of sophistication you want to achieve while ensuring they are suitable for your skin type, particularly if you have sensitive skin.
Start with determining the type of earrings you wish to create. For instance, if you’re leaning towards lightweight and playful designs, consider using beads, acrylics, or resin. If you prefer an elegant look, materials such as sterling silver, gold-filled metals, or even semi-precious stones can elevate your earrings significantly. Here’s a quick guide on materials:
- Metals: Stainless steel, sterling silver, and gold-filled are great for sensitive ears.
- Beads: Glass, wooden, and clay beads offer a plethora of colors and styles.
- Findings: Hooks, hoops, and wires should match your chosen metal type for a cohesive look.
- Accent Pieces: Charms, gemstones, or decorative elements can add unique flair.
To ensure the longevity of your handmade earrings, consider the weight of your materials. Heavier options may require sturdier findings to prevent sagging or breaking. Always remember to factor in the overall comfort when selecting materials, especially for hooks or posts that sit directly against the ear.
Experimenting with a variety of materials can lead to unique and beautiful creations, so don’t hesitate to mix textures and colors. By thoughtfully choosing your materials, you set a solid foundation for making stunning earrings that you’ll be proud to wear or gift.
Essential Tools for DIY Earring Creation
Creating beautiful handmade earrings is an enjoyable craft that can be made easier and more efficient with the right tools at your disposal. With just a few essential supplies, you can embark on your journey into the world of DIY jewelry, allowing your creativity to blossom while ensuring professional results.
To start crafting your stunning earrings, consider equipping yourself with the following essential tools:
- Jewelry Pliers: A set of needle-nose pliers, round-nose pliers, and flat-nose pliers are crucial for bending, shaping, and cutting wire as well as opening and closing jump rings.
- Cutter Tool: Flush cutters are ideal for trimming wire cleanly and precisely, giving your earrings a polished look.
- Beading Tray: A designated space for organizing beads and components helps prevent spills and makes it easier to visualize your designs before assembly.
- Ruler or measuring tape: Accurate measurements ensure balanced designs, especially important for symmetrical earrings.
- Glue or adhesive: For designs involving non-metal components, a quality jewelry adhesive can help secure pieces that may otherwise come apart.
- Storage Containers: Keeping your materials organized in labeled containers will save you time and frustration, allowing you to focus on creating.
Each of these tools is designed to facilitate different aspects of earring making, from the initial design to the final assembly. Investing in high-quality tools can make your DIY experience much more enjoyable and help produce earrings that are both beautiful and durable. Whether you are just beginning or looking to refine your technique, having the right tools can empower you to create stunning pieces that express your personal style.
Step-by-Step Guide to Making Simple Earrings
Creating your own earrings can be an incredibly rewarding experience, allowing you to express your personal style while honing your crafting skills. In just a few simple steps, you can transform basic materials into beautiful, wearable works of art. Here’s an easy-to-follow guide that will have you making earrings in no time, perfect for beginners and seasoned crafters alike.
Begin by gathering your materials and tools: you’ll need a pair of earring hooks, some decorative beads or charms, and your essential tools like pliers, wire cutters, and jump rings. A common choice for beginners is to use bead wire or string as the base, which allows for various bead arrangements. Once you have everything set up, choose a design that resonates with you. You might opt for a mood-boosting color combination or a particular theme, such as nature or geometric shapes.
Once you’ve outlined your design, it’s time to start assembling. Begin by cutting a piece of bead wire or string to your desired length-about 4 inches is a good starting point. Thread your chosen beads onto the wire, ensuring they are secure and evenly spaced. If you’re using multiple beads, experiment with different sizes and shapes to create visual interest. Once you’ve reached the desired look, secure it by making a loop with your wire at the top and attaching it to a jump ring. This will connect your bead arrangement to the earring hook.
Finish your earrings by closing the jump ring securely using the pliers, ensuring everything is tightly fastened. For added flair, you can even dangle additional charms or smaller beads from your main design. It’s important to check that there are no sharp ends sticking out that could irritate your ears. Finally, wear your newly crafted earrings proudly or consider making more designs as gifts for friends and family!
This straightforward approach invites creativity and experimentation. As you gain more experience, you can explore different materials, techniques, and intricate designs, transforming simple pieces into cherished treasures.
Exploring Different Earring Styles: From Hoops to Dangles
Exploring a variety of earring styles not only allows you to express your unique aesthetic but also offers countless opportunities for creativity in your DIY projects. From timeless hoops that frame the face to eye-catching dangles that sway with movement, the world of earrings is rich with possibilities. Understanding the different styles can help you choose the right design for your mood, outfit, or occasion.
Hoop Earrings are a classic choice, ranging from small, delicate styles to bold, oversized designs. They are versatile, pairing well with casual attire or complementing elegant evening wear. When crafting your own hoops, consider experimenting with different materials such as metals, acrylics, or even fabric. You can also embellish them with beads or charms to enhance their visual appeal.
Dangle Earrings, on the other hand, provide a playful flair to any look. These earrings, which swing or hang from the earlobe, can be made using a variety of items, from colorful beads to feathers or crystals. The length and shape can vary significantly, making it easy to personalize your creation. When designing dangles, think about incorporating contrasting colors and textures that will catch the eye and draw attention.
Statement Earrings have become increasingly popular, allowing wearers to showcase bold designs that serve as the focal point of their outfit. These can include oversized geometric shapes, intricate lace work, or eye-catching patterns. When creating statement pieces, don’t shy away from mixing bold colors and unique shapes. The key is to ensure that your design aligns with the overall aesthetic you want to convey.
Lastly, consider Stud Earrings, which offer a subtle and timeless elegance. These straightforward designs can be enhanced through the use of interesting materials, such as resin or gemstones. You can create playful shapes or opt for minimalistic designs that suit various occasions. The beauty of stud earrings lies in their simplicity, allowing you to wear them easily every day or as part of a more layered earring stack.
No matter which style you choose to explore, learning about these diverse earring designs can inspire your DIY projects, encouraging you to mix and match techniques and materials. This exploration is not just about crafting beautiful accessories but also about developing a deeper connection with your creative process and personal expression through jewelry.
Techniques for Adding Unique Designs to Your Earrings
Creating earrings is not just about stringing beads together; it’s an opportunity to infuse each piece with your personality and creativity. By experimenting with various techniques, you can transform simple designs into extraordinary works of art that stand out. Consider the following methods for adding unique touches to your handcrafted earrings:
Incorporate Mixed Media
Exploring mixed media can add depth and interest to your earrings. Combine materials such as wood, metal, and fabric to create a more dynamic aesthetic. For example, you could attach wooden charms to metal hoops or wrap fabric around wire for added texture. This layering of materials not only yields stunning visual contrasts but also allows you to play with different weights and finishes.
Experiment with Color and Patterns
Color can dramatically affect the design and appeal of your earrings. Use vibrant enamel paints or alcohol inks on metal or resin bases to create unique patterns. You might also consider decoupage techniques, using paper or fabric scraps to adorn your designs. By mixing hues or applying patterns selectively, you can achieve a one-of-a-kind look that is entirely your own.
Utilize Bead Weaving Techniques
Bead weaving can elevate your earring designs into delicate masterpieces. Techniques such as peyote stitch or right-angle weave allow you to create intricate patterns and shapes that traditional beading might not achieve. Even a simple addition of woven beads can create a striking effect, enticing onlookers to admire the craftsmanship.
Add Movement and Dimension
Incorporating elements such as chains, tassels, or fringe can give your earrings a sense of movement that catches the eye. These elements can sway and sway with your movements, adding an animated quality to your design. Consider using lightweight materials to keep the pieces comfortable, allowing the wearer to enjoy style without sacrificing comfort.
Incorporating these techniques can inspire you to push the boundaries of creativity in your earring designs. Each method opens doors to new possibilities, making your DIY journey both exciting and fulfilling. Keep experimenting, and you’ll find that the more you create, the more unique your pieces will become!
Tips for Soldering and Securing Earring Components
Successfully soldering and securing earring components is crucial for ensuring the longevity and durability of your handmade jewelry. Whether you are working with metal pieces or incorporating findings, understanding the right techniques, tools, and materials will elevate your creations to the next level. With some practice, soldering can become a straightforward process, enhancing the strength and aesthetic appeal of your earrings.
To begin with, when preparing to solder, ensure that all surfaces to be joined are clean and free of grime. Use a fine-grit sandpaper or a file to create a rough texture on the joining surfaces, which will help the solder adhere better. It’s also beneficial to use a flux, a chemical cleaning agent that helps prevent oxidation during the heating process. Apply flux to the areas where you’ll be soldering to facilitate a strong bond.
Next, invest in quality solder and a suitable soldering iron. For jewelry making, a soldering iron with a fine tip is ideal for precise work. Choose a solder that matches the metal composition of your components. For example, if you’re working with silver, use silver solder to ensure a seamless finish. Be sure to practice controlled heating; overheating can damage your pieces, while insufficient heat can lead to a weak bond.
Once your pieces are soldered, allow them to cool completely before handling. This prevents the risk of burns and allows the solder to set effectively. After cooling, clean the soldered joints with a pickle solution or a gentle abrasive cleaner to remove any oxidation that may have occurred.
Securing Earring Components is equally important. When attaching components such as hooks or posts, ensure they are tightly fastened. Use pliers to carefully close jump rings or secure clasps. A good practice is to slightly twist the ends of the jump ring rather than pulling them apart; this maintains the integrity of the ring shape and ensures a tighter closure.
When you take these steps into consideration-prepping your materials, using the right tools, and ensuring secure connections-you’ll not only improve the durability of your earrings but also enhance their overall beauty. As you gain experience, don’t hesitate to experiment with different methods of securing components, such as thread techniques or using adhesive alongside solder, to discover what works best for your designs.
How to Finish and Polish Your Handmade Earrings
Finishing and polishing your handmade earrings not only enhances their beauty but also helps in achieving a professional look that showcases your craftsmanship. The final steps of cleaning, polishing, and treating your earrings can make a significant difference in their appeal and longevity. Here’s how to ensure your creations shine brightly and maintain their allure over time.
To begin with, start by cleaning your earrings. Use a soft, lint-free cloth to gently wipe down all surfaces, particularly where fingerprints may linger. For metal components, a mild soap solution can serve as an effective cleaner; simply mix a few drops of dish soap with warm water. Dip a soft cloth in the mixture, wring it out, and carefully clean the items. Avoid soaking metal pieces, especially if they contain delicate or glued components, as this might weaken them.
Once clean, move on to polishing. There are various polishing pads and cloths available that can be specifically designed for metals like silver or gold. For instance, a microfiber cloth can help remove tarnish and dust effectively. If you’re working with a particularly tarnished piece, consider using a specific metal polish. Apply a tiny amount onto the cloth and buff the metal gently in circular motions. Always follow the product’s instructions to prevent damage to your earring’s finish.
Unique Finishing Techniques
Exploring unique finishing techniques can also add character to your earrings. Consider using the following methods:
- Oxidation: For a vintage look, use a liver of sulfur solution to darken silver pieces, then polish to highlight raised areas.
- Texturing: Employ hammers or texturing tools to create patterns that add visual interest and uniqueness.
- Sealants: For mixed-media earrings, applying a clear jewelry sealant can protect non-metal components from moisture and wear.
In addition to these techniques, remember to inspect all connections and components closely after polishing. Ensure that jump rings are securely closed and that earring backs or hooks are intact. Attention to detail in this final stage ensures that your earrings are not only beautiful but also durable, allowing the wearer to enjoy them without the worry of parts coming loose.
Incorporating these finishing and polishing steps into your earring-making process will elevate the final product and provide that extra touch that defines quality handmade jewelry. Whether you are a seasoned jeweler or a beginner, taking the time to perfect the finish of your earrings is a worthy investment in your craft.
Earring Care: Keeping Your Jewelry Sparkling
Jewelry, particularly earrings, can hold sentimental value and represent personal style, making their care essential to preserving their beauty and longevity. Many people may not realize that simple maintenance routines can keep their favorite pieces looking as good as new. Understanding how to properly care for your earrings can make a world of difference in both their appearance and durability.
To begin with, regular cleaning is key. A gentle approach is best-using a soft, lint-free cloth to wipe your earrings after each wear can effectively remove oils and residues that accumulate over time. For deeper cleaning, particularly with metal and gemstone earrings, consider making a solution of warm water mixed with a few drops of mild dish soap. Soak the earrings in this solution briefly and then use a soft brush, like a toothbrush, to reach intricate areas. Rinse them with clean water and dry thoroughly with a soft cloth. Avoid using harsh chemicals or abrasives, as these can damage delicate surfaces.
Creating an appropriate storage solution is equally vital to maintaining your jewelry’s sparkle. Store earrings in a cool, dry place, away from direct sunlight to prevent tarnishing. Use a dedicated jewelry box or a soft pouch to keep them organized and prevent them from getting scratched or tangled. For particularly intricate designs, consider using earring stands or hooks that allow them to hang freely, ensuring they stay untangled and easily accessible.
Finally, remember that routine inspections can save you from future mishaps. Regularly check the earring backs, hooks, and other components to ensure they are secure. Fixing loose elements promptly not only maintains the earring’s integrity but also prevents potential loss. By establishing a simple yet effective care regimen, you’ll ensure that your handmade creations remain a stunning addition to your collection for years to come.
Creative Ways to Store and Display Your Earrings
Displaying and storing earrings properly not only protects your beloved pieces from damage but also allows you to showcase your creativity. With innovative storage solutions, you can turn a mundane necessity into a stylistic statement that complements your home decor. From DIY projects to chic store-bought options, here are some inspiring ways to keep your earrings organized and beautifully displayed.
One captivating option is to create a decorative earring board. Using a corkboard or a wooden frame, you can cover it with fabric-choose colors or patterns that reflect your personal style. By pushing decorative pins or thumbtacks into the board, you can hang your earrings in a visually appealing manner. This makes it easy to see and access your collection while serving as an eye-catching piece of wall art. Furthermore, it’s a practical way to showcase your unique designs, aiding in selection for any occasion.
For those who prefer a more minimalist approach, clear acrylic stands or trays can be a fantastic choice. These modern displays keep earrings visible while ensuring they remain untangled. A multi-tiered acrylic holder can accommodate various styles, from studs to dangling earrings, allowing you to categorize them by color or design. The transparency of the acrylic also ensures that even the simplest pieces take center stage, making them feel special.
Another creative idea is to repurpose everyday items for earring storage. Consider using a vintage teacup or a small decorative bowl as an eclectic display piece. Not only does this method add charm, but it can also spark conversation when guests admire your collection. You could also use a branch or driftwood hung from the wall, where earrings can dangle gracefully. This approach adds a rustic touch while maintaining functionality.
Finally, investing in dedicated storage solutions, such as earring hooks or hanger displays, can drastically reduce clutter. Brands like Target offer a variety of earring organizers ranging from velvet stands to organized racks, which can seamlessly fit into any room’s decor while ensuring your earrings are stored securely and stylishly [[1]]. For more intricate collections, consider a jewelry box with compartments, where you can keep your earrings safe from scratches and tangles, ensuring they are preserved for years to come.
With these creative storage and display ideas, you not only enhance the aesthetic appeal of your space but also your love for jewelry-making. It becomes easier to appreciate and care for your handcrafted earrings, ensuring they remain sparkling and ready to wear whenever inspiration strikes.
How to Start Your Own DIY Jewelry Business
Starting a DIY jewelry business can be a fulfilling venture, especially if you have a passion for creating beautiful handmade pieces like earrings. With the rise of online marketplaces and the demand for unique, artisanal products, there’s never been a better time to turn your crafting hobby into a profitable business. To successfully launch your own DIY jewelry shop, it’s essential to blend creativity with practical business strategies.
First, begin by identifying your niche and designing a signature style that sets your jewelry apart. Consider what type of earrings you want to create-whether it’s elegant dangles, trendy hoops, or whimsical designs. Conduct market research to discover current trends and understand what resonates with your target audience. Collecting feedback on your designs from friends or through social media can provide valuable insights and help refine your offerings.
Once you have your designs in place, focus on sourcing high-quality materials. Select reliable suppliers for your components, ensuring they align with your brand’s values-be it sustainability, affordability, or luxury. Your choice of materials not only affects the look and feel of your earrings but also your pricing strategy and market positioning. It’s worth investing time in learning about the materials and tools essential for crafting earrings, as knowledge will help you create durable, attractive pieces that appeal to potential buyers.
Setting Up Your Business
Before launching, establish a solid business plan detailing your goals, target market, pricing strategy, and marketing approach. This plan will serve as your roadmap. When it comes to pricing, consider all costs involved-materials, shipping, promotion, and your time. It’s essential to strike a balance between being competitive and ensuring you make a profit.
Create a visually appealing online presence; platforms like Etsy, Shopify, or Instagram are great for showcasing your work. High-quality photos can help your earrings stand out, so consider investing in good lighting and photography. Engaging storytelling about your creative process can also draw in customers. Utilize social media to connect with your audience through tutorials, behind-the-scenes looks, or user-generated content, showcasing how real-life customers enjoy your jewelry.
Best Practices for Marketing and Sales
Marketing your handmade earrings involves more than just listing products online. Build a brand that resonates with your audience by developing a consistent aesthetic and voice across your platforms. Consider collaboration with influencers or other artisans to expand your reach. Attend local craft fairs, markets, or jewelry exhibitions to gain visibility and interact with potential customers in person. Word-of-mouth can be a powerful tool, so encourage satisfied customers to share their experiences.
Lastly, be prepared for the challenges of running a business-from customer service to understanding logistics for shipping and handling returns. Keep detailed records, adapt your strategies based on sales data, and continuously seek feedback to improve your products and services. With dedication and creativity, your DIY jewelry business can flourish, turning your passion into a successful venture that delights customers with your unique earrings.
Marketing Handmade Earrings: Best Practices for Success
To stand out in the crowded world of handmade jewelry, particularly earrings, it’s essential to adopt a multifaceted marketing approach. Understanding the unique value of your handmade pieces is crucial. Every earring tells a story, whether it’s the inspired design, the artisanal craftsmanship, or the quality materials used. Highlight these aspects to captivate potential customers; storytelling can significantly enhance engagement. Share your crafting journey on social media platforms like Instagram or Pinterest, where visual appeal plays a critical role in attracting followers and, ultimately, buyers.
Utilizing social media effectively can be a game-changer. Consider hosting giveaways or collaborations with micro-influencers who resonate with your brand’s aesthetic. This not only broadens your reach but also builds credibility within niche communities. Regularly engaging your audience through posts, stories, and interactive content such as polls or Q&As helps foster a sense of community. Live sessions showcasing your earring-making process can enthrall your audience and provide an authentic connection, making your brand more memorable.
Participating in local artisan fairs and exhibitions can put your creations directly in front of potential customers. This face-to-face interaction allows you to share the passion behind your work and get immediate feedback, which can be invaluable for refining your designs. Moreover, consider creating attractive display setups that highlight the uniqueness of your earrings-visual merchandising can significantly impact sales.
Finally, don’t underestimate the power of email marketing. Building a mailing list allows you to share updates about new collections, exclusive promotions, and your creative process with your most engaged clientele. Utilize tools like newsletters to keep your audience informed and invested in your journey. By combining these strategies-strong storytelling, social media engagement, local marketing, and email outreach-you can create a powerful marketing presence that will help your handmade earrings thrive in a competitive marketplace.
Common Mistakes to Avoid in Jewelry Making
Creating beautiful handmade earrings is an exciting journey, but even the most passionate jewelry makers can stumble into common pitfalls that can undermine their efforts. One of the foremost mistakes is overlooking quality materials; using subpar components can lead to breakage or discomfort for the wearer. Investing in durable wires, clasps, and earring posts not only ensures longevity but also enhances the overall aesthetic of your creation. The joy of crafting can quickly dissipate if your exquisite design falls apart due to cheap materials.
Another frequent error is neglecting to measure accurately and plan your designs. In the thrill of creativity, some artisans skip crucial steps like sketching their ideas or measuring components, which can result in poorly proportioned pieces. Taking the time to plan your designs ensures that everything fits together harmoniously, and your earrings will look polished and professional rather than haphazard. Additionally, failing to test earring comfort is an oversight that can result in items that are not wearable. Always try on your creations or solicit feedback from friends to address issues with weight or stiffness before finalizing your designs.
The lack of proper tools is also a common stumbling block. Quality tools not only make the process smoother but also help in achieving cleaner finishes. Tools like jump ring pliers or precision cutters can make a significant difference in the outcome of your projects. Emphasizing organization in your workspace can prevent the frustration of losing small components or tools during the making process; a well-organized craft area fosters creativity and efficiency.
Lastly, don’t underestimate the importance of cleaning and finishing your earrings properly. Many newcomers skip final touches like polishing, which can dramatically elevate the appearance of the finished product. A simple polishing cloth can remove fingerprints and smudges, giving your jewelry a professional sheen. Embrace these strategies to enhance your journey in jewelry making, and approach each project with the knowledge and care that will distinguish your work.
Faq
Q: What are the best materials for making DIY earrings?
A: The best materials for DIY earrings include metals like sterling silver or gold-filled wire, beads of various materials (glass, wood, resin), and lightweight materials like acrylic. Always choose materials that suit your skin sensitivity, and consider the overall aesthetic you want to achieve. For more on materials, check our section on choosing the right materials.
Q: How do you attach earring hooks to your handmade earrings?
A: To attach earring hooks, use round-nose pliers to open the hook’s loop gently. Slide your earring design onto the loop, then carefully close the loop with the pliers. This ensures a secure connection and prevents the earrings from falling off. Refer to our essential tools section for pliers recommendations.
Q: What are the common mistakes to avoid when making earrings?
A: Common mistakes include using overly heavy materials that can strain the ears, neglecting to secure components properly, and not testing the earrings for comfort. To learn more, visit our section on common mistakes to avoid in jewelry making.
Q: How can I ensure my earrings are hypoallergenic?
A: To ensure earrings are hypoallergenic, use materials like surgical-grade stainless steel, titanium, or niobium for connections and hooks. Always check product descriptions when purchasing materials to confirm they are hypoallergenic. For tips on securing components, see our soldering tips section.
Q: What techniques can I use to create unique earring designs?
A: Unique earring designs can be achieved through techniques like wire wrapping, layering different materials, or incorporating asymmetry. Experimenting with color combinations and textures can also enhance creativity. For in-depth design ideas, refer to our techniques for adding unique designs section.
Q: How should I store my handmade earrings to prevent damage?
A: Store handmade earrings in a cool, dry place away from direct sunlight. Use jewelry boxes with separate compartments or soft pouches to prevent tangling and scratching. For more storage advice, check out our creative ways to store and display your earrings.
Q: What tools do I need for making earrings at home?
A: Essential tools for making earrings at home include round-nose pliers, wire cutters, chain-nose pliers, and a ruler for measuring. A bead mat can help keep beads from rolling away. For a comprehensive list, have a look at our tools section.
Q: When is the best time to start a DIY jewelry business?
A: The best time to start a DIY jewelry business is when you feel confident in your skills and have a unique product that stands out. Assess the market demand and prepare a solid business plan. For more insights on starting your own business, explore our section on DIY jewelry business tips.
Insights and Conclusions
Thank you for joining us on this DIY journey to create beautiful handmade earrings! Now that you have the essential skills, why not take your craftsmanship further? Explore our detailed guides on jewelry care and styling tips to ensure your creations stand out. You can also check out our popular posts on cleaning metals and gems or learn how to start your own jewelry shop.
Don’t forget to share your finished earrings with us in the comments below! If you found this guide helpful, sign up for our newsletter for more exciting jewelry-making resources and tricks delivered straight to your inbox. Remember, the world of jewelry crafting is vast and filled with possibilities-keep exploring and creating!