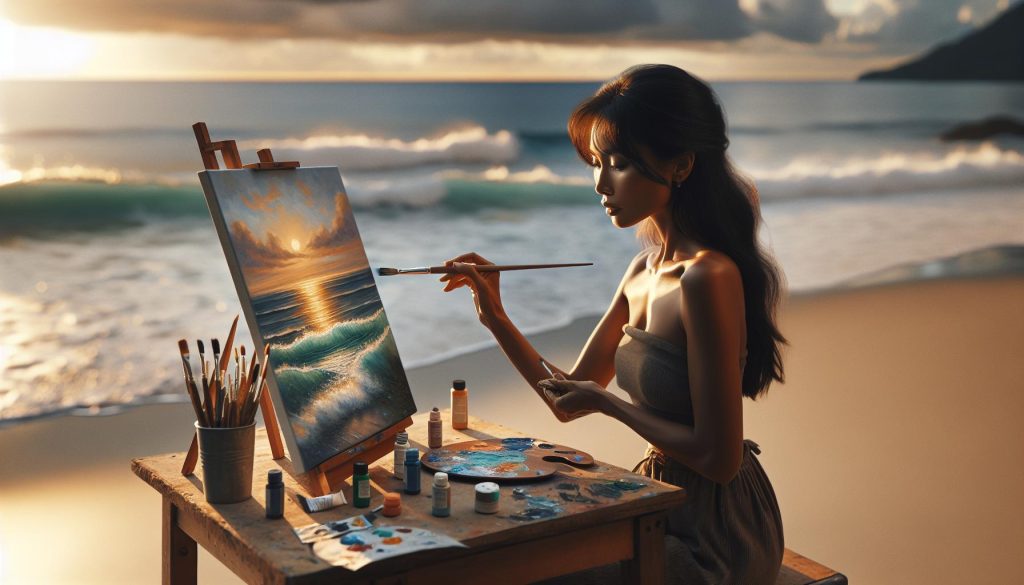
Have you ever gazed into the mesmerizing waves of the ocean and wished you could capture that beauty on canvas? Drawing the ocean with acrylic paint not only allows you to reflect its vibrant hues and textures but also provides a therapeutic escape that reconnects you with nature. Whether you’re a beginner looking to improve your painting skills or an experienced artist aiming to enhance your techniques, this guide will empower you to create stunning ocean scenes that evoke emotion and wonder. With step-by-step instructions and expert tips, you’ll soon find yourself skillfully transforming a blank canvas into a breathtaking seascape. Dive in and let your creativity flow with the tide!
How to Choose the Right Acrylic Paint for Ocean Art
When embarking on the captivating journey of painting ocean scenes, selecting the right acrylic paint is crucial for achieving stunning results. Acrylic paints are favored by many artists for their versatility and vibrant color payoff, but not all acrylics are created equal. Professional-grade paints, for example, offer richer pigments and better coverage, making them ideal for serious ocean art. In contrast, student-grade paints, while more affordable, may lack the intensity and viscosity needed for luminous water depictions.
Consider the color palette essential for ocean scenes. A combination of blues, greens, and turquoises is vital to reflect the myriad tones of the sea. Specialty paints, like iridescent or metallic colors, can add a unique sparkle reminiscent of sunlight dancing on water. Additionally, opt for high-opacity paints if you’re layering over darker backgrounds or need to cover previous brush strokes. Checking the lightfastness rating can help ensure your work retains its brilliance over time, particularly if displayed in sunlight.
Don’t overlook textures when choosing your paint. Heavy-body acrylics allow for bold applications and impasto techniques that can mimic crashing waves, while fluid acrylics work beautifully for smoother applications and glazing effects. Experimenting with different textures and finishes will enable you to capture the dynamic movement of the ocean effectively. With the right choices, your ocean art is sure to resonate with those who view it, inviting them into a world where creativity meets the rhythmic beauty of the sea.
Essential Tools and Supplies for Painting Oceans

To truly capture the essence of the ocean in your paintings, the right tools and supplies play a crucial role in translating your vision onto the canvas. Choosing high-quality materials can significantly influence the outcome of your artwork, helping you achieve the depth, texture, and vibrancy characteristic of ocean scenes. Here are the essential items you need to equip yourself with for an inspiring painting experience.
Paints
Start with a selection of acrylic paints in a variety of colors, especially different shades of blue, green, and turquoise. Professional-grade acrylics provide richer pigments and better coverage, while student-grade paints can still be used for practice. Don’t forget to include specialty paints like iridescent or metallic finishes to simulate the shimmering effect of sunlight on water, adding an extra dimension to your work.
Brushes
Investing in a diverse set of brushes is vital. Flat brushes are excellent for making broad strokes, useful in creating the water’s surface, while round brushes can help with details such as foam and splashes. Additionally, a filbert brush can blend seamlessly between the two techniques, allowing for smooth transitions in water textures.
Canvas and Surfaces
Choose the right canvas or surface. A primed canvas or canvas boards are perfect for acrylics. Consider using a textured canvas to enhance the tactile quality of your waves and ripples. Alternatively, acrylic paper can be a cost-effective option for practice and experimentation.
Palette and Mixing Tools
Have a palette for mixing your colors and a palette knife for both mixing and applying paint. A rigid palette allows you to easily blend colors for smooth gradients, which are essential in replicating the subtle shifts in sea tones.
Additional Supplies
Lastly, don’t forget essential supplies such as water containers, paper towels, and sponges for cleaning brushes and creating textures. A spray bottle can also be handy for keeping paints moist during painting sessions. If you’re layering, consider using a glazing medium to enhance transparency and luminosity.
By selecting the right tools and supplies, you’re setting the foundation for creating stunning ocean artwork that captures both the vibrancy and subtlety of the sea. With every stroke, the tools you choose will help bring your creative vision to life, inviting viewers to explore the enchanting world beneath the waves.
Step-by-Step Guide to Sketching Your Ocean Scene

To create an ocean artwork that resonates with viewers, beginning with a thoughtful sketch is essential. The initial lines on your canvas will determine the overall balance and composition of your piece, so it’s important to approach this step with care and creativity. Start by gathering reference images of oceans, waves, and skies to inspire your composition. Observing how light interacts with water, as well as the movement and shapes of waves, will aid you in creating a dynamic scene.
Begin your sketch by lightly defining the horizon line, keeping it straight and positioned according to your vision-high for expansive skies or lower for more ocean focus. Use a pencil or charcoal that allows for easy adjustment. As you sketch the ocean, remember to incorporate the rhythm of the waves; use flowing lines to represent both the crests and troughs. Varying the size and direction of the waves will add interest and mimic the natural undulations found in the ocean.
Next, add details such as rocks, beaches, or distant boats to give your scene depth. These elements can serve as focal points that draw the viewer’s eye along the composition. Consider also the placement of additional features-like clouds or seagulls- which can enhance the atmosphere of your piece. Once you’re satisfied with your initial outlines, review your sketch for balance and proportion, making adjustments as needed to ensure a cohesive and engaging design.
Finally, when you’re ready to transfer your sketch into a more permanent medium, use a light touch with your acrylic paint to preserve the outlines until you’re confident in your color application and textural details. This step sets the foundation for the vibrant ocean scene that will follow, allowing you to transition seamlessly into deeper colors and expressive techniques. Embrace this opportunity to express your unique style while capturing the essence of the ocean.
Understanding Color Mixing for Realistic Water

To create lifelike depictions of water in your ocean art, mastering color mixing is crucial. Water is notoriously difficult to represent accurately, as it is constantly changing with light and depth. One core principle to understand is that the color of water varies depending on multiple factors such as light conditions, depth, and the atmospheric context. For instance, shallow tropical waters might display vibrant turquoise tones, while deeper ocean waters can appear darker and more muted, showcasing deep blues and greens.
When mixing colors for your water art, start with a basic palette including primary colors like cyan, blue, and yellow. Consider adding colors such as green and white to expand your range. Experimenting with ratios can reveal the subtleties of color necessary for realistic depictions. To create a lighter color that mimics sunlit waves, mix white with a small amount of blue or green; for shadowed areas, try adding a touch of black or a complementary color (like orange or red) to dull the brightness and create depth.
Tips for Effective Color Mixing
- Layering: Apply thin layers of color to gradually build depth, allowing underlying colors to show through.
- Use Reference Images: Always have real-life or photographic references on hand to guide your mixing process.
- Testing: Create color swatches on a spare canvas to see how they dry, as acrylic paint often dries darker than it appears when wet.
- Understanding Translucency: Water is translucent; mixing transparency into your paint (by adding a medium) can help mimic this effect.
Creating realistic reflections will also depend on your understanding of color mixing. For reflective surfaces, such as the crest of waves, use a lighter, more transparent mixture to simulate the glint of sunlight. This technique not only adds realism but also enhances the three-dimensionality of your ocean scene. By addressing these aspects of color mixing with intention and creativity, you will find yourself capable of capturing the exquisite beauty and dynamism of ocean waters, making your artwork truly evocative.
Techniques for Creating Depth and Texture in Water

To truly bring your ocean scenes to life with acrylic paint, understanding how to create depth and texture in water is essential. The interplay of layers and the exaggeration of textures can transform a flat representation into a vibrant seascape that captivates the viewer’s eye. One effective method to achieve this is through the use of glazing and layering techniques. By applying semi-transparent layers of paint, you can mimic the natural variations in water depth and movement. Begin with a base layer, perhaps a lighter blue or turquoise, and then gradually add darker shades in glazes on top. This approach not only increases depth but also allows the colors underneath to resonate, creating a shimmering effect that resembles light playing on water.
Another valuable technique is dry brushing, where you use a stiff brush with minimal paint to lightly drag across the canvas. This method is excellent for adding texture that suggests the frothy tops of waves or the ripples of water currents. Concentrate on the areas where waves crest or where the water seems to catch the light. For even more realism, consider incorporating impasto mediums, which can create a three-dimensional feel. Mixing your acrylics with a thickening agent allows you to build up the paint, so it stands out from the surface, adding a tactile component that visually replicates the chaotic nature of the ocean’s surface.
Utilizing Tools for Enhanced Techniques
- Palette Knife: Use this tool to scrape or apply paint for textured surfaces that mimic coral reefs or rocky shorelines.
- Sponge Application: Dabbing a sea sponge onto your canvas can create organic shapes and patterns that are reminiscent of the ocean floor or the churning of waters.
By layering your colors strategically and employing these techniques, you’re not just painting water-you’re telling a story of movement and energy inherent in the ocean. The textures and depth you create will draw the viewer in, inviting them to explore the intricate beauty of your seascape. Embrace experimentation with these methods, and you’ll discover your unique style for depicting the mesmerizing nature of ocean waters.
Adding Light Effects to Capture Reflections
Capturing the dynamic interplay of light on water is one of the most captivating aspects of painting ocean scenes. The shimmering reflections created by sunlight dancing on the surface can bring your artwork to life, making it not just visually stunning but also emotionally evocative. To effectively add these light effects, focus on employing a mix of transparent layers and strategic brush techniques, which will help emulate the captivating qualities of water.
A solid approach to illustrating reflections is to begin with a well-defined base layer for the water, incorporating lighter shades to represent the surface in direct sunlight. Once your base is dry, layer on semi-transparent washes of color, such as light blues, mint greens, or even soft yellows, to create the illusion of light filtering through the water. Use a glazing technique to apply these layers, allowing the underlying color to peek through. This technique not only adds luminosity but also enhances the depth of the water.
To further enhance the effects of light, consider using a soft, dry brush to gently feather in highlights. This method works well in areas where light hits the surface, like wave crests or bubble formations. Use a thin mix of white or very light blue, and apply it sparingly; less is more when creating realistic highlights. Additionally, incorporating a flicking motion can simulate the sparkle of sunlight reflecting off the waves.
Essential Brush Techniques
- Fan Brush: This brush can help you create soft bristle-like effects that mimic the texture of foamy waves.
- Round Brush: A small round brush allows for precision when applying highlights directly where needed.
- Sponge: Dabbing a sponge on the canvas can create random spots of light, essential for capturing the natural irregularity of water reflections.
Experimenting with these techniques, and layering colors thoughtfully will not only enhance your depiction of reflections but also contribute to an overall impression of movement and tranquility. As you become more familiar with these methods, you’ll find your ocean artwork is not just a reproduction of what you see, but a personal expression of the vibrant energy that exists in those sparkling waters.
Incorporating Ocean Flora and Fauna for Detail
Incorporating elements of ocean flora and fauna into your acrylic painting not only adds vibrancy but also enhances the narrative of your artwork. The underwater landscape is teeming with life, from delicate sea anemones to colorful coral reefs, and each element can provide a unique focal point. When you include these details, it invites your viewers to dive deeper into your creation and experience the tranquility and beauty of the ocean.
To effectively depict ocean life, start with a solid understanding of your subjects. Studies images or even visit an aquarium to observe the shapes, colors, and movements of marine life. This foundational knowledge is key to achieving realism. For instance, sea turtles can be painted with a mix of earthy greens and muted browns, while tropical fish can explode with vibrant colors. Using small brushes for intricate details, such as the scales of a fish or the fronds of kelp, will ensure these flora and fauna appear lifelike.
When layering paint, consider using a technique known as wet-on-wet. This allows you to mix colors on the canvas, creating a smooth gradient that is great for backgrounds or to simulate the movement of water around your subjects. Additionally, the use of a palette knife can add texture and dimension, perfect for rendering rough surfaces like coral or rocky ocean beds.
While painting, remember the importance of composition. Strategically place your ocean creatures to guide the viewer’s eye throughout the scene. A school of fish could lead the eye toward a distant shipwreck or a gathering of starfish might anchor the bottom of your painting, thus creating balance. By integrating flora and fauna with purpose and creativity, your ocean artwork transforms into a vibrant celebration of marine life that resonates with viewers and brings your canvas to life.
Tips for Layering Paint for Stunning Results
To create truly stunning ocean paintings, mastering the art of layering paint is essential. Layering not only enhances the depth and texture of your artwork but also brings a dynamic quality to your ocean scenes that captivates viewers. A key principle to remember is that acrylic paint dries quickly, allowing you to build multiple layers without significant wait time. Here are some effective strategies to elevate your layering technique.
Begin with a solid base layer that sets the tone for your ocean artwork. Use a large brush to apply a wash of blue or aqua across the canvas. This initial layer not only provides a foundation but also helps unify the color palette. Once this layer is dry, start adding more colors in varying opacity. You can achieve this by diluting your acrylic paint with water or a medium, enabling you to create transparent layers. This method is particularly effective for capturing the movement of water and the play of light on waves.
Another valuable technique is to employ dry brushing to define features. After your base layers have dried, use a dry brush to apply lighter colors over the top. This method allows you to control how much paint you use, resulting in a soft, textured effect that mimics the natural fluidity of water. Consider using white or pale colors to highlight areas where light reflects off the surface. Additionally, using a palette knife can add further texture; it’s ideal for depicting the rugged underwater terrain or frothy wave crests.
Don’t shy away from experimenting with layering colors that contrast or complement each other. For example, layering deeper blues or greens beneath lighter hues can create an illusion of depth, making your painting more immersive. Utilize glazes-thin, transparent coats of paint-to subtly change the tone of a layer beneath without completely covering it. This approach can transform the underlying colors and produce an ethereal quality in your ocean vistas.
Lastly, remember to step back and assess your work from a distance frequently. This will help you gauge the effectiveness of your layers and adjust accordingly. By employing these layering techniques thoughtfully, you’ll create ocean scenes that evoke emotion and draw viewers into the depths of your artistic vision. Your ocean paintings will not only reflect the beauty of the sea but also showcase your skill in manipulating acrylic paint for stunning results.
Common Mistakes and How to Avoid Them
Creating stunning ocean paintings can be incredibly rewarding, yet many artists encounter common pitfalls that can hinder their progress. Recognizing and addressing these mistakes early on can save you time and enhance the quality of your artwork. One frequent error is neglecting proper preparation; not taking the time to sketch your scene or experimenting with color mixing can lead to frustrating results. Before diving in, sketching your composition lightly on the canvas allows you to visualize the layout and makes adjustments easier as you work.
Another common misstep is overworking the paint, especially when trying to achieve smooth water effects. Acrylic paint dries quickly, so continuous brushing can lead to muddied colors and loss of texture. To prevent this, work in smaller sections and allow layers to dry between applications. Use a palette knife or a stiff brush for adding texture, as these tools can create the illusion of waves and ripples without over-blending your colors.
Lighting effects are critical in ocean paintings, yet artists often fail to properly represent them. A common mistake is using too much white for highlights. Instead, opt for lighter versions of the existing colors to maintain harmony in your painting. Lighter shades of blue or green work beautifully to mimic sunlight reflecting on water. Similarly, consider the direction of your light source-this will inform how and where you apply highlights, adding realism and dimension to your artwork.
Finally, skipping the finishing touches can diminish the impact of your piece. Once you feel your painting is complete, take a moment to step back and assess if it needs additional detailing-a few well-placed highlights or subtle layers can make all the difference. By being mindful of these common mistakes and applying these strategies, you’ll not only enhance your painting skills but also create captivating ocean scenes that resonate deeply with viewers.
Showcasing Your Finished Ocean Artwork
Showcasing your completed ocean artwork not only highlights your artistic journey but also brings life to your creative space. The moment you step back to observe the final piece is an exhilarating experience; the colors breathe with vibrancy, and the textures tell the story of your artistic choices. To truly make your ocean scenes resonate, consider these effective showcasing tips that will captivate your audience and enhance the overall presentation of your artwork.
One of the most impactful ways to present your finished piece is through proper framing. A well-chosen frame can elevate your ocean painting from simply a canvas to a standout centerpiece. Choose a frame that complements the colors in your artwork-soft, natural wood frames work well with calmer scenes, while bold metallic frames can add a modern touch to more dynamic pieces. Additionally, mats can provide a buffer that helps draws the eye into the work, enhancing its overall presence.
When displaying your artwork, think about the lighting in the room. Natural light can be magical, but it can also fade colors over time. Consider using adjustable LED spotlights or gallery lights to illuminate your painting. This method not only enhances colors and textures but also creates shadows that add depth, drawing viewers into the world you’ve created. Position your artwork at eye level to facilitate a more immediate connection between the piece and the observer. Grouping multiple pieces together can also create a compelling story, allowing viewers to compare and appreciate the nuances in each work.
Lastly, don’t underestimate the power of context. Where you choose to display your artwork can dramatically affect how it is perceived. In a serene environment, your ocean scene can evoke a sense of calm and relaxation, while a vibrant, busy space might highlight its energy and movement. Consider creating small placards with the title of the piece, the inspiration behind it, and any significant techniques used. This interactive element invites viewers to engage more deeply and provides a personal touch that helps communicate your artistic vision.
By thoughtfully curating the display of your ocean artwork, you not only showcase your talent but also invite others to experience the beauty and emotion of the oceans you’ve portrayed. Whether it’s through effective framing, strategic lighting, or the right contextual placement, these techniques will support your goal of making lasting impressions with your art.
Inspiration from Famous Ocean Artists and Styles
The breathtaking beauty of the ocean has inspired countless artists throughout history, each bringing their unique styles and techniques to the canvas. By studying these renowned figures and their approaches, you can unlock new perspectives and ideas for your own ocean artwork. From classic masters to contemporary visionaries, here’s how their influence can enrich your acrylic painting experience.
One of the most captivating artists to consider is Claude Monet, a pioneer of Impressionism. His use of light and color is unparalleled, especially in his series depicting water lily ponds and oceans. Monet believed in capturing the essence of a moment rather than every detail, often using quick, loose brush strokes. This technique can be mimicked in your own acrylic paintings by focusing on the overall feel of the ocean scene, using varied brush sizes to create both broad washes and fine details. Try layering colors directly on the canvas, blending wet paint to achieve that dreamy, impressionistic look characteristic of Monet’s work.
Another significant name is Winslow Homer, known for his dramatic seascapes that showcase the raw power of nature. His paintings often emphasize contrast, from the tumultuous waves crashing against the shore to the serene calmness of a setting sun. To replicate Homer’s style, consider using a palette knife alongside your brushes to create texture and depth, particularly in turbulent water. Explore the effects of light and shadow by layering transparent glazes over dry paint to give your ocean scenes a sense of realism and structure, just as Homer did.
Moving to contemporary artists, take inspiration from the works of artist J.M.W. Turner, whose atmospheric seascapes are defined by swirling skies and dynamic water. Turner’s ability to capture motion can inspire your technique; try using a fan brush to create the look of swirling currents and waves. Incorporating vibrant colors and contrasting values will also help you portray the energy of the sea, a hallmark of Turner’s iconic style.
Incorporating elements of these famous artists, along with their philosophies, can elevate your acrylic ocean paintings. Start by selecting a single artist’s technique to experiment with, and gradually combine different methods to discover your unique voice in ocean art. Your personal interpretation of the ocean, influenced by these great masters, can lead to stunning results and a deeper connection to your creative process.
Advanced Techniques for Experienced Painters
As you delve deeper into the world of acrylic ocean painting, mastering advanced techniques can elevate your artwork to new heights. One powerful approach involves the use of glazing, a technique where you apply thin layers of transparent paint over dried layers. This allows for the building of depth and luminosity in your water, mimicking the way light interacts with the ocean. Choose contrasting colors to create shadow and light effects, enhancing the realism of your scenes. For example, applying a glaze of deep blue over existing lighter shades can create the illusion of depth in your water, giving it a more dynamic and engaging appearance.
Another technique to consider is wet-on-wet blending, where you apply wet paint directly onto wet surfaces. This method can produce soft, dreamy ocean waves and skies. Using a large flat brush, blend colors directly on the canvas to achieve gentle gradations typical of sunrise or sunset over the water. Experiment with this technique to create movement in your ocean scenes; for instance, a mixing of whites, blues, and greens can suggest the rolling surf while maintaining a fluid appearance.
To add more detail to your ocean art, try palette knife techniques. Instead of traditional brushes, a palette knife can create unique textures that resemble turbulent waves or rocky shores. The scraped and layered effect can provide a tactile quality to your painting, allowing for a more three-dimensional representation of ocean elements. You can also use the knife to apply unblended colors, making certain areas of your artwork pop with vibrant highlights.
Finally, don’t forget to experiment with unconventional tools. Items like sponges or toothbrushes can create interesting textures and patterns, such as splashes or foam on the water’s surface. By incorporating various application methods, you can capture intricate details, such as frothy waves or subtle reflections of light in the water, enhancing the overall impact of your painting. Embrace these advanced techniques, and let your creativity flow as you explore the limitless possibilities of acrylic ocean art.
Q&A
Q: What are the best color combinations for acrylic ocean paintings?
A: The best color combinations for acrylic ocean paintings include shades of blue, teal, and green paired with white for foam effects. Adding hints of yellow or orange can represent sunrise or sunset. Experimenting with different hues will help achieve depth and vibrancy in your artwork.
Q: How can I create realistic waves using acrylic paint?
A: To create realistic waves, start with a solid base color for the water. Use a lighter color for the wave crest, blending it with the base. Employ a dry brush technique to add texture and peak details. Additionally, layering shades of blue can enhance the illusion of depth.
Q: What brushes are best for acrylic ocean painting?
A: Flat brushes are ideal for broad strokes and background colors, while round brushes can create waves and details. A fan brush is excellent for adding texture to the water surface. Consider using synthetic brushes as they work well with acrylic paint drying techniques.
Q: How can I capture light reflections in my ocean painting?
A: To capture light reflections, use a glazing technique by applying thin layers of lighter paint over the base color. Incorporating white highlights will create the illusion of shimmer. Observe real water reflections to understand how light plays on the surface.
Q: What techniques help in layering acrylic paint effectively?
A: Effective layering requires drying time between coats to prevent smudging. Use a gel medium to increase transparency and smooth layering. Start with a thin layer and gradually build up to achieve the desired effect, allowing for rich color depth.
Q: Can I use other mediums with acrylic paint for ocean scenes?
A: Yes, you can combine other mediums, such as gel mediums for texture or watercolor for soft effects. Experimenting with acrylic inks can provide vibrant finishes. Ensure to use compatible products to avoid issues with drying and adhesion.
Q: How do I fix common mistakes in acrylic ocean painting?
A: Fixing mistakes involves several strategies: use a wet cloth to wipe off unwanted paint, apply a new layer to cover errors, or turn them into creative elements. Learning to embrace imperfections can also lead to unique artwork enhancements.
Q: What are some advanced techniques for painting ocean scenes?
A: Advanced techniques include using palette knives for texture and impasto effects, or splattering paint to mimic ocean spray. Incorporating mixed media elements like sand or fabric can add depth and uniqueness to your ocean art. Explore the advanced techniques section of the article for more insights.
To Wrap It Up
Congratulations on completing your ocean acrylic painting! Remember, practice makes perfect, and every brushstroke brings you closer to mastering your technique. If you’re excited to explore more artistic creations, check out our guides on “Color Mixing for Beginners” and “Acrylic Painting Tips for Stunning Landscapes.”
Don’t hesitate to share your artwork with us in the comments below, or tag us on social media-we’d love to see your stunning results! For more creative inspiration and tips, subscribe to our newsletter, ensuring you never miss an update. Dive in, unleash your creativity, and transform blank canvases into vibrant ocean masterpieces today!